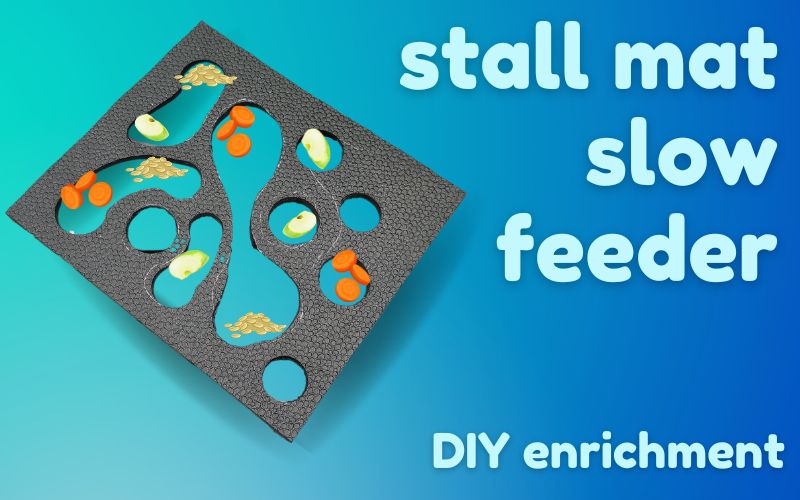
Repurpose a used horse stall mat to create the ultimate equine slow feeder for grain or treats! This is a great way to reuse worn or split horse stall mats, and you’ll create a better feeding experience for your horse. Here’s how to make a DIY slow feeder from a horse stall mat, step by step.
DIY Horse Stall Mat Slow Feeder Explained
Slow feeder surfaces are ideal for horses. Textured slow feeders are much more common for dogs (you can even repurpose dog slow feeders as simple treat toys for your equine friend), but horse-sized slow feeders offer many benefits for your equine friend.
Since there aren’t many commercially-made equine slow feeders on the market, equestrians who want an enrichment item like this usually have to make their own. But fear not: making your own DIY slow feeder for your horse’s grain or pelleted feed isn’t challenging! And the results are definitely worth it.
I’ve covered repurposed or DIY textured slow feeder surfaces before (don’t miss the article on making a slow feed mat made from a car’s floor mat), but this mat takes the idea to the next level. It’s my favorite, most durable horse slow feeder yet.
This project uses a horse stall mat and basic power tools to create a slow feed surface that is customizable for your horse’s needs, and will last forever. It does require some basic know-how and you’ll need to use power tools, but it’s not hard to do!
First, why make this DIY horse stall mat slow feeder? What’s so great about slow feeders, anyway?
Slow Feeders for Horses: Must-Have Enrichment
Horses are meant to eat slowly. Think grazing – one bite of grass at a time, for hours each day. Slow and steady eating is how horses’ bodies are meant to work, and they really need constant, slow access to food for best mental and physical health.
But today’s lifestyle often doesn’t encourage horses to slow down.
Horses happily vacuum up loose hay and bolt down processed, super-tasty feed as quickly as possible. But this has consequences. Going without forage like hay for long periods sets the stage for gastric ulcers, and bolting down feed can lead to choke.
Slowing down forage intake is pretty easy – just use a hay net, hay pillow, Porta-Grazer or other similar item. But what about bucket feeds?
Even if your horse is on a forage-based diet, they probably eat at least a small amount of food from a bucket each day. And many horses receive pounds at a time. Slowing down these meals is more challenging, and that’s where slow feeders come in.
A textured slow feeder replaces a plain bucket of feed. It adds structure that your horse has to work around in order to eat, slowing down their rate of feeding. Slow feeders make meals last longer.
Benefits of the DIY Horse Stall Mat Slow Feeder
The DIY horse stall mat slow feeder is a step above store bought plastic devices or basic repurpose and upcycle projects. It’s made from a heavy-duty rubber stall mat, so it stays put. You can customize it to fit inside any existing pan or trough. It’s much more difficult to flip over than a basic plastic slow feeder, and it’ll last for years.
This DIY project is an equine enrichment item. Enrichment encourages your horse to use their body and mind in natural ways, the surest way to avoid boredom and keep your horse occupied and stimulated.
How to Make the DIY Horse Stall Mat Slow Feeder: Step by Step
Ready to jump in? You only need a few tools and materials for this project. I’ve included plenty of photos so you can get the best idea of how this project will come together.
Let’s get started!
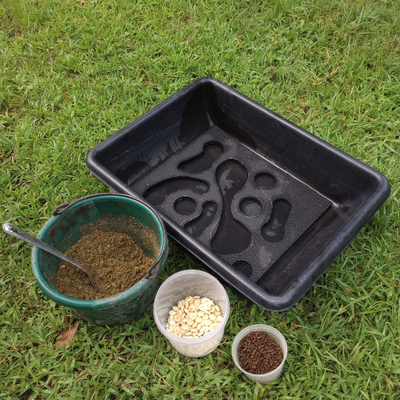
What You Need
- One rubber horse stall mat – old, cracked, or damaged is fine
- Pan, bucket, or trough
- Paint marker, silver/gold Sharpie, or chalk marker
- Measuring tape
- Jigsaw with sheet metal blade
- Hole saw (optional but VERY helpful)
- Drill and large drill bit if not using hole saw
- Basic woodworker’s clamps or locking pliers
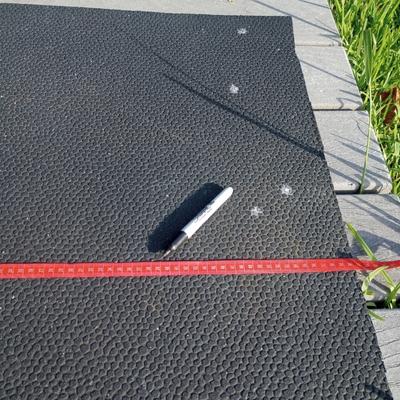
Step 1: Measure and Mark the Stall Mat
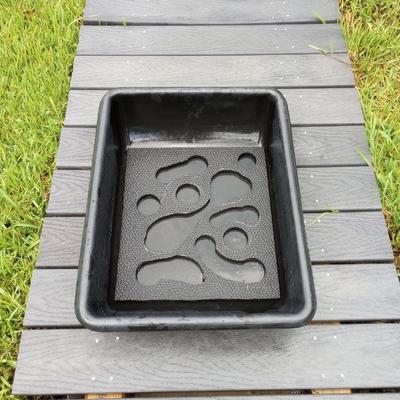
Your DIY horse stall mat slow feeder will fit inside a bucket, pan, or trough. I really like these multipurpose mixing trays:
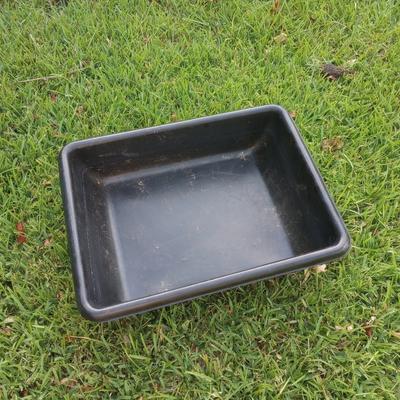
You can find them at your local hardware store in the concrete section.
To get the best fit, measure your pan or tray with a flexible tape measure to determine the length and width. If you’ll be using a curved or irregularly shaped trough or bucket to hold the feeder insert, make a template from paper pressed into the bottom of your container.
Mark the desired shape onto your stall mat. If you’re reusing a damaged mat, try to mark out the undamaged portion.
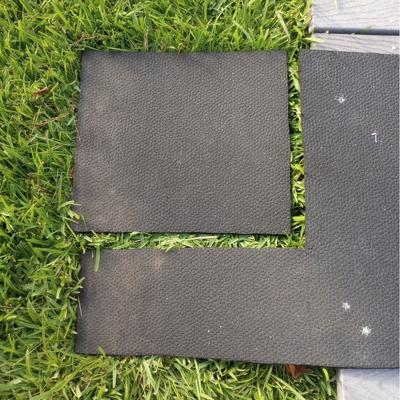
Step 2: Cut the Mat to Size
In this step, you’ll cut the mat to the dimensions you marked out in the first step.
The DIY horse stall mat slow feeder can be made from any rubber stall mat, but 1/2″ thick mats are easier to work with than thicker ones. There’s more than one way to cut a stall mat to size. For this step, use whatever method you prefer:
- Score repeatedly with a utility knife or box cutter
- Use a serrated steak knife to saw through the mat (pictured in this post)
- Cut with a jigsaw or other powered saw with appropriate blade
Whatever method you choose, be extremely careful. Cutting the mats by hand takes time, but don’t rush the process. It’s safer to cut slowly and methodically than try and blaze through this part of the project.
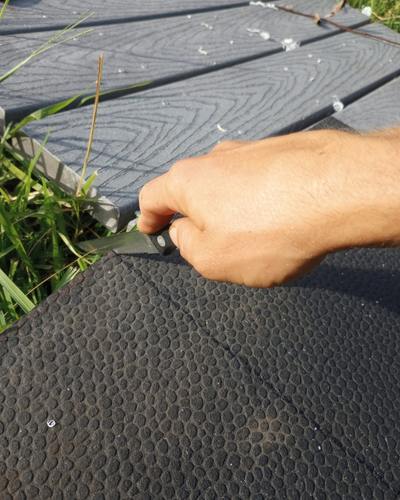
If you use a serrated blade or utility knife, make sure the mat is on a firm surface. Bend one side of the mat downward, away from your cut, as you work to prevent the blade from binding. I keep a set of inexpensive steak knives like this for cutting rubber, Astroturf, rope, and other horse enrichment supplies.
When using a jigsaw: The best cutting method for fitting oval-shaped troughs or round buckets is to use a jigsaw with a sheet metal blade. This blade’s wavy surface keeps the blade from binding and jamming as you cut. Make sure you clamp down the mat and use safety equipment such as goggles when working with power tools!
Step 3: Mark the DIY Stall Mat Slow Feeder Cutout Shapes
It’s time to get creative! Using a paint marker, metallic Sharpie or chalk pen, draw circles or a wavy design on the surface of the mat.
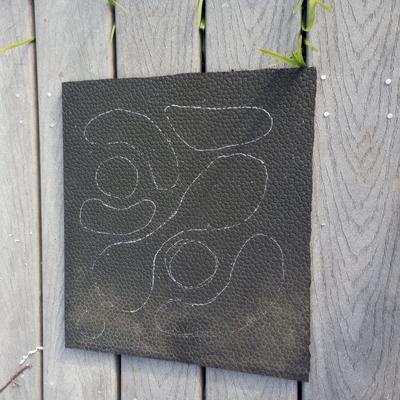
Your goal is to create texture and lots of little spaces, a bit smaller than your horse’s lips, that will hold onto food. Working through the design to scoop up each bite of food is what makes this slow feeder work for your horse.
For your first mat, use large blobby shapes and plain circles. These are easiest to cut. After you’ve gotten the hang of working with the tools, you can make another mat with a more complex design.
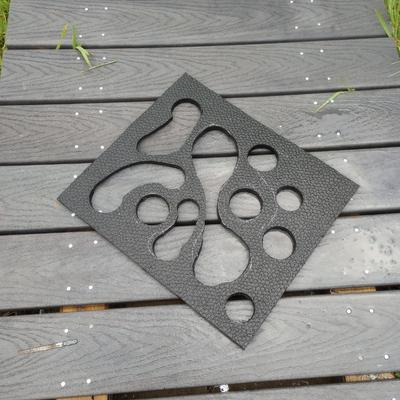
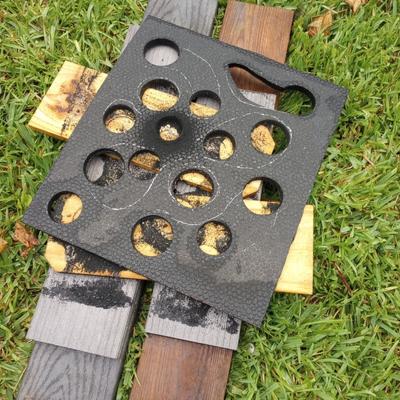
Step 4: Cut Out the Shapes
In this step, you’ll cut out the shapes you outlined, creating a textured rubber insert for your horse’s pan, bucket, or feed trough.
This is the only tricky part of the project, because you’ll need to use power tools. Beg, borrow, or steal (not really!) a jigsaw and a drill.
Jigsaws have thin blades that cut by quickly moving up and down. They’re ideal for making curved, freeform cuts.
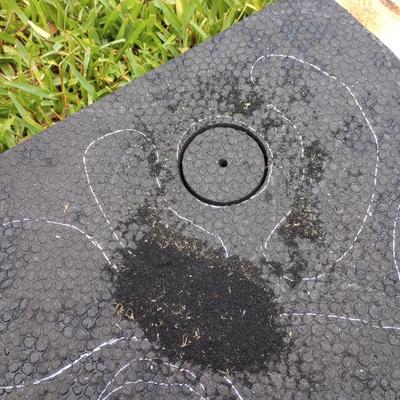
There are two ways to use a drill for this project. I’m a huge fan of hole saws, which fit into a drill’s chuck and easily cut perfectly round holes. I used a hole saw attachment to quickly cut circles in the mat, and then ran the jigsaw between the circles. This made the process simpler as I wasn’t working on an ideal surface.
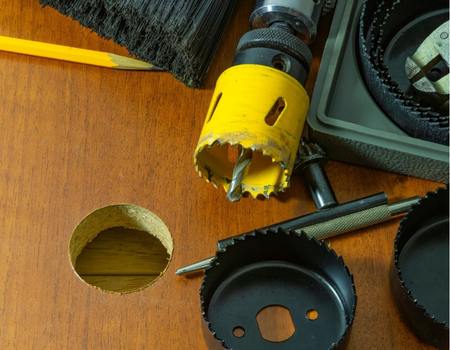
The pilot bit in the middle of the hole saw holds the blade in place as you cut:
In fact, if you only have a hole saw but no jigsaw, you can still make a great DIY horse stall mat slow feeder by cutting lots of circles in the mat. I’ve written about hole saws and how to use them to make awesome DIY projects, like the plastic carton hay and treat roller and the treat-dispensing Jolly Egg. If I could choose either a hole saw kit or a jigsaw, the hole saw would probably win.
Here’s a DIY horse stall mat slow feeder made from only hole saw cuts (and one crooked section from a jigsaw:
But if you don’t have a basic hole saw kit, no worries. Use a regular fluted drill bit to make a starting hole for your jigsaw blade, insert the jigsaw, and cut from there.
Work slowly and methodically to get clean, rounded edges, and don’t rush the process. Go at your saw’s speed and work gently around curves. You’ll end up with fabulous freeform cutouts in your stall mat:

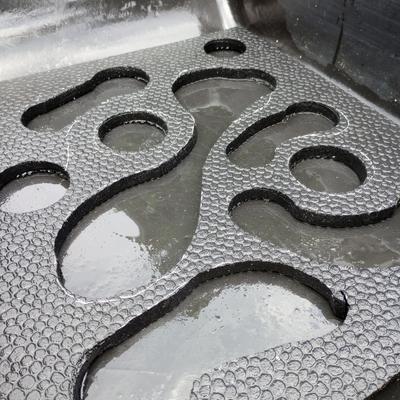
Step 5: Use your DIY Horse Stall Mat Slow Feeder!
Once your pattern has been cut out, you’re all set! Brush or hose off any loose bits of rubber and place the slow feeder mat into your pan, trough, or bucket. You can glue the mat into place with construction adhesive, but if you’ve measured it correctly, it won’t move around in the tray or bucket:
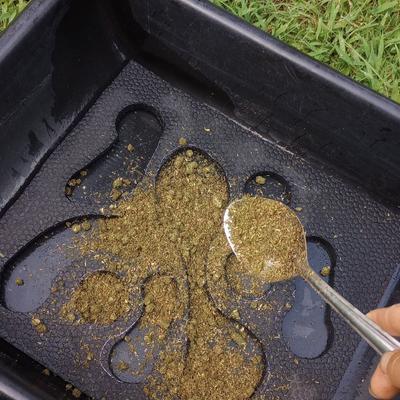
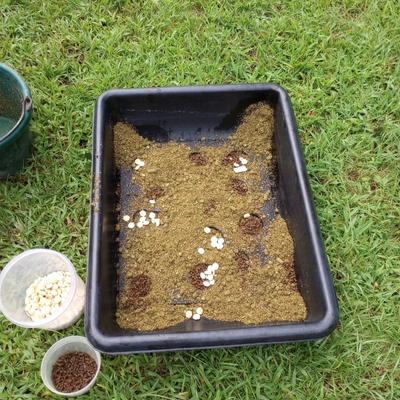
Now prepare your horse’s feed as normal, or use treats like fruits and veggies for an enrichment activity.
Scatter the food all over the mat – it’s okay if it piles up and covers the insert.
As your horse eats, they’ll quickly reach the textured portions and the slow feeder will begin to work its magic. It’s that simple – and lots of fun!
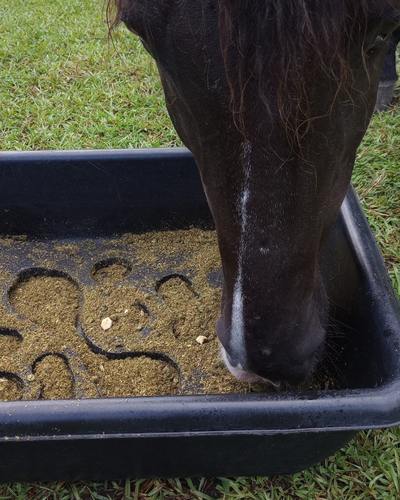
You can see here that the horse has finished the top layer of forage and treats and is working into the texture in the mat. The slow feed insert makes the meal last much longer and gets two hooves up from the horse:
Related Enrichment
For more inspiration related to slow feeders for horses, jump to these how-to articles:
Peanut Butter Licking Mat for Horses
Pingback: Horse Slow Feed Mat DIY | Step by Step Instructions and Pics - Enriching Equines