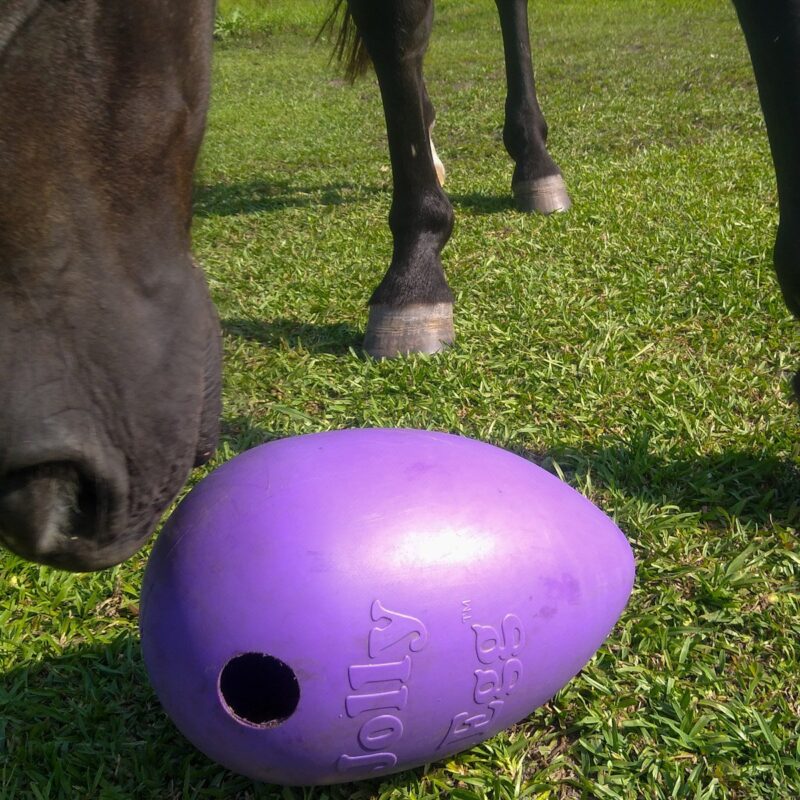
A DIY hay ball and other horse toys that release treats are really popular equine enrichment items. Horses love them and they help keep your equine friend from being bored. This DIY, upcycled horse toy project needs a few tools but is one of the best horse toys I’ve ever made! Here’s how to create your own Jolly Egg horse toy.
What Are DIY Hay Balls and Treat Balls for Horses?
Hay balls are rolling or hanging items that you fill with forage like grass hay, chaff, or alfalfa. Your horse uses this slow feeder toy to get some extended foraging time and a mental workout. Treat balls for horses work the same way and but are made for use with horse feed. You can also fill them with special treats like crackers, fruit, or peanuts.
Horses love slow feeders and treat puzzles like these. They’re great multipurpose enrichment items for horses that help prevent boredom and encourage your horse to use their body and mind.
With a rolling treat toy, your horse gets a mental workout, develops dexterity, and enjoys tasty food. Hay balls for horses give your horse the opportunity to experience foraging for their own food. They also promote slower feeding. This makes rolling treat feeders and other horse food puzzles a real enrichment win!
Can You Make a DIY Horse Treat Ball?
Treat balls and hay balls for horses are some of the best equine toys to DIY or upcycle! Buying off-the-shelf hay balls can be expensive. There’s a place for purchased horse toys in every stable, buy making DIY enrichment is a great way to stretch your budget. And many DIY toys for horses are easy to make from free or inexpensive materials.
If you’d rather buy something off the shelf, store bought treat balls are used frequently for dogs. Lots of canine treat balls can also be used for horses. There are even a few horse-specific designs on the market, like the Ball Feeder from Shires. We’ve covered how to repurpose a plastic food canister into a simple DIY treat roller for horses, but in this post we’ll be modifying another excellent enrichment item, the Jolly Egg from Jolly Pets. You will need a drill to make the holes in the Egg. But don’t worry – you can borrow a drill for this project if you don’t have one, and the results are SO worth it.
In this article you’ll find out how to turn a Jolly Egg – a fantastic pasture toy – into one of the best rolling treat puzzles for horses. We’ll cover how your horse can benefit from this DIY enrichment, where to get your Egg, and how to use a drill to create this entertaining and durable enrichment item. Let’s roll!
What is a Jolly Egg?
Jolly Pets is a great pet toy company. They make a large line of multi-purpose, fun, and durable toys for animals. Most of their product line caters to dogs, but you can use several of their products for horses as well.
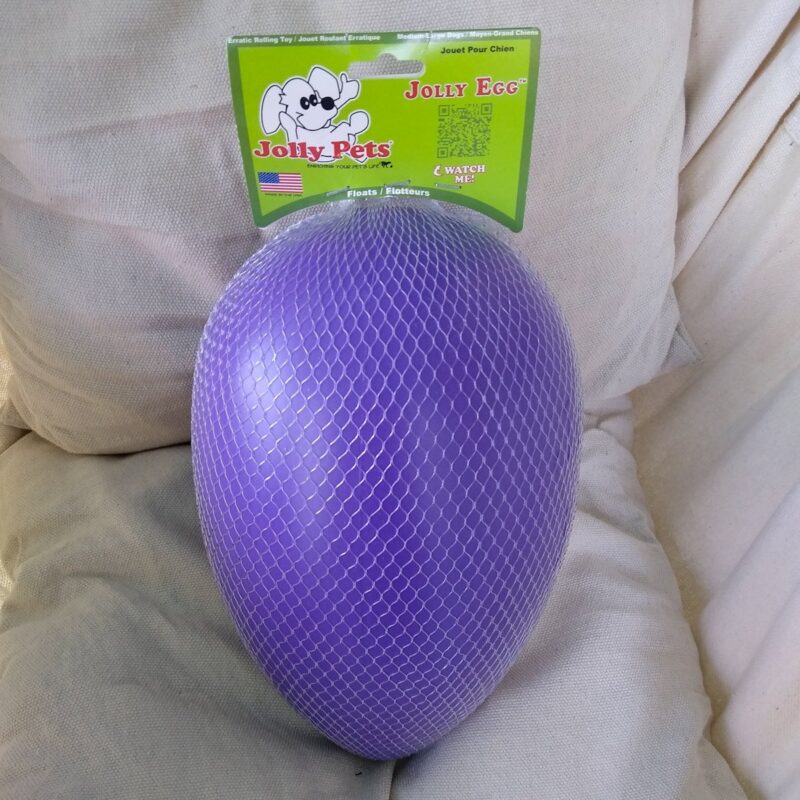
The Jolly Egg is one of their best products. It’s a really innovative design – instead of the usual ball-shaped toy, this product is egg-shaped. Instead of rolling in a straight line, it curves and wanders in erratic circles and spirals. For a dog, this makes the Jolly Egg extra fun.
For your horse, it makes an outstanding treat roller that goes way beyond the standard hay ball. When you drill a few holes in the Jolly Egg, you’ll be able to add your horse’s hay, feed, or special treats to create a fantastic slow-feeding puzzle roller that challenges your horse mentally and physically. All you have to do is about 5 minutes of DIY work and you’ll have a DIY horse toy or hay ball. It’s an equine enrichment item that will give your horse years of enjoyment.
Why the DIY Jolly Egg Hay Ball Feeder is Great for Horses
The Jolly Egg treat roller looks simple but offers a lot of bang for its buck. This item encourages an array of behaviors that keep your horse occupied and entertained. One of my favorite things about this do it yourself horse toy is that it can keep many horses occupied for a long time as they play and forage.
At first, the egg offers sensory stimulation to your horse with its new and unfamiliar shape. This encourages curiosity and exploration. After examining the egg, they’ll use their sense of smell to tell that there’s food inside the new, strange object.
If you use it as a DIY hay ball, your horse will immediately recognize the hay and start to figure out how to pull the forage out.
If you use horse treats or equine-edible fruits and veggies, your horse will have to figure out how to get the goodies out of the ball. They’ll push or nudge the egg around so that the treats fall out of the holes. Problem solving is a natural equine behavior, and this enrichment will give your horse plenty of mental stimulation.
Getting the treats out of the DIY Jolly Egg toy requires dexterity and finesse. And finding the treats that drop out of the holes is a sensory challenge. Your horse will use their eyes, nose, and whiskers for this enrichment.
The Jolly Egg does all of this while giving your horse agency and the opportunity to seek out their own food. Making choices, behaving in natural ways, and eating a correct diet are all elements of good equine welfare (check out the Five Opportunities to Thrive article to learn more).
There aren’t many toys or puzzles that offer THIS much enrichment value in one item – it’s a real behavioral heavy-hitter. Even though turning your Jolly Egg into a treat roller will take a drill and a little know-how, it’s a quick DIY and is so worth it.
What you need to make the DIY Jolly Egg Toy
- 1 jolly egg, small or large size (you can also use the Push ‘n Play Jolly Ball) Note: both the large Jolly Egg and the large round Push ‘n Play ball run about $30, so there’s an investment prior to drilling them for this DIY project – but that’s still cheaper than most treat or hay balls for horses and they are VERY durable and long-lasting.
- A drill
- Hole saw attachment in your preferred size
How to Make the Jolly Egg DIY Hay Ball
You’ll use a hole saw to cut a few holes in the egg so that you can fill it with treats or hay. The first step is to decide what size and pattern of holes you want your egg to have.
There’s no one best way to arrange the holes in the egg. The pattern and size of each hole depend on how challenging you want the puzzle to be.
If you want to use the Jolly Egg as a DIY hay ball for your horse, you’ll need more holes than if you want to use it for a treat or feed-dispensing roller toy.
Larger holes allow you to use larger treats. Big treats are easier for your horse to find. Large holes also make it easier for food to drop out of the hole. The bigger the holes, the easier the egg is to empty.
Smaller holes make the food less likely to tumble out, so the horse has to roll the egg more for a chance at releasing treats. Smaller holes tend to make the ball more difficult to empty. On the other hand, small holes may restrict you to only using pelleted feeds and grains rather than chunks of fruit or veggies or hay cubes.
Make Your Jolly Egg Horse Toy Challenging but Not Frustrating
It’s important to strike a balance between difficulty and reward with this item. If it’s too hard for your horse to get the food from the ball, they may give up or become frustrated. But if your goal is to occupy the horse for the greatest length of time, you’ll want to make the item challenging and slow to dispense all the food.
For your first egg, try five or six small holes evenly spaced over the ball. This provides a good medium-difficulty puzzle especially for horses new to playing with this enrichment item. If you’re making a DIY hay ball from the Jolly Egg, you’ll want larger holes than if you want to use grain or treats.
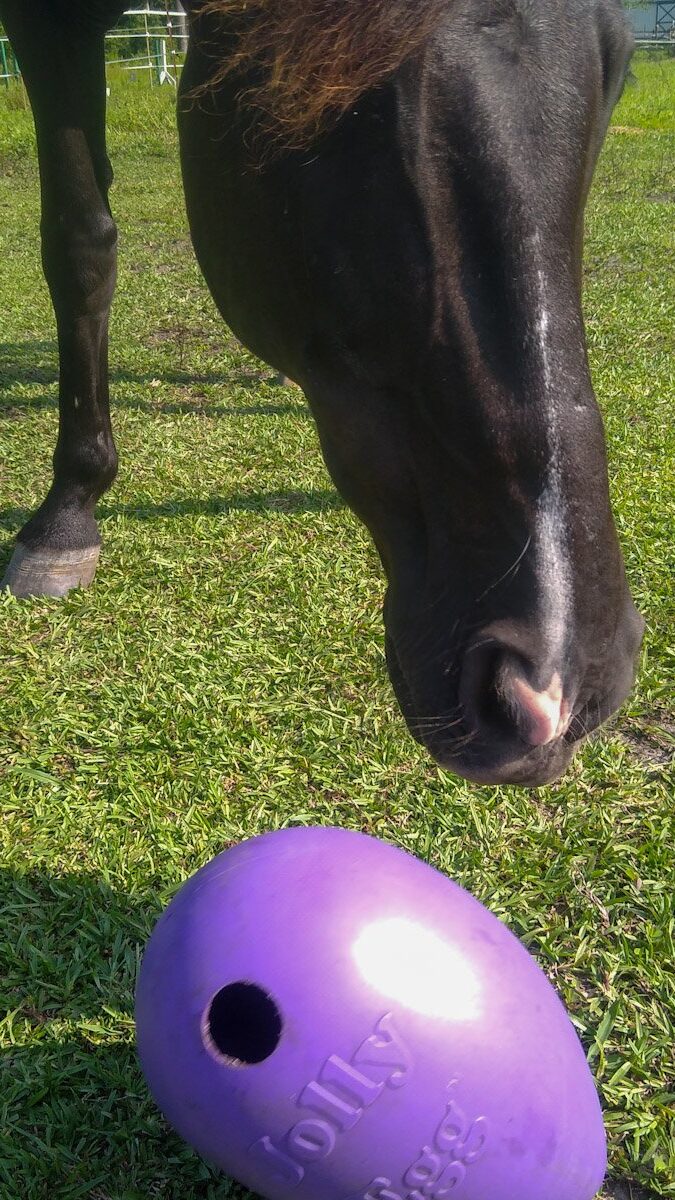
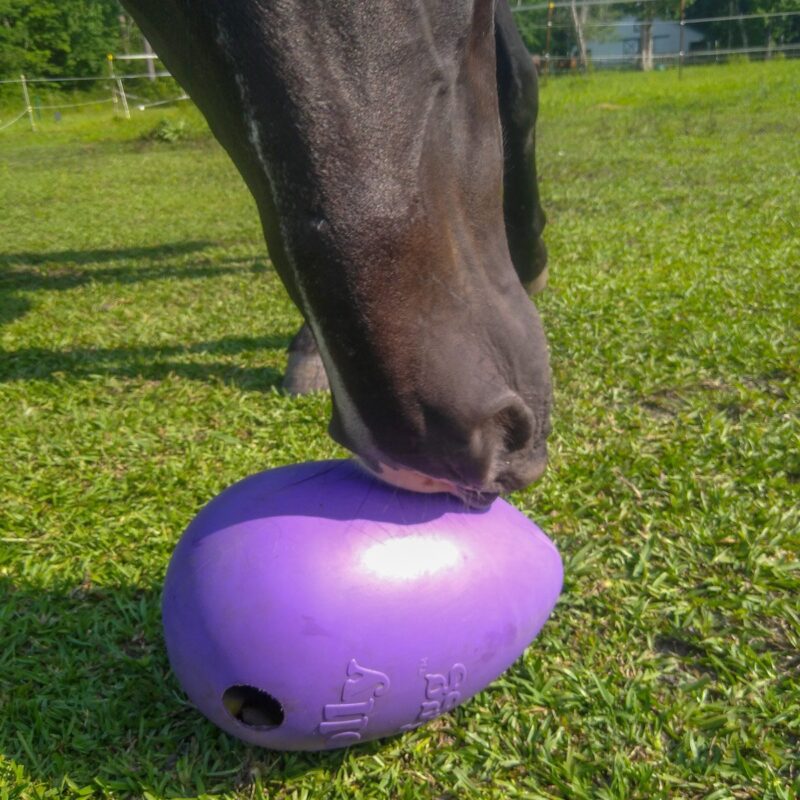
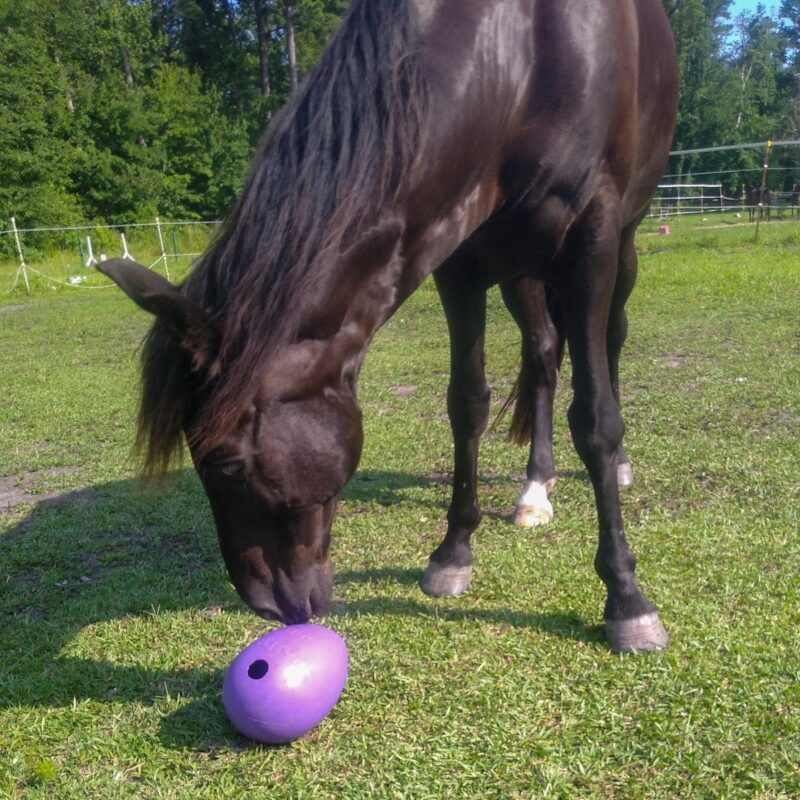
For the demo jolly egg shown in this post, I decided to drill only one hole. This means that for treats to fall out, the horse has to roll the egg completely around. The erratic rolling of the Jolly Egg means that it doesn’t turn over the same way each time the horse nudges it. And to make it even more difficult, I decided to offset the hole so that only a perfect roll that tilts the egg slightly downward results in a treat.
This extra-difficult horse toy is only a good idea for equines that need a lot of challenge and stimulation. It’s best for horses who are experienced with toys and puzzles. Enrichment shouldn’t be a frustrating experience! For your first hay balls or treat rollers, more holes are a good idea.
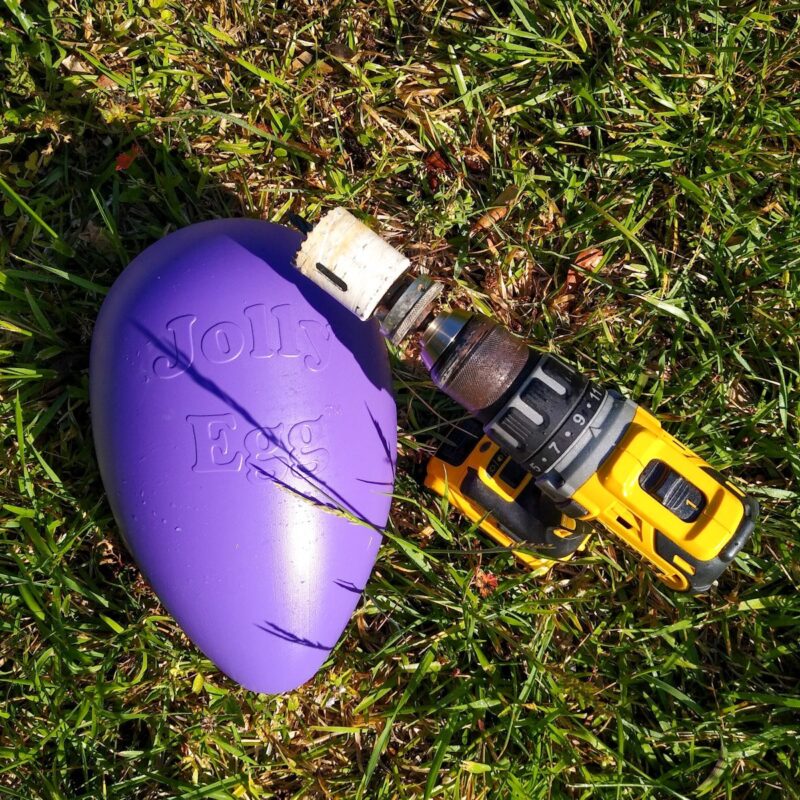
The Right Drill and Hole Saw for Your Horse Toy
You’ll need a hole saw to make this DIY hay ball/horse toy. Don’t be intimidated! Hole saws are as simple to use as a regular drill bit.
Hole saws are cylinder-shaped drill attachments with little saw teeth on one end. They’re used for cutting holes too large for other drill bits. They come various sizes for cutting openings from half an inch to several inches across. The 1 inch hole pictured in this post is generously sized, so several openings this size would create a roller that would be simple and easy to empty.
My one-hole Jolly Egg is probably too challenging for horses that are new to this toy, but can be very engaging for a cognition-oriented horse who needs a challenging puzzle. You’ll probably be best off drilling a few holes of ½” to ¾” (1.25 to 2cm) all over the egg. If your horse gets very good at emptying out the Jolly Egg, order a second one and use a more difficult hole size and arrangement. Then you’ll have two, with different levels of difficulty.
Remember to use common sense and safety precautions such as gloves and safety glasses when working with tools.
Making the DIY Treat Ball for Horses from Your Jolly Egg, Step By Step
1. Mark your holes.
Once you’ve planned the layout and size of the holes, mark their locations using a marker or pencil.
2. Attach the hole saw
The hole saw goes into the chuck of your drill just like a standard drill bit. Make sure it’s installed straight and tight, and check before using.
3. Cut the holes
A hole saw blade usually has a drill bit in the middle. This acts as a pilot to keep the saw from wandering. Keep your Jolly Egg secure while drilling. In this example, I wedged it between my knees but for safety I recommend a helper or bench vise.
Begin drilling the pilot hole, letting the bit do the work and not applying too much pressure or speed. When the teeth of the hole saw reach the Jolly Egg, apply gentle pressure and moderate speed until the saw cuts cleanly through the egg. Don’t press down too hard or you’ll be surprised when the hole saw suddenly punches through the material.
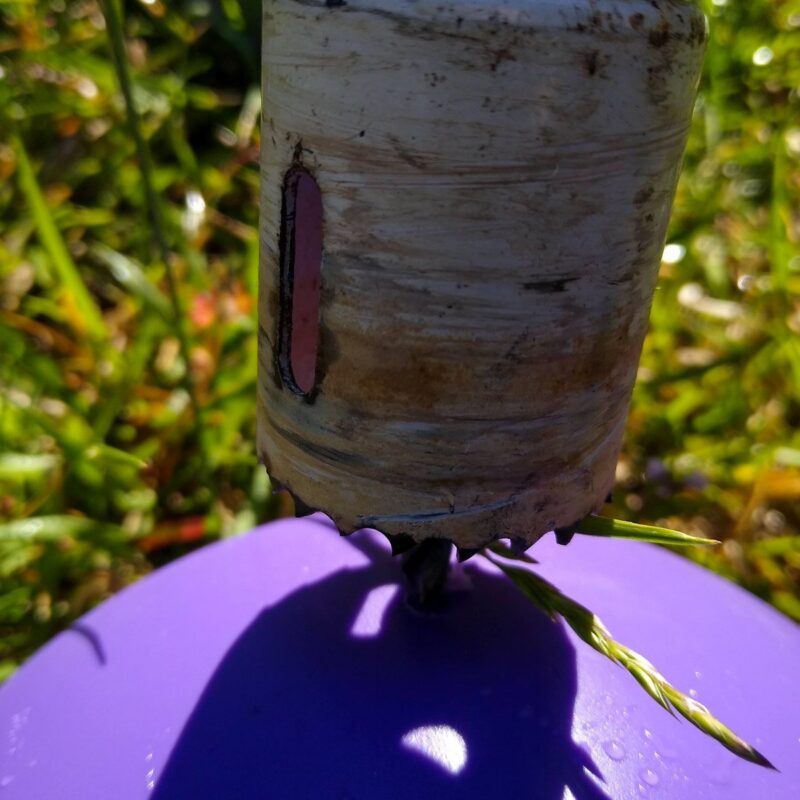
4. Remove the plastic plug
Using a screwdriver or other thin object, carefully push the plastic circle from the center of the hole saw bit.
Now repeat until all your holes have been drilled. If you like the arrangement before you’re fully finished, feel free to stop with fewer holes. You can always add them later, but you can’t remove holes.
You’ll have a set of perfectly round holes in your Egg, like this:
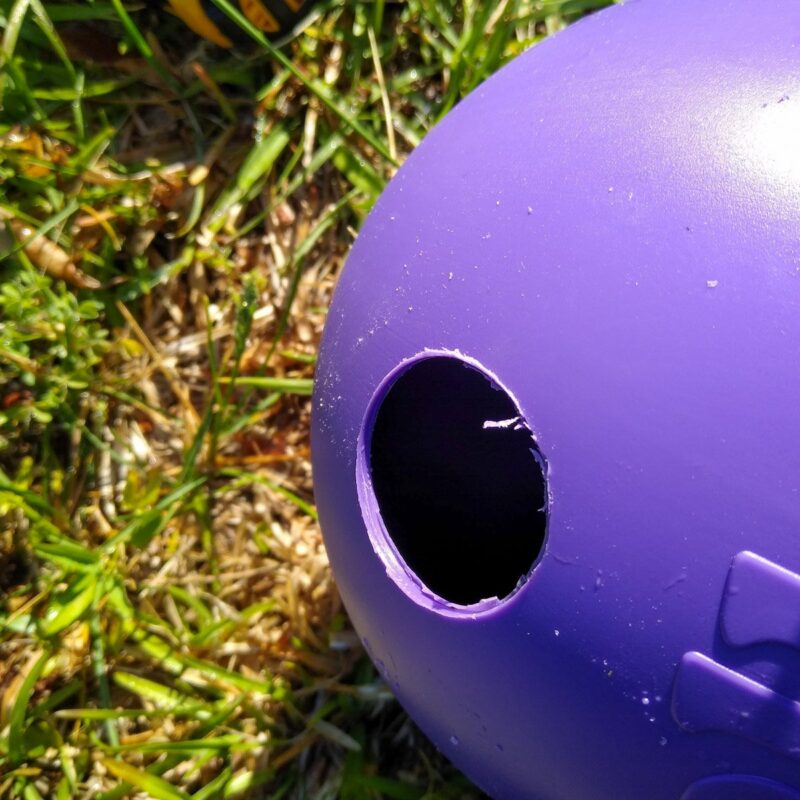
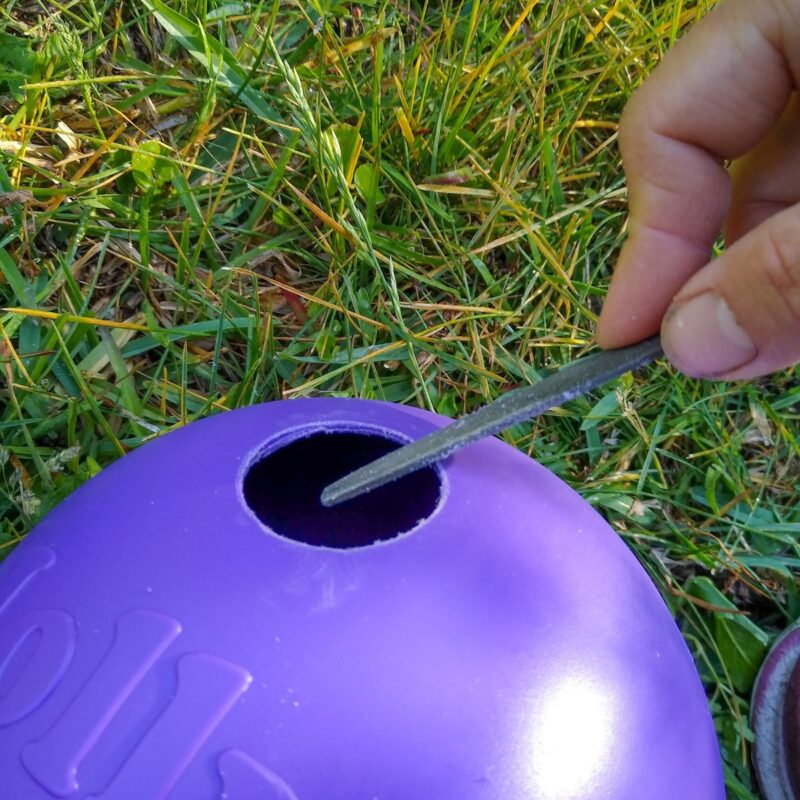
5. Clean up the edges
There will be little plastic filings around the edge of each hole. In this photo, I’m removing the tailings and rounding off the edges of the cut for a smoother look, using a miniature metal file. You can also use a nail file, emery board, or even a paring knife. Run your tool around each hole, filing down the surface, until you’ve removed all the plastic tailings.
6. Shake It Out
Give the egg a few good shakes to remove any plastic threads that have fallen inside. You can also rinse it out with water.
Using your Jolly Egg Hay Ball and Treat Toy
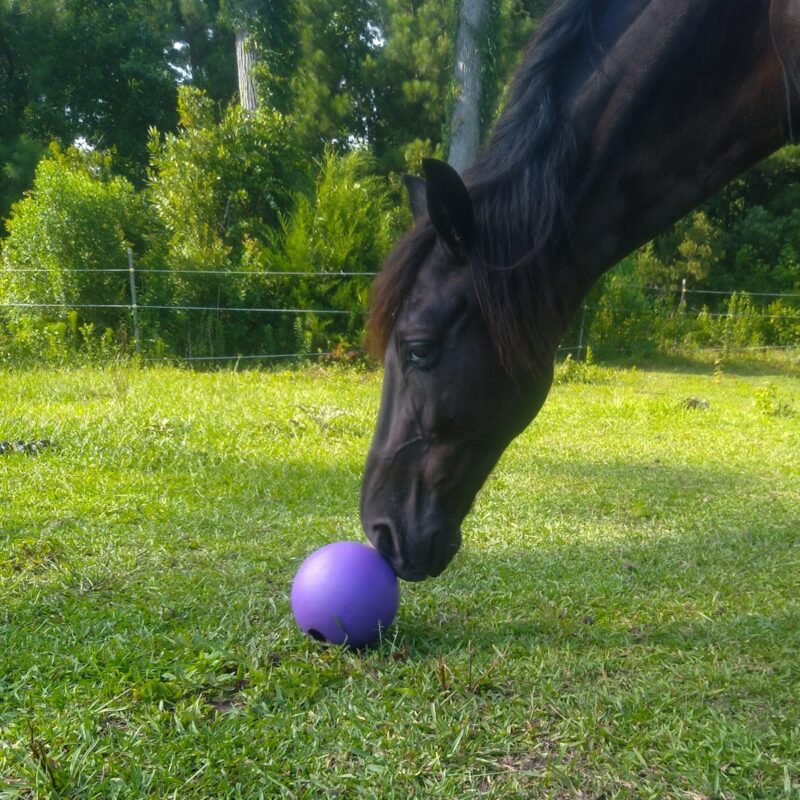
Now you’re ready to give the Jolly Egg treat roller to your horse!
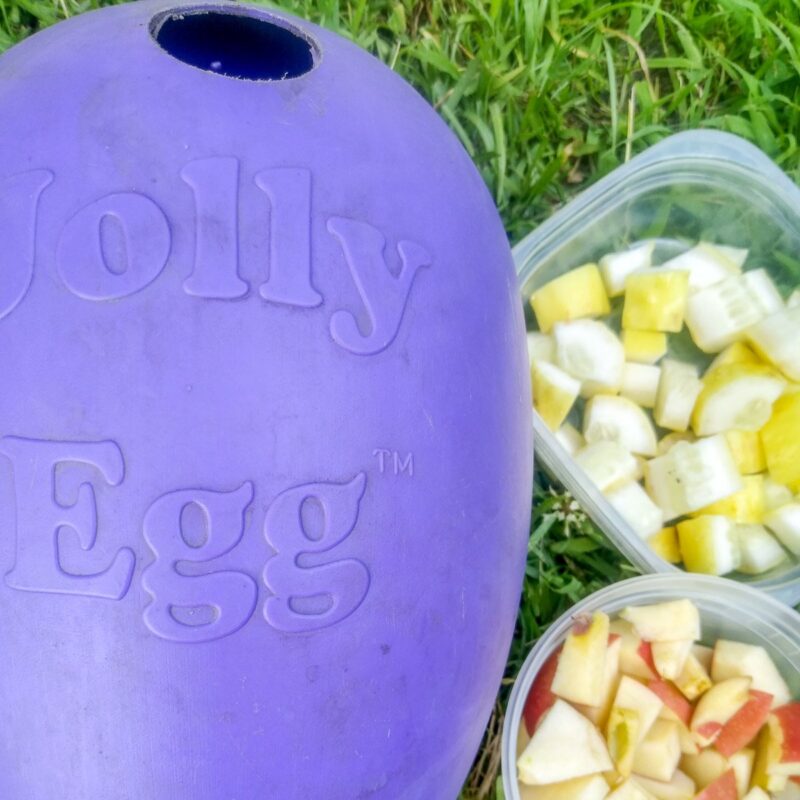
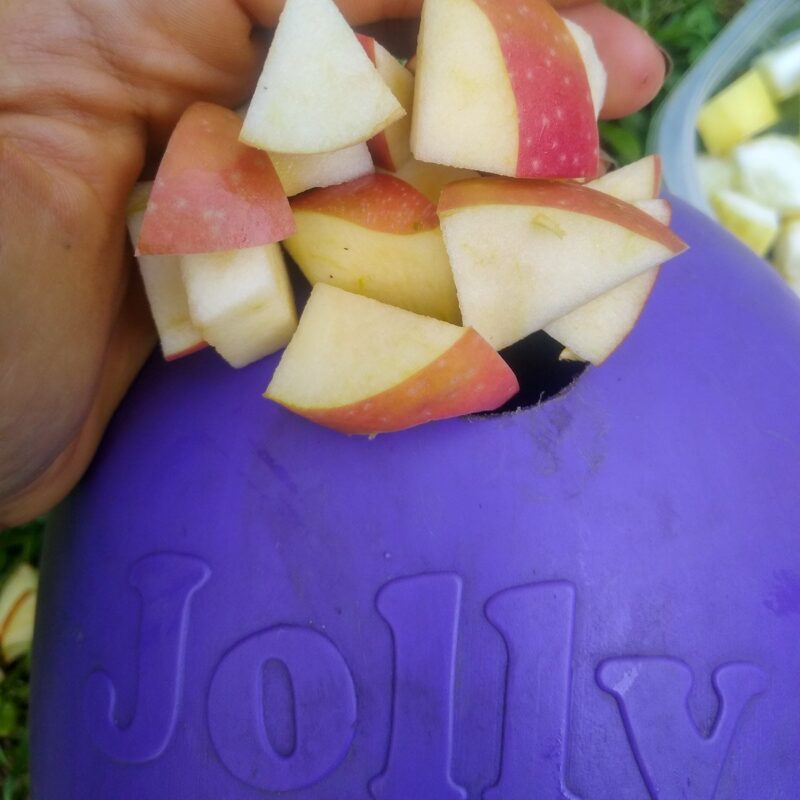
You can use the Jolly Egg in the stall or pasture. Just add the food of your choosing. If your Jolly Egg has small holes or you’re using pelleted feed, a kitchen funnel can make adding the treats fast and easy.
Put the egg on a solid surface or grip between your boots as you fill. This keeps grain and other small items from falling out of the holes before you’re ready.
Remember to introduce all horse toys slowly, since horses can be nervous about new things. It may take your horse a little while to figure out how to use the egg. Adding some food on top and beside the egg is a good idea to help them understand that the new toy enrichment is a foraging opportunity. If they don’t seem to understand that the egg should be moved, nudge it with your foot and drop a treat in the place where it was. You can also use positive reinforcement training such as clicker training to teach your horse how to roll the egg.
If your horse is slow to catch on, check out our article on how to teach your horse to use their toys.
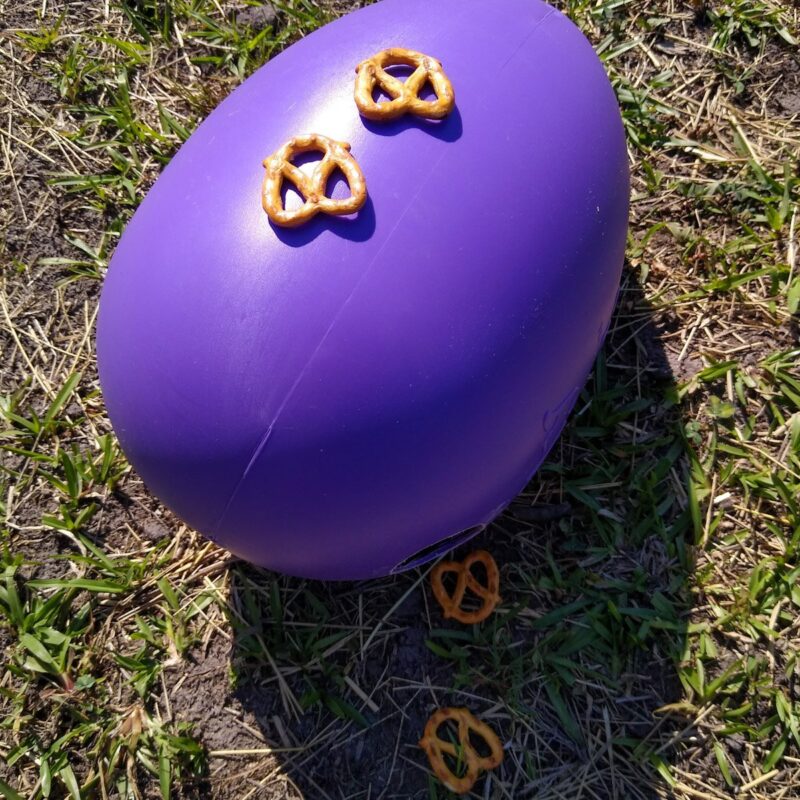
After your horse has finished using the egg, check it for remaining food. In case not all the treats come out, remove the egg after no later than a day to prevent leftovers from spoiling inside. To remove treats, hold the Jolly Egg with one hole facing downwards and shake it a few times.
Safety Notes
I love Jolly Pets products because they’re very durable, and that means safer where horses are concerned. The Jolly Egg is a very safe enrichment item. There are just a few points to note.
- Supervise your horse the first few times they use the egg, just to make sure that they learn to use it properly and safely
- Check for sharp burrs of plastic after drilling your holes, and don’t forget to file them down
- Make sure all food is out of the Jolly Egg before storing it after use, to prevent hygiene concerns from spoiled treats or fruit
With five minutes and a drill, you can make one of the best slow-feeding puzzles around. The Jolly Egg will keep your horse occupied and entertained while encouraging natural behaviors, which can lead to better physical and mental health. What’s not to love?
Have you used this item or a similar treat ball? How did it go? Tell us about it in a comment!
Pingback: Are Horse Ball Toys Good for Horses? - Enriching Equines