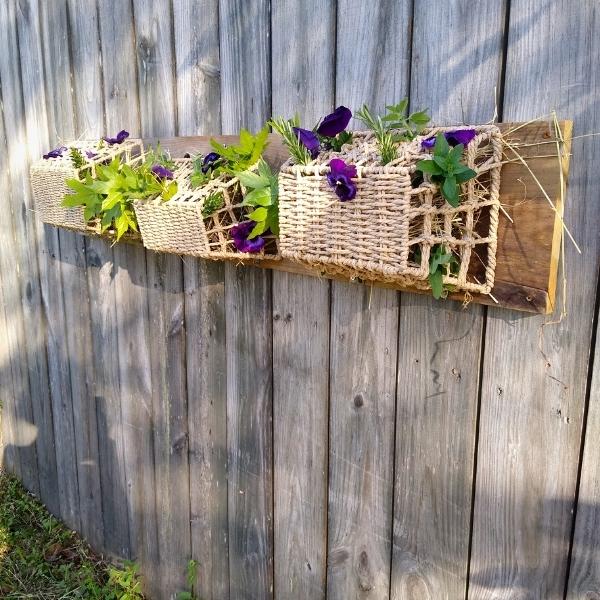
This DIY horse enrichment project is Pinterest material for sure. Wall mounted woven baskets hold herbs, a hay buffet, or veggie treats for your horse to browse and enjoy. And it’s more than cute, it’s great horse enrichment that is ideal for any stall or shelter wall. This project is surprisingly easy and quick to put together, so here’s how to make the DIY forage baskets for horses, step by step.
What Are DIY Forage Baskets for Horses?
This horse enrichment project uses easy to find materials and simple tools to make a cute, fun forage buffet for your horse.
The baskets are small, so you can fill them with a selection of herbs, edible flowers, hay, or veggies. Your horse will enjoy browsing the selection of tasty, healthy goodies.
This DIY horse enrichment project uses baskets you might have at home or can easily pick up from the local discount store. You can use reclaimed wood for the sturdy backing board. One special kind of fastener completes the project, which you can put together with very basic tools. Easy!
Why are DIY Forage Baskets Good Horse Enrichment?
Horses love foraging for new and interesting flavors. Hay and pasture meet their needs for a fibrous, grass based diet. But variety is the spice of life!
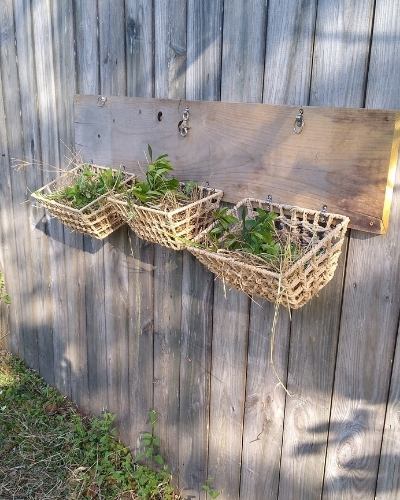
This feeder gives your horse the chance to enjoy a variety of new and interesting flavors. The baskets are easy to refill, so you can use them over and over – adding a different selection of food each time.
Your horse will have to do a little work to get the herbs, hay, or flowers out of the baskets, kind of like using a hay net. This ups the enrichment value even more, because your horse can pick what they want to eat and then use their sensitive whiskers and lips to pick it out of the basket.
Enrichment for horses is all about encouraging natural behaviors. This project gives your horse a boredom busting opportunity to forage and browse, and you can use it again and again.
How to Make the DIY Forage Basket for Horses
To make this easy project, you only need a few supplies:
- Small open weave storage baskets
- A wooden board wide and long enough for your baskets
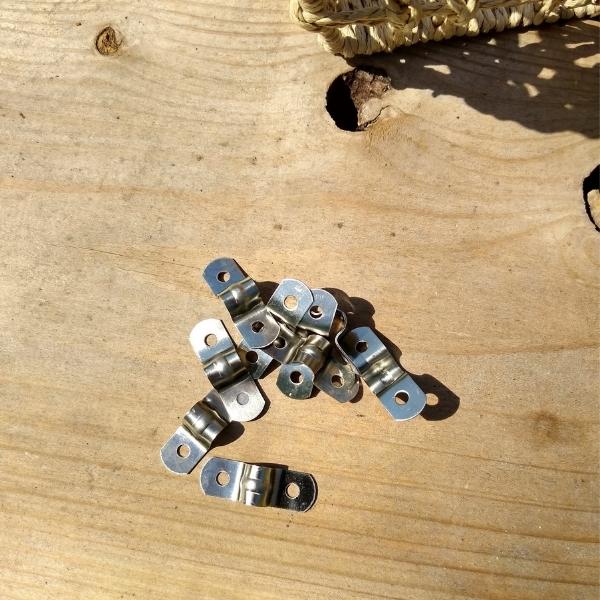
- Small stainless steel pipe or tube straps, 3 per basket (sourced below)
- Small screws and screwdriver or drill
- Ring clips or carabiners
Finding the Supplies
Check for open weave storage bins at your local home goods store. I found these at the local dollar shop and brought all three home for $20, making this a really budget friendly project.
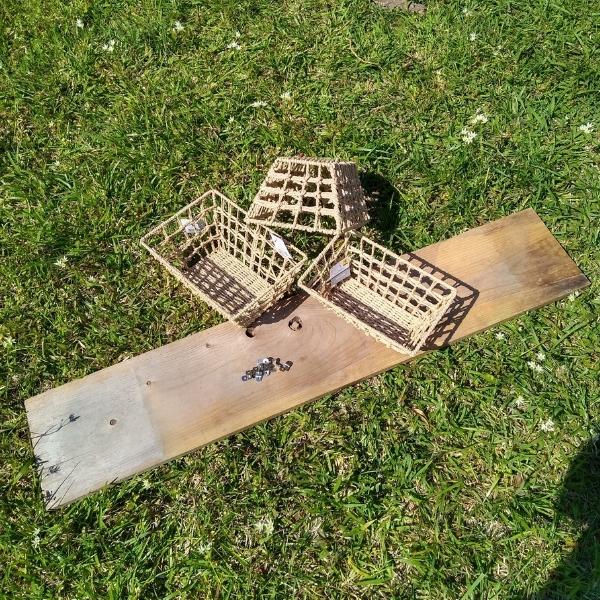
If you can’t find them locally, shop online. As an alternative, these farmhouse baskets from Amazon are an option too. Those are metal, so if you make this project using them, your horse should be supervised while enjoying the enrichment.
You can use as many baskets as you like. Mix and match sizes, or keep them all the same – it’s a really flexible project!
You’ll need a length of wooden board for this project. In a pinch, you can use plywood. It’s possible to just install the baskets on a wall, but a board lets you move the feeder around as a unit.
The stainless steel tube straps are the special touch that makes this project so usable. They hold the baskets onto the wooden board and let them open up so you can add forage. Find them here on Amazon. They’re really well priced and you’ll have extras for other projects.
Optional First Step: Prep the Board
You can use your wooden board as-is, but if you plan to use this enrichment out in the pasture, staining or painting it is a good idea. Do this before you install the baskets.
It’s a good idea to round the board’s corners and sand down the edges, just to make this basket feeder extra safe. That part isn’t shown in this pictures, but you can find a full step by step of how to make safe edges in our article on making the Sensory Texture Board for Horses.
To make installing the board easier, you can pre-drill a pilot hole in each corner. This makes screwing the DIY forage baskets to the wall of the stall or pasture shelter a cinch.
Step One: Lay Out the Forage Baskets
Place your baskets upside down on the wooden backing board and check their fit. They should be far enough apart that your horse’s nose will fit between them.
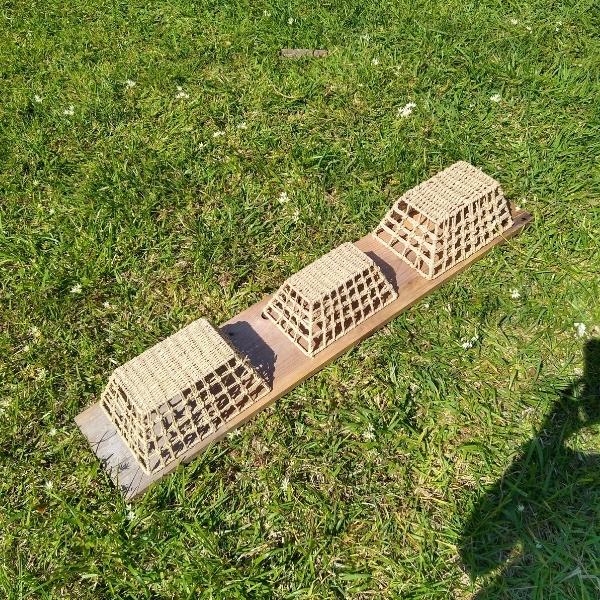
One edge of the baskets needs to be at least an inch away from the edge of the board, so that the metal fasteners will fit in the next step.
Step Two: Attach the Metal Clamps
Along the bottom edge, slip two metal straps onto the frame of each basket, near the corners for maximum support. Mark inside the holes of the strap for each one so you’ll know exactly where they go: they will shift and move around as you work.

Using a small screw and either a drill or just a screwdriver (you can probably put in short screws using only hand tools), attach the metal clamps starting with the end that’s outside of the basket.
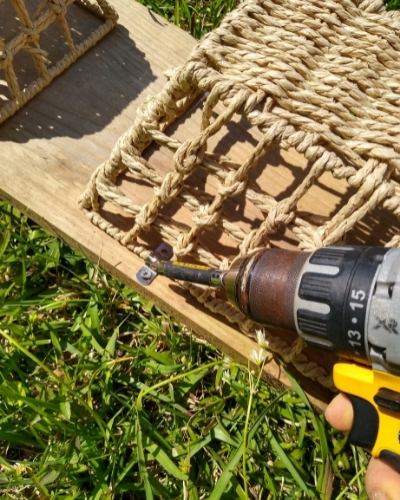
Step Three: Finish Attaching the Baskets
Placing the first screw will hold the clamp and basket in place for you to attach the second screw.
Gently “open” the baskets so you can reach the strap’s second hole, and install the second screw into each one.
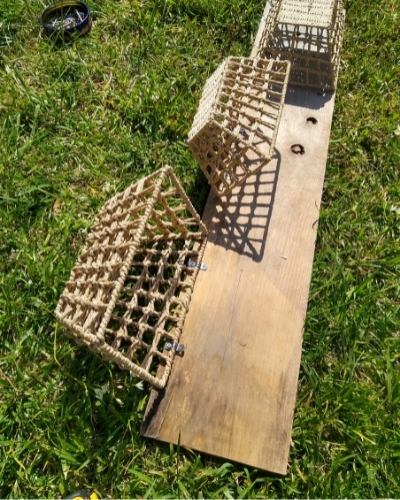
Now your baskets are correctly mounted on to the wooden frame! It’s time to add a strap to the other end of the basket so that you can clip them closed when they’re full of food.
Step Four: Add the Clip Straps
You need to add a clip or eye to the top edge of each basket so that you can clip them securely closed before your horse enjoys the DIY basket feeder.
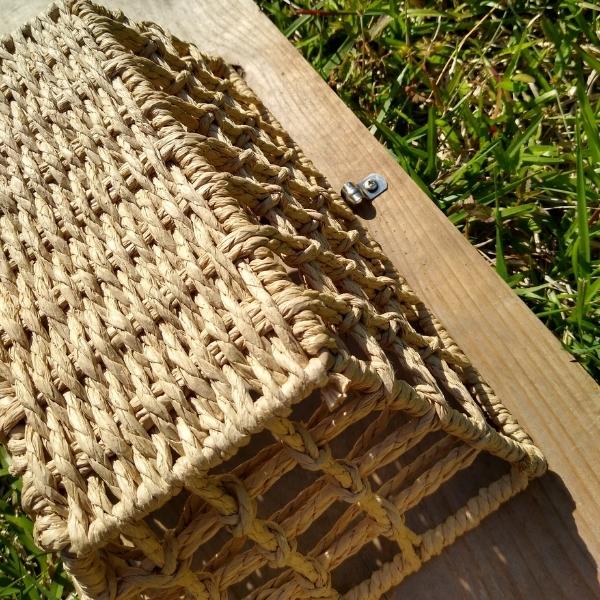
My board wasn’t quite wide enough to place the clamp on the outside of the basket, so you’ll see I’ve moved it just to the inside:
The open weave of the basket means it’s still really easy to work with. Another good reason to install this clip on the inside is that your horse can never reach it with their lips or tongue (it’s not dangerous, but you just never know).
Install one strap along the top edge of each basket. The orientation of the clip (whether the opening faces up and down or right to left) depends on which clips you’ll use to lock the baskets shut. Let’s cover that now.
Step Five: Add Clips or Snaps
To close the baskets, you’ll need something that’s easy to take off and on. A carabiner clip works well. If you have extra French snaps from old tack, you can use them.
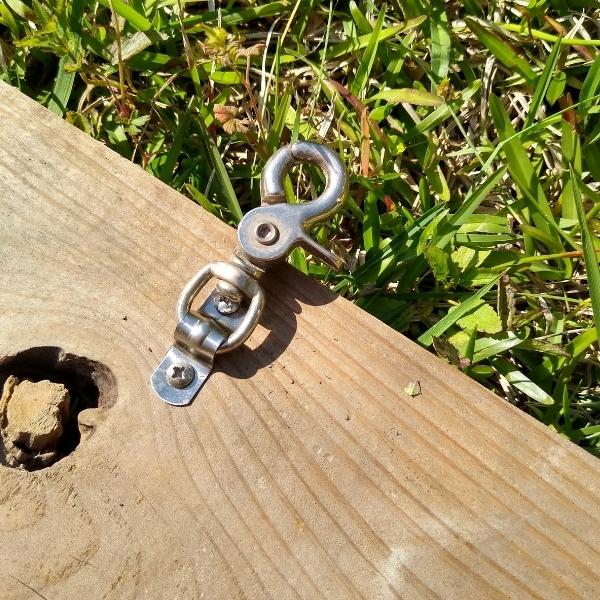
If your horses are easygoing and you don’t need a heavy duty carabiner, stainless steel ring binder clips like these are fantastic for this project. They’re easier to clip on and off than a carabiner once the basket is full of tasty browse or hay.
With that, you’re done! Time to install and fill the DIY forage baskets and let your horse enjoy.
Where to Use Your DIY Forage Baskets for Horses
This enrichment item can go outdoors, on the wall of a run-in shelter or attached to a sturdy wooden fence.
You can also attach this DIY project to the wall of your horse’s stall. Predrilled pilot holes make this a snap, and then it’ll be easy to remove in the future.
The DIY forage baskets’ wooden board makes it possible to install this project oriented side-to-side, as shown, or vertical. It’s totally up to you.
What Food for Your DIY Forage Baskets?
The best part of this project is the awesome variety of browse you can fill it with!
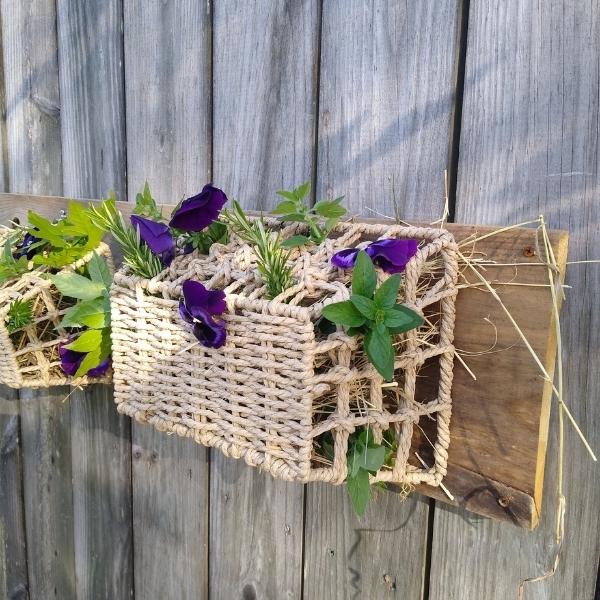
You can use any horse-safe browse or forage for this item. Here are a few ideas to get you started:
- A different type of hay in each basket, such as a handful of timothy, alfalfa, and orchardgrass hay
- Baskets mostly filled with hay and a different fresh herb added to each basket for flavor variety
- Edible flowers such as pansy, dandelion, and clover
- Hidden sticks of carrot, celery, and apple
To refill the feeder, just unclip the binder ring or carabiner, swing the basket down on the “hinges” of the strap, and add the goodies. Close it up using the clip. Easy!
Related Enrichment
This DIY forage basket for horses encourages browsing and offers food variety. For similar ideas, try: