What’s the best kind of horse toy? One that your horse loves and uses safely, of course! But extra points go to enrichment items and DIY horse toys that are multipurpose, and inexpensive, and easy to make. This DIY horse toy made from a hanging bucket lid checks all those boxes.
I cover a lot of DIY enrichment items, because sometimes getting crafty and creative is all you need to make an awesome puzzle, feeder, or toy for your horse. This browse toy for your horse is a simple DIY that punches way above its size class for fun and enrichment value.
It provides sensory stimulation, relieves boredom, and encourages a great natural feeding behavior. That’s pretty great for an enrichment item that costs almost nothing!
Here’s why the bucket lid DIY horse toy is awesome, and how to make it for your equine friend.
A DIY Horse Toy from a Bucket Lid?
This homemade horse toy is so simple it’s silly. All you need is a bucket lid, which you can get at any local hardware store. You can buy them separately from buckets, though a spare 5-gallon bucket is always good to have around the stable.
You’ll drill or cut holes in the lid in whatever pattern you like, load in treats or forage, and hang the lid from a sturdy overhead structure.
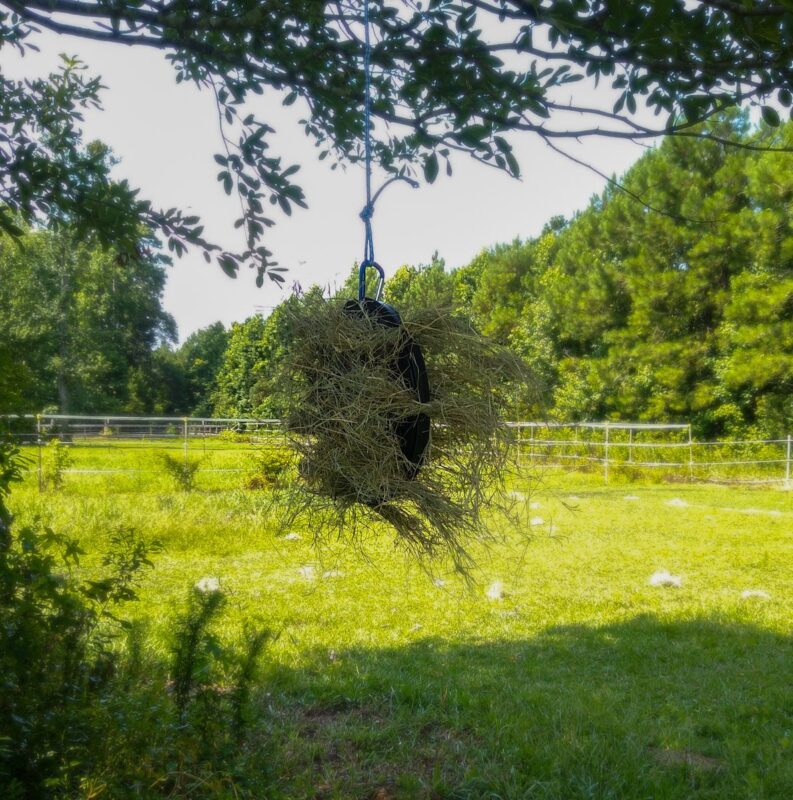
You can use any treat, fruit, or veggie in this DIY horse toy. Hay works really well too:
What Behaviors Does the Bucket Lid DIY Horse Toy Encourage?
Enrichment for horses is all about encouraging natural equine behaviors. This easy horse toy gets your horse moving, thinking, and having fun. To get the food, your horse will need to practice browsing behaviors, which means feeding from plants above the ground.
Browsing is different from grazing – it uses different muscles and needs a different kind of coordination. IWe’ve done some how-to posts on different browsing toys before, like the Things on Strings swinging treat kebab and the horse-shaped carrot noodle browse board that lets you get crafty while making a fun toy for your horse.
The bucket lid DIY stall toy is also great because it provides sensory stimulation. The swinging disc is interesting for horses to look at, and the smell and feel of the food provide variety for your horse’s senses. Activities like this relieve boredom and give your horse a way to express curiosity safely.
Plus, you can use this toy safely in the stall or in the pasture, and you can even set up more than one at a time if you have multiple horses. When the food is gone, the bucket lid DIY horse toy doubles as a swinging toy that your horse can nudge and push. So even after the treats have been eaten, this enrichment item keeps on giving.
How to Make the Bucket Lid DIY Horse Toy
Here’s how to make this simple DIY horse enrichment project, step by step.
1. Find the right bucket lid.
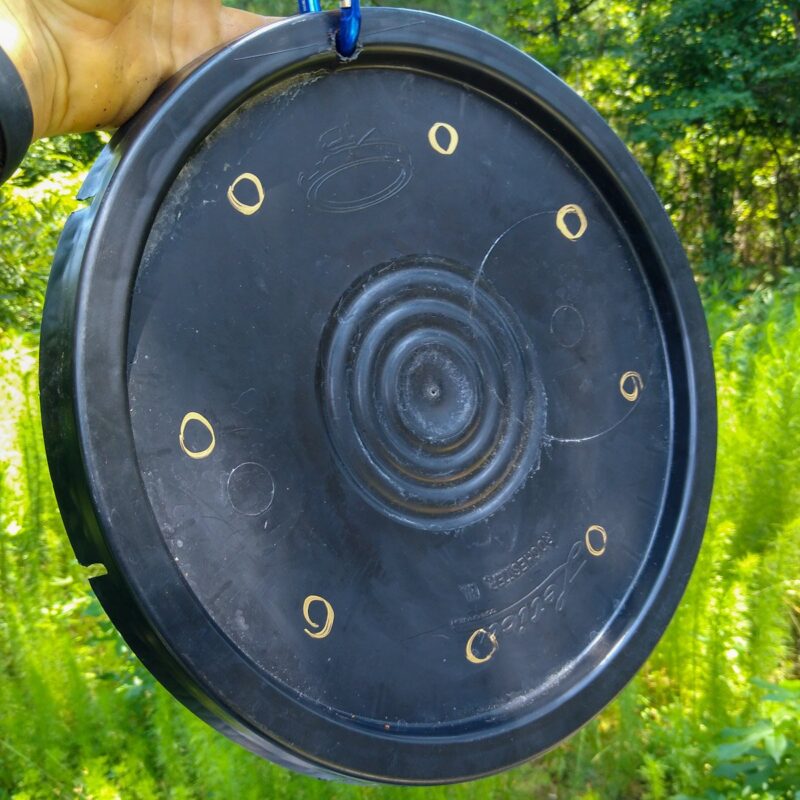
Most bucket lids are fine for this equine enrichment project. The sturdier, the better. You’ll want a lid that can stand up to repeated use so that your horse can play with this item again and again. You can buy a bucket lid from the hardware or feed store, or repurpose one – you can use one of your own or ask around at large grocery stores or restaurants. This tutorial uses a five-gallon bucket sized lid, but any size is fine. Use what you have and be creative! Your horse will love it no matter the size or shape.
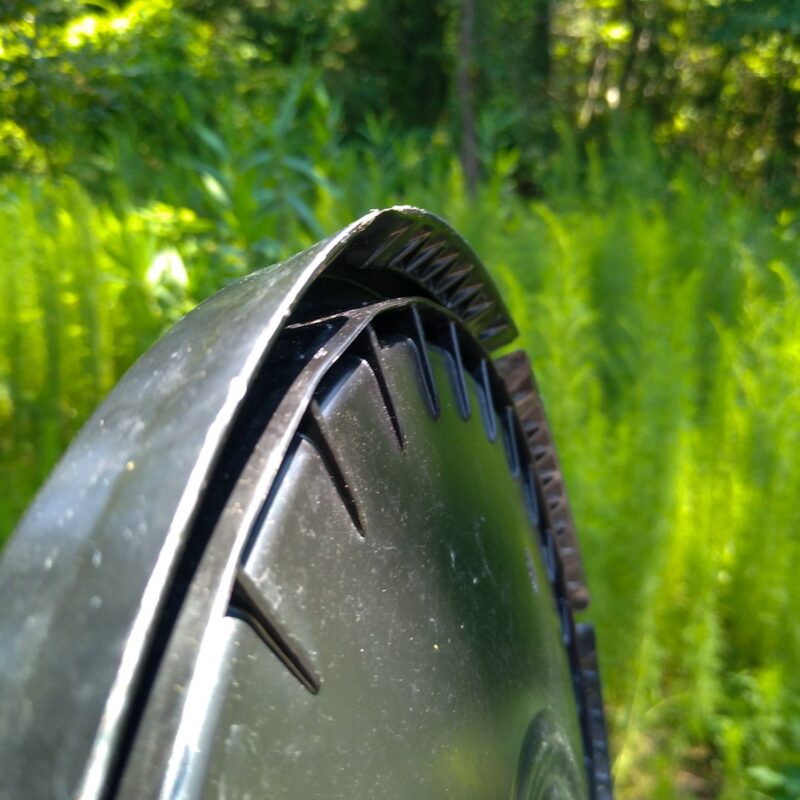
A flat surface over most of the lid is best because it’s easier to drill clean holes into a plain flat surface. But if your bucket lid has texture, like the one pictured, it’s still usable.
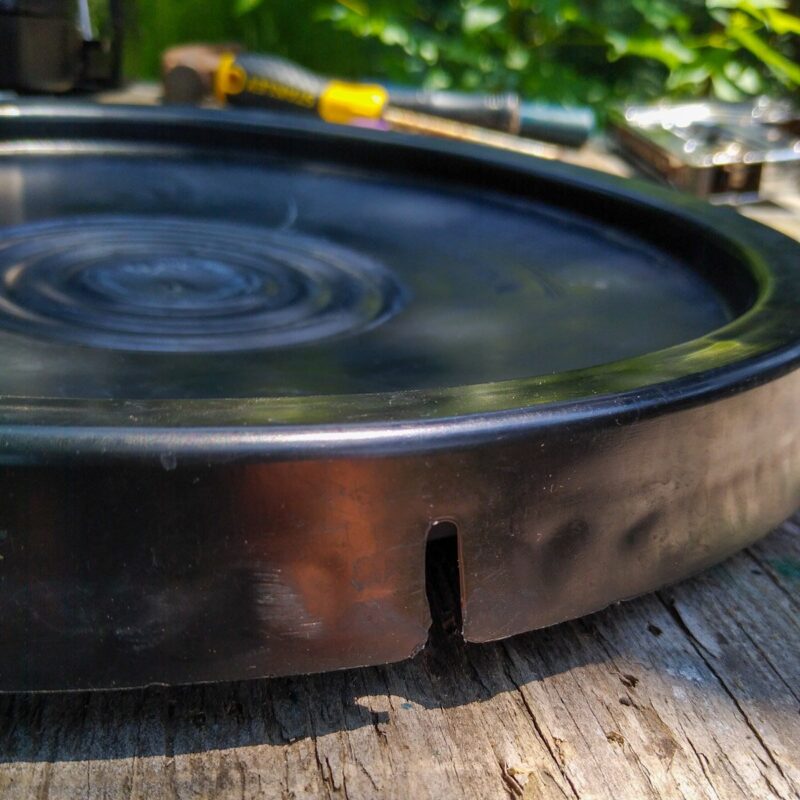
You should not use any bucket lid that is cracked or damaged, and avoid lids with irregular rims – sometimes lids have torn-out edges where a seal has been pulled to open the bucket. Rounded edges around the rim are best. You can see that this bucket has a fairly sharp rim, which I filed down slightly after adding holes. It probably was not a major safety concern, but it’s better to lean on the side of safety with enrichment.
2. Add the Clip
For safety, you need to be able to hang this enrichment item securely from an overhead structure. The best way to do this is by using sturdy hardware and horse safe rope.
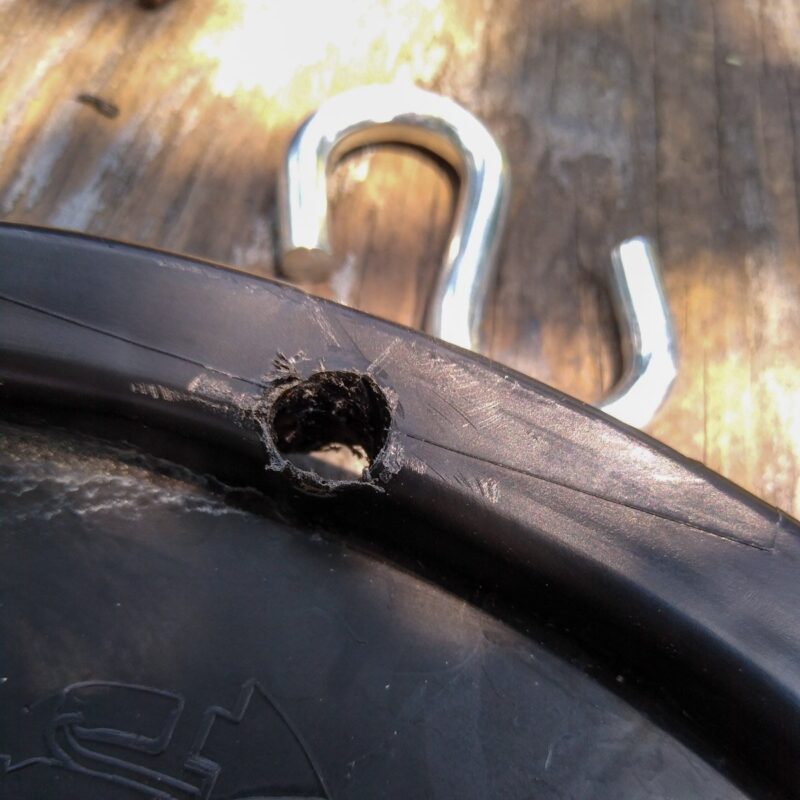
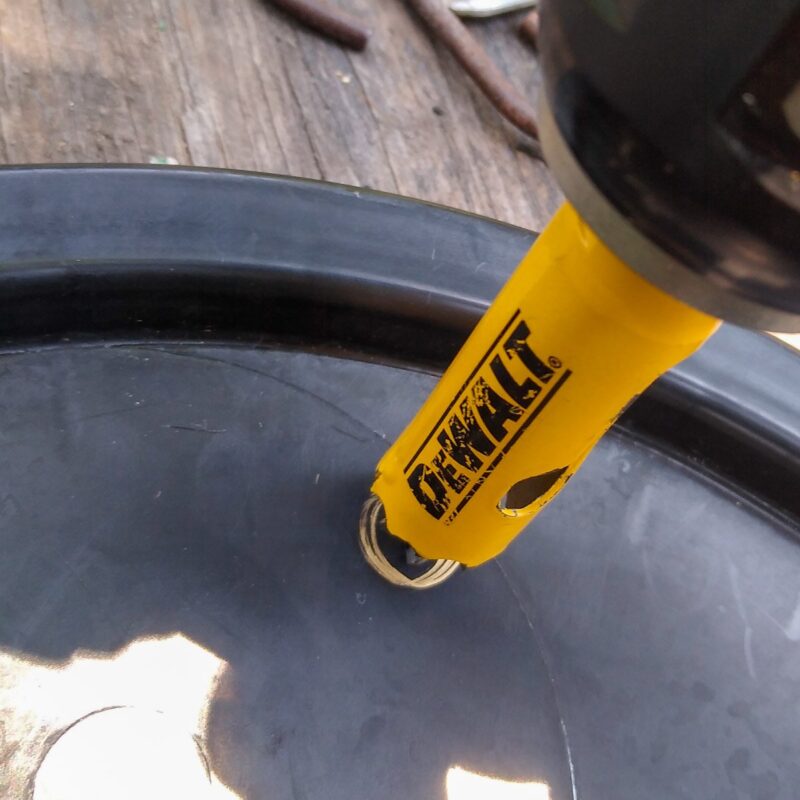
Drill a hole near the rim of the lid, just wide enough for the clip or hook you choose to use. You can also forgo the clip and pass a thick rope through the hole, but a clip makes it easier and lets you better customize where and what height the lid hangs.
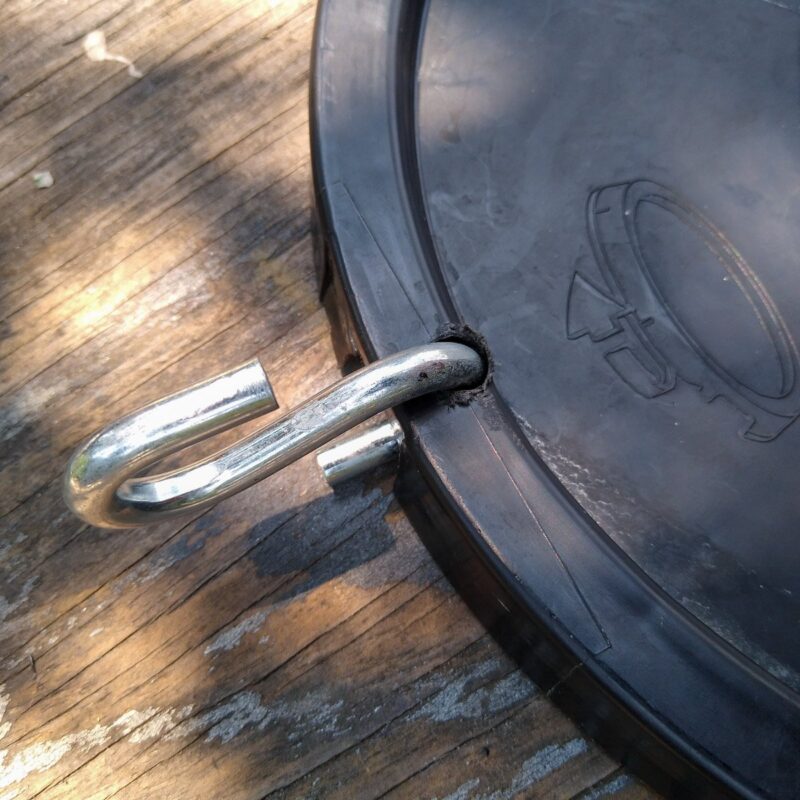
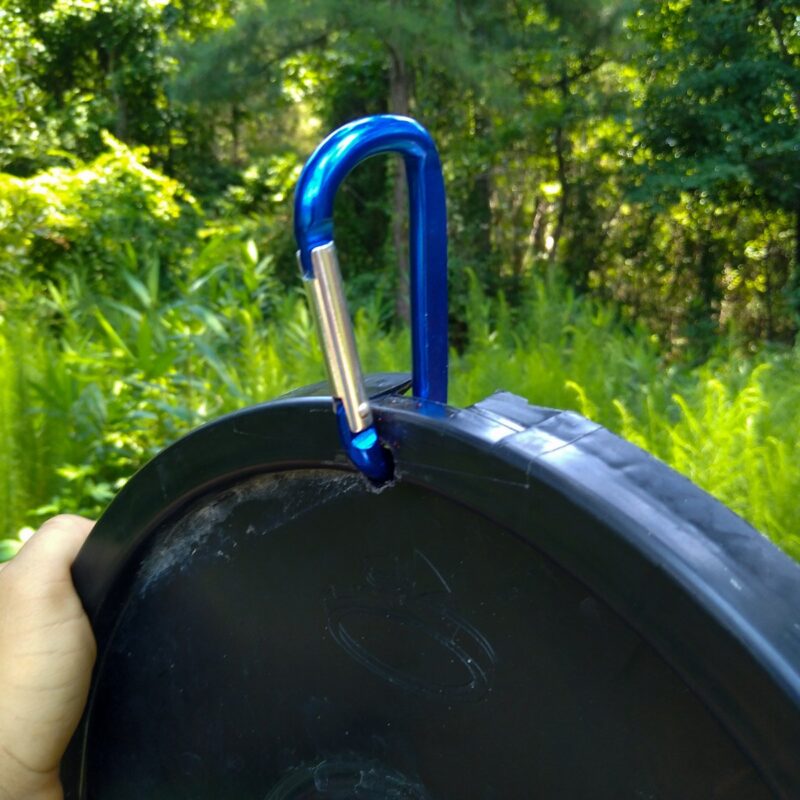
This S-hook is easy and will do the job really well. But if your horse is very enthusiastic about bucket lid DIY hay toy and likes swinging it around, you might want to go with a fully enclosed carabiner, like this:
With your choice of clip installed, it’s time to make the holes or slots that will hold the goodies for your horse.
3. Mark the Holes
You can be creative at this stage! The layout of the holes determines what food items you can use and what the bucket lid horse toy will look like when it’s ready for your horse. Use bigger holes for stuffing in hay, medium sized holes for vegetables and fruit like apples, carrots, or squash, and small holes for herbs or other leafy stems.
The holes can be evenly spaced around the lid, in clusters, or lines. You can make lots of holes or just a few. Since this is an easy DIY, you might want to make several lids, each with a different pattern.
For this lid, I used a 3/4 inch hole saw and a half inch drill bit, then created smaller holes using a 1/4 in drill bit in a star pattern in the center of the lid. There is no right or wrong way to do it and no minimum or maximum number of holes. It’s a really forgiving project!
Remember to remove any plastic tailings with a file or knife to keep your horse from accidentally eating little bits of plastic. Safety first!
4. Add the Treats!
When the holes are done to your liking, you’re ready to add the goodies. I called it a DIY hay toy, but you don’t have to use only hay! Any horse safe food item that fits into the holes or slots can be used with this horse toy. Use your creativity with this enrichment to give your horse a unique experience.
The shorter the bits of food are, the more challenging they are for the horse to remove. To make the lid a little easier for the horse to eat from, cut your pieces of food into long strips. You may want to start by using long wedges of carrot or apple, which are firm and easy to fit into the holes.
Other Horse Treat Options
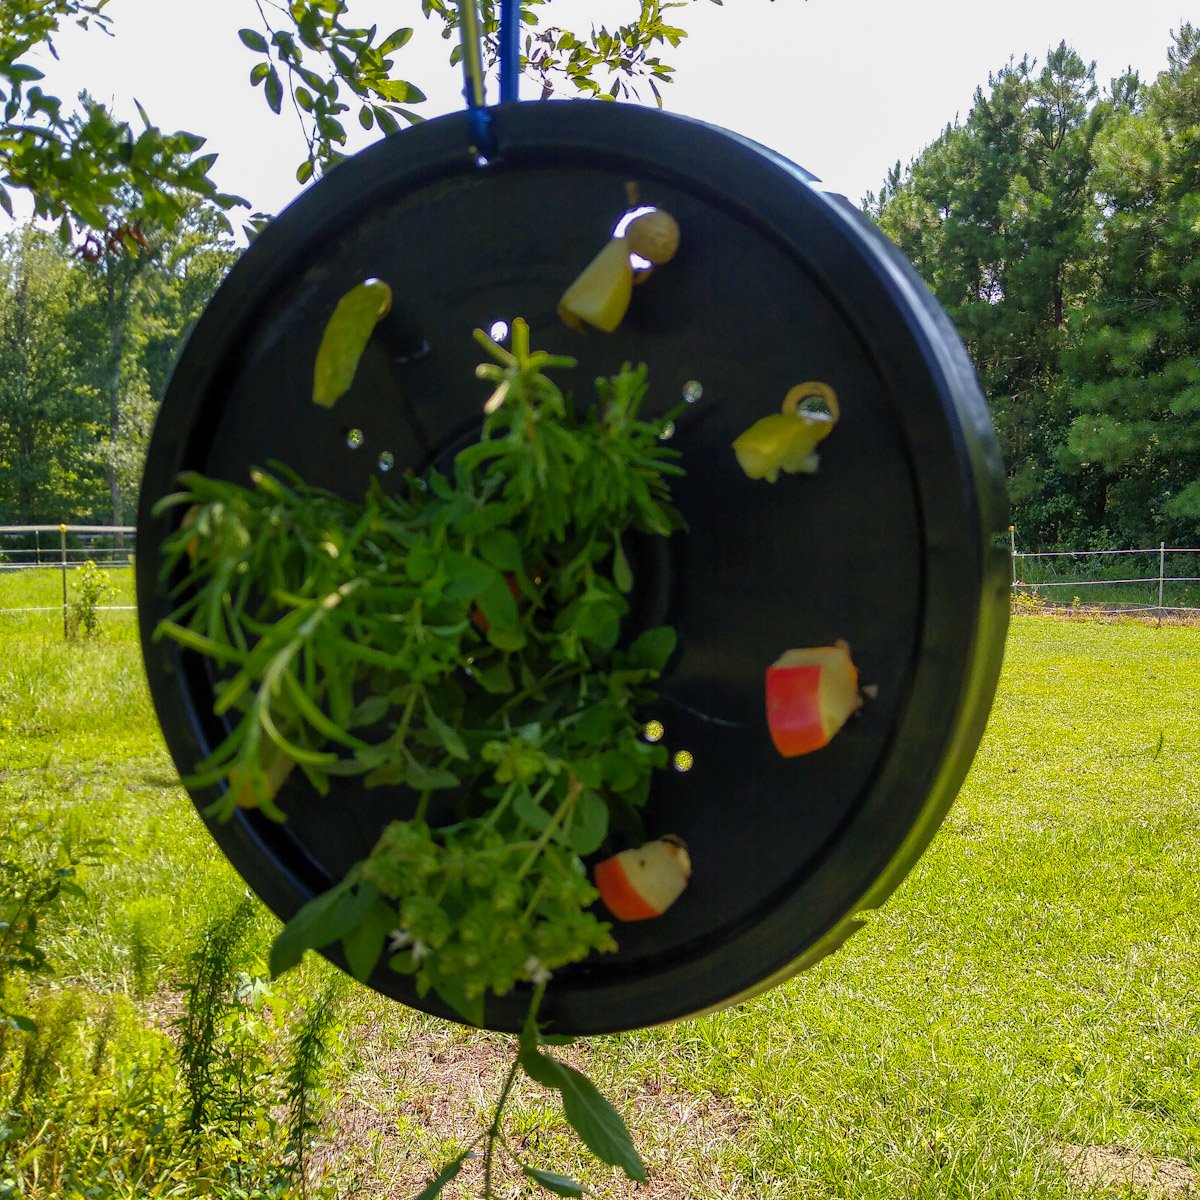
Other options for easy nibbling include green beans, long strips of squash or cucumber as shown here, and twists of long-stem hay. Fair warning: as you can see, wedging the browse treats into the holes can be squishy! Foods that are more dry, like carrots, don’t make as much of a mess – not that your horse will mind, of course.
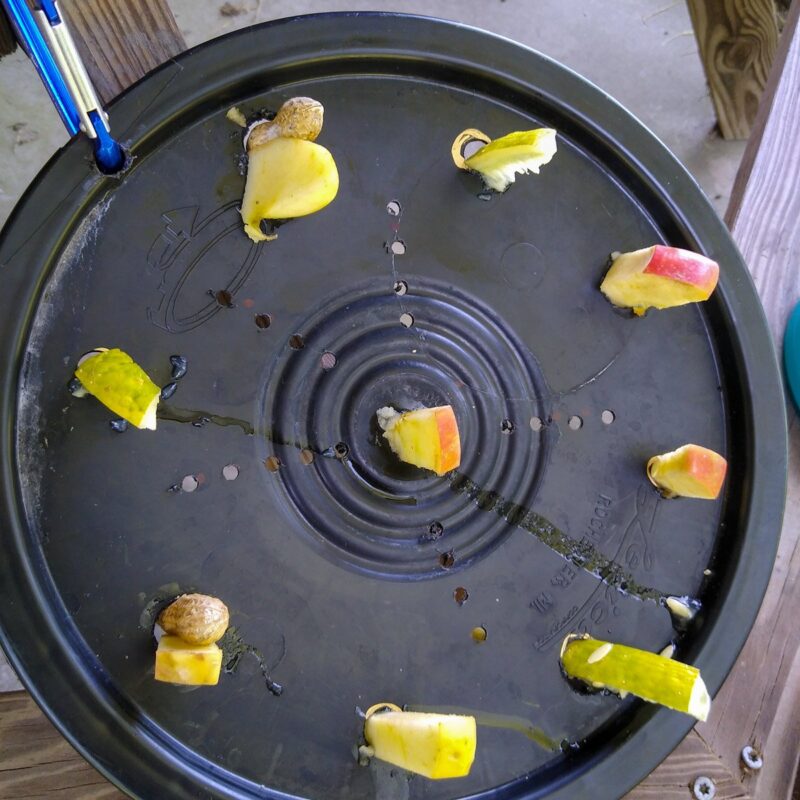
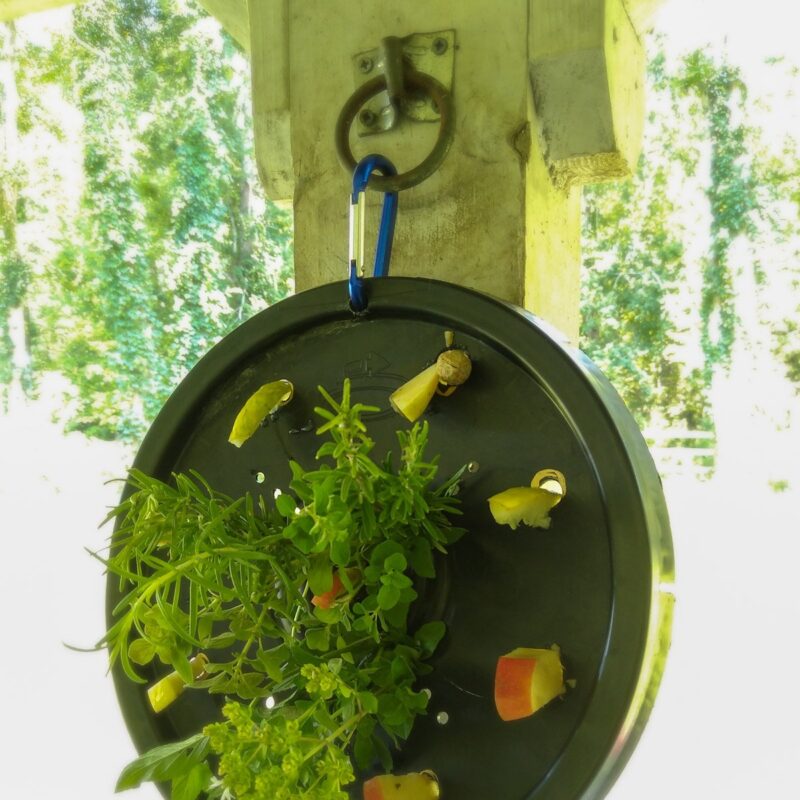
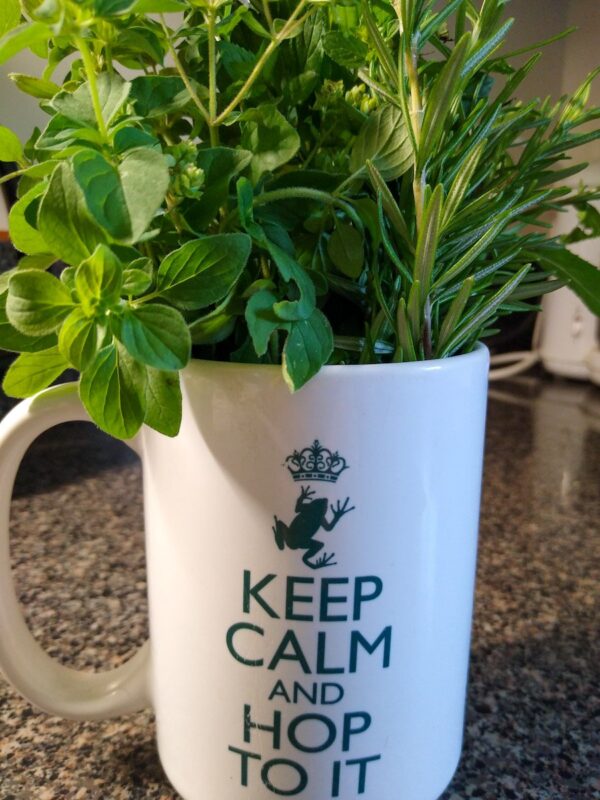
Keep adding treats until the holes are full. I made this demo lid with small holes in the center, which are perfect for stems of fresh herbs from the garden (motivation mug not included). They add a great sensory experience as the horse gets the unique smell of each herb, and they’re edible too. You could also add stems from other edible, twiggy plants – check your local agricultural service to find out what species are horse-safe in your area.
When you’re finished, the board will look something like this:
When your horse gets more experienced with the browse board and has the coordination for greater challenge, add smaller chunks that don’t stick out quite as far. Smaller pieces of apple and carrot will work. You can also use commercial horse treats that fit into the holes nicely too.
5. Hang up Your DIY Horse Toy
With the browse board all loaded up, find a secure location to hang it. Remember to use horse-safe rope or cord to hang up your enrichment! Shown here is a polypropylene line and smooth metal clips.
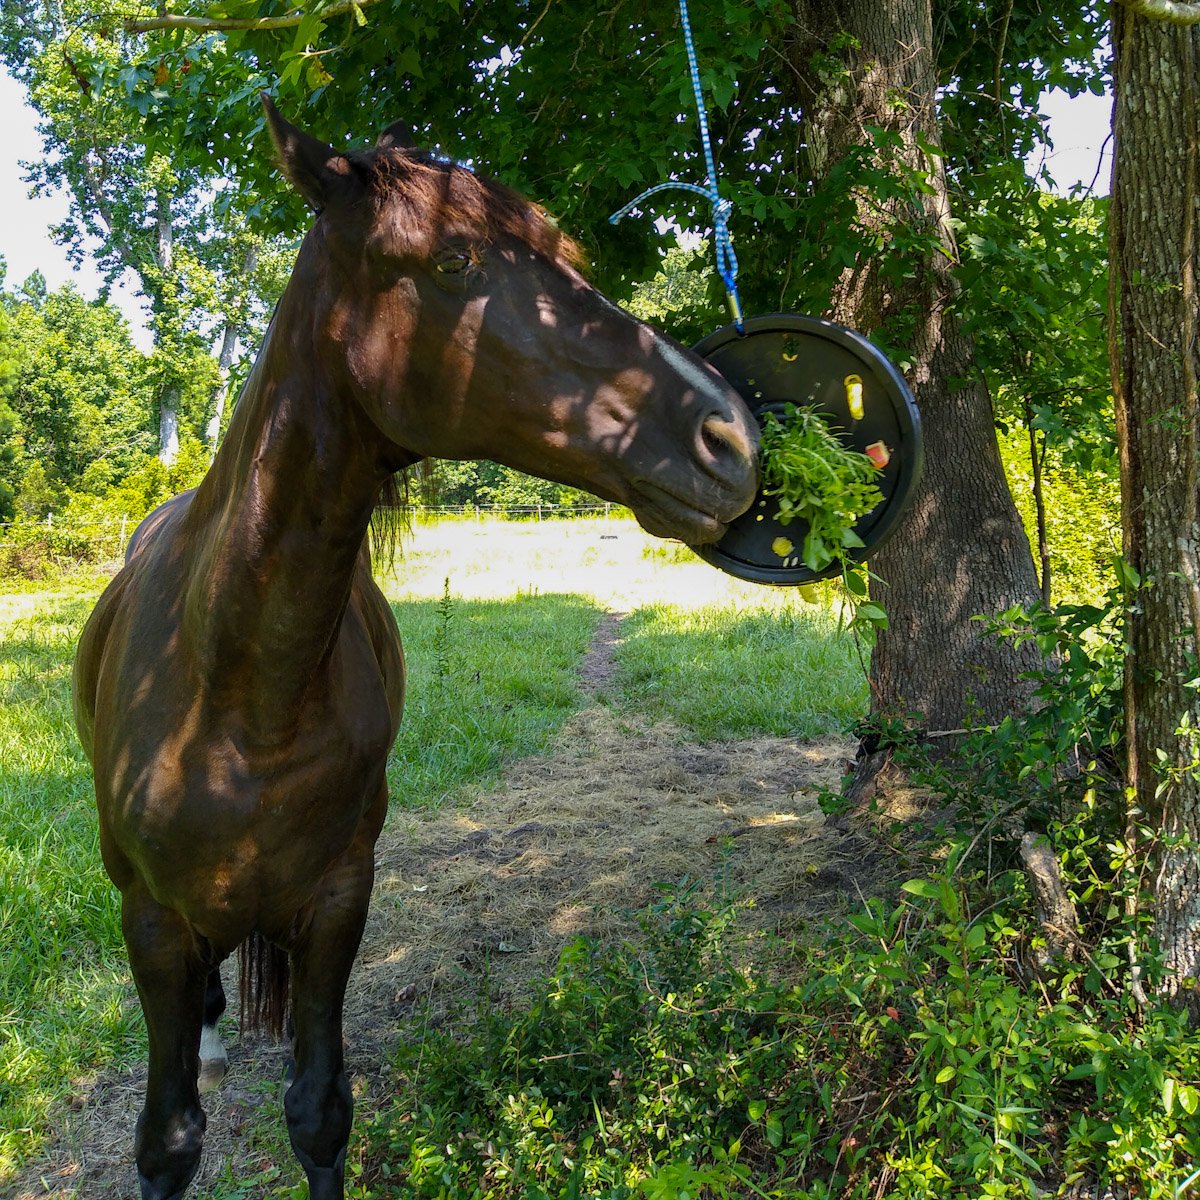
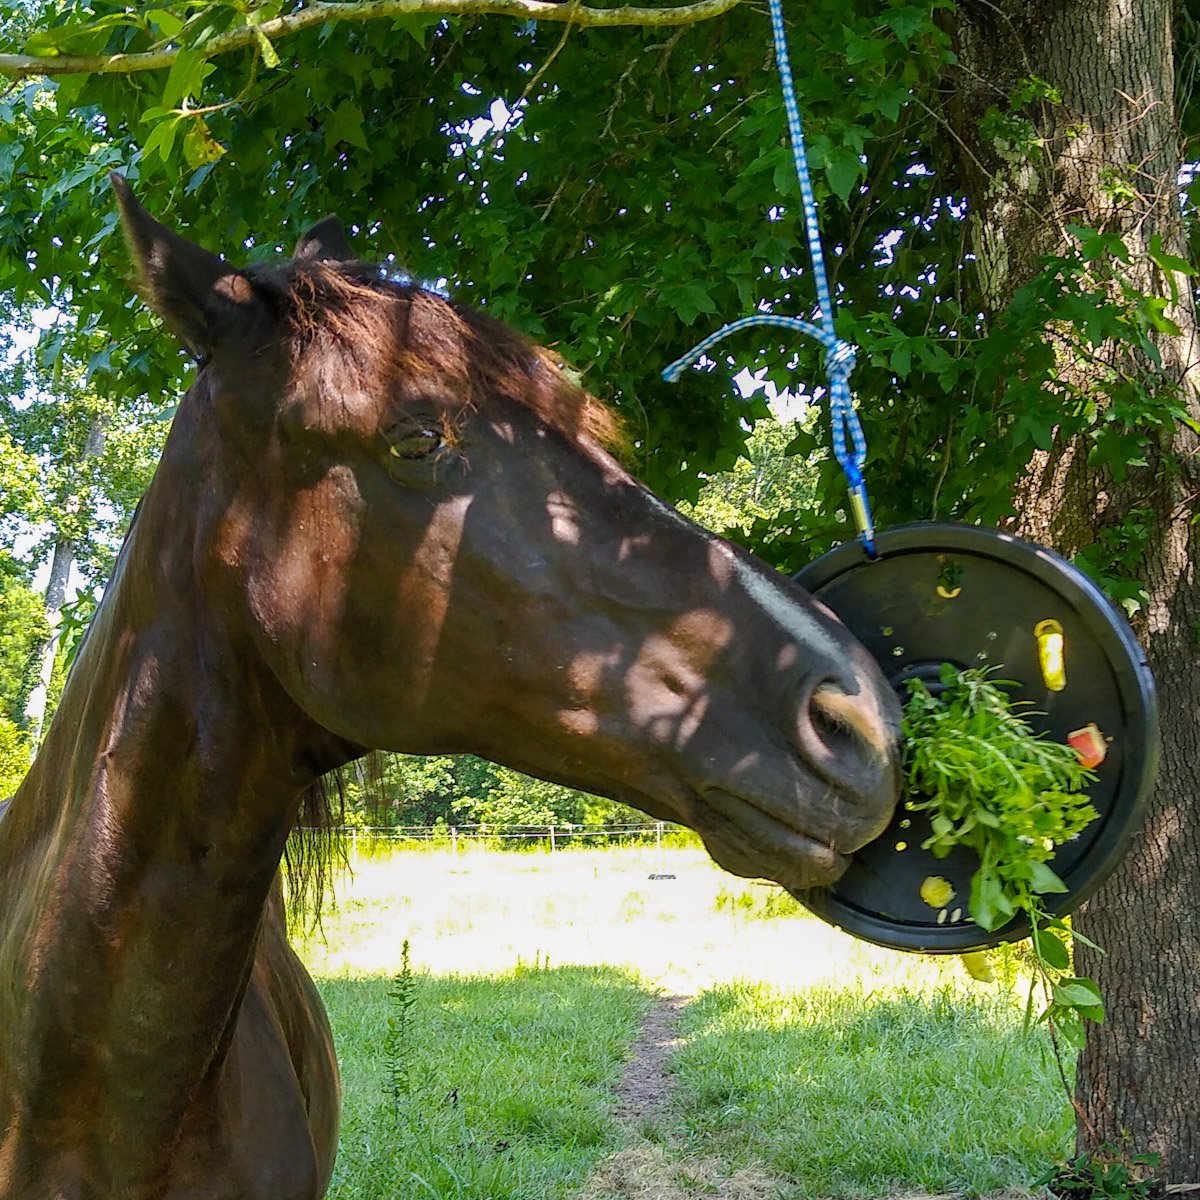
Some horses take to it right away, while others want to check it out for a bit first before putting their face near it. How your horse responds will depend on their personality and their history with enrichment. After the food is gone, many horses will push the lid around as a swinging toy. This play behavior is also great for your horse – it prevents boredom, promotes physical activity, and is just plain fun.
Some Safety Notes on the Bucket Lid DIY Horse Toy
Because this enrichment item swings freely, you want to make sure it’s secure and can’t fall down, even if your horse grabs it and tugs with their teeth. Use strong rope (not baling twine) and sturdy knots. If you use a metal clip or carabiner, only use ones that have no protruding points or sharp edges. This prevents injury just in case the board swings and knocks into your horse.
Remember to introduce this enrichment slowly and comfortably, just like all new horse toys and puzzles. It’s best to let your horse have this item during turnout first, rather than in the pasture. This way, they can choose whether they want to interact and get more distance from it if they’re uncomfortable. Some horses don’t like the swinging object at first, especially if they’re new to enrichment. Set your horse up for success by letting them learn how this toy works in an open setting. When they’re comfortable, you can use it in the stall.
With a little attention to safety, you can quickly and easily make a DIY horse toy that your horse can enjoy over and over. It doesn’t take up much room in the stable, either, so you’ll stay organized! Using this and other enrichment activities that encourage browsing are a great way to give your horse something to do and enrich their experience, whether in their stall or pasture.
Have you made this enrichment item? How did it go? Tell us about it in a comment!