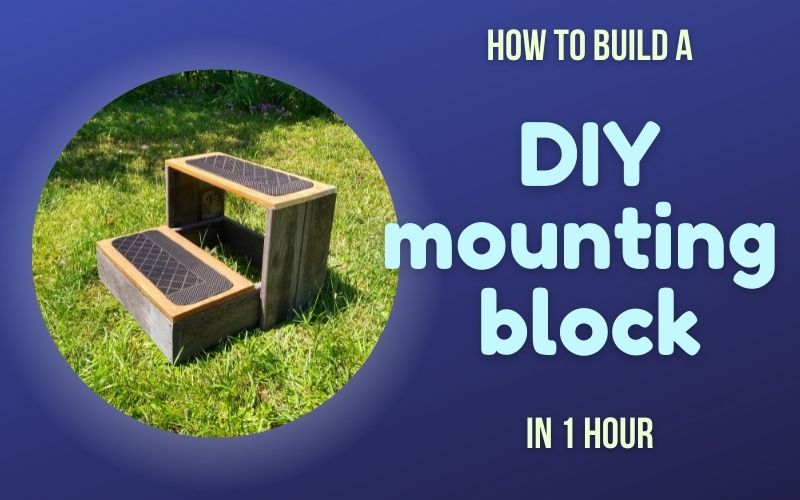
This awesome DIY mounting block is budget friendly, looks great, and is SO fast to build. You can put one together in an hour using reclaimed lumber and basic tools for an easy afternoon project. You’ll end up with a sturdy mounting block that’s great for your horse’s back and your wallet. Here’s how to make a DIY mounting block, step by step.
Why You Should Know How to Build a Mounting Block
First, why do you NEED this piece of equipment in the first place? If you already love mounting blocks or just prefer to buy them, you can skip this part.
Mounting blocks aren’t just a handy luxury. They’re a must-have piece of equipment. Mounting blocks – DIY or commercially made – are good for the long term health of your horse’s back and make riding more accessible to equestrians of all abilities. They’re also ideal for training your horse to self-station when you want to mount – a great skill to have in other places, like trail riding.
Basically, mounting blocks for horseback riding are fundamental addition to your barn.
Why Build a DIY Mounting Block?
Mounting blocks are designed to be big and bulky so that they’re safe and stable to use. They’re not made for carting around with you to everywhere you want to ride. So it’s a good idea to have a mounting block in each location that you commonly climb aboard. Each round pen, arena, or trail head should have a mounting block.
But buying a mounting block will set you back. They’re pretty pricey, for a chunk of molded plastic – this 3 step mounting block is nice but clocks in at more than $150. As equestrians, we’re all looking for ways to stretch our budget.
Enter the DIY mounting block! If you have an hour to spare and some basic tools, you can make an attractive and sturdy two-step mounting block for a fraction of the price of buying online or in a store.
And you have some unused lumber lying around the barn, the cost might be zero – I made this mounting block as a personal project before realizing it was easy and fast enough to deserve a how-to article. It cost nothing other than an hour of time.
What Makes this DIY Mounting Block so Great?
This project is awesome for several reasons. First, the budget friendliness mentioned earlier. I priced out this design at less than $50, and that’s buying all new lumber at today’s inflated prices.
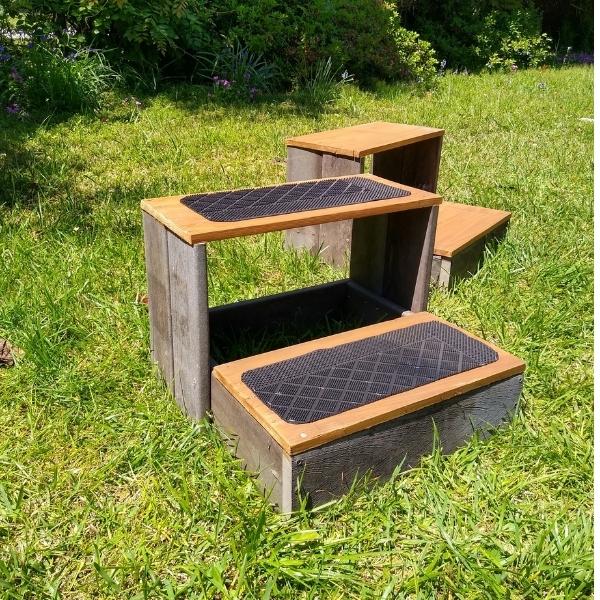
But because this block uses short lengths of wood, it’s excellent for using up reclaimed lumber to save even more cash. The blocks made for this article used scraps of wood leftover from a previous project, meaning the stable got two mounting blocks for free other than my time.
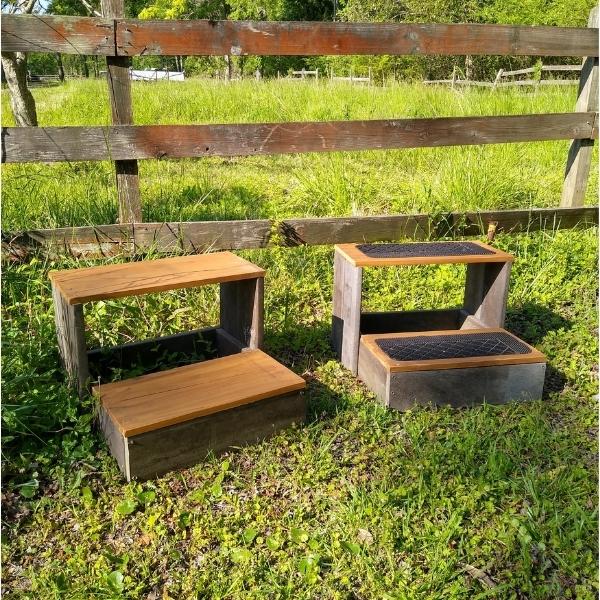
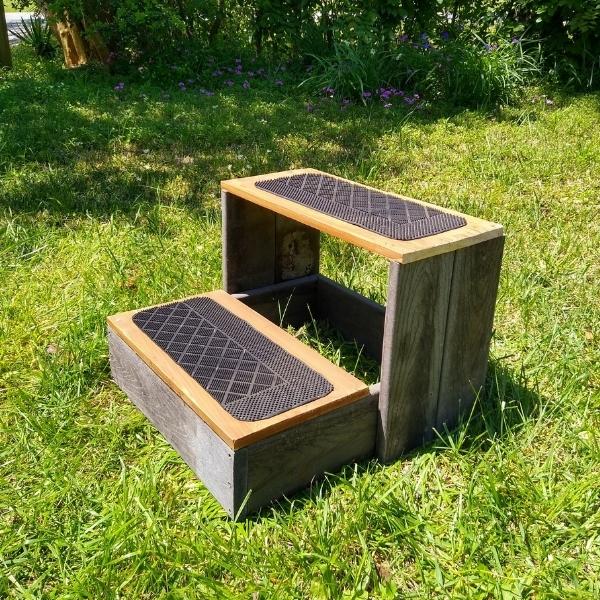
Second, it’s a great looking mounting block! This style comes out looking really nice, functional but not too rustic. No thrown-together vibes here. It’s at home in any stable, English, Western, or anywhere else. You can also paint it to match your barn’s colors.
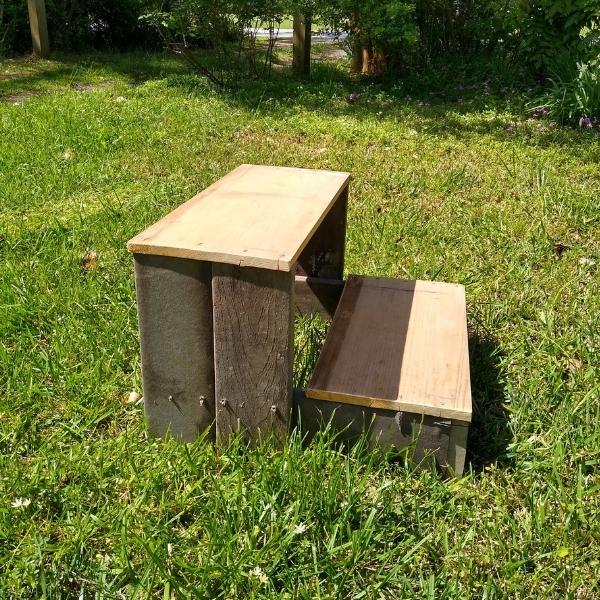
But the block is also very functional. It’s heavy and long lasting, and it won’t tip or slip when you step up. It comes in at 17 inches high, which is plenty of height for most equestrians and horses, and offers two steps for flexibility and safety. Still, it’s not too heavy; if you can handle a bag of feed you can pick up this block without a problem.
This project is forgiving and customizable. The design is very flexible. Have plenty of 2x4s instead of the 2×6 lumber used here? No problem – just tweak your measurements. Want a third step? Change the length of the base frame and you’re all set.
But best of all: you’re in and out quick because this DIY mounting block comes together in an hour. You can make it and use it to ride on the same day if you want, it’s that fast. I timed it: working at normal speed, I got these blocks made in 50 minutes each.
How to Build a Mounting Block, Step by Step
To make this DIY 1 hour mounting block, you’ll need some wood in a few different dimensions, and some basic tools. If you or a friend has access to a wood shop that’s great, but if not, no problem! I don’t, and these mounting blocks still turned out great.
What You Need for the DIY Mounting Block:
Frame Lumber (2×6, treated is best)
- (4) 2×6 cut to 21 inches
- (4) 2×6 cut to 16 inches
- This is a total of 18 board feet, so purchase or scavenge any combination of lengths that give you these 8 short cuts
Step tread boards (solid pine recommended; can use 1” thick exterior plywood)
- (1) 1×12 board/plank cut to 21 inches
- (1) 1×12 board/plank cut to 24 inches
Fasteners and Tools
- Wood screws, 2in or 2.5in, for making the frame
- Wood screws or nails, 1.5 to 2 in, for fastening down the step treads
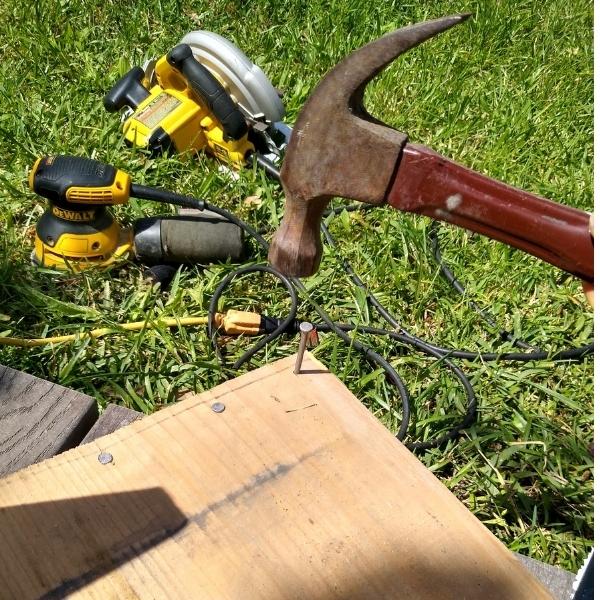
- Circular saw
- Drill with Philips bit for screws and fluted bit for pilot holes (optional but recommended)
- Carpenter’s square
- Orbital sander or sandpaper (optional)
- Wood stain or paint (optional)
- Rubber doormat for treads (optional)
If you’re buying lumber for this project at the local hardware or building store, treated lumber is recommended especially if your mounting block will be used anywhere outdoors. Treated dimensional lumber is usually kept in a different area than the wide pine boards you’ll use for the step treads.
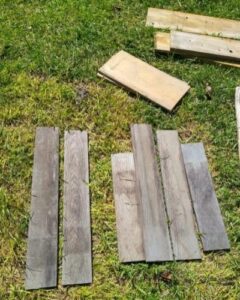
I started with this pile of leftover lumber rather than buying new at the store:
Step One: Cut the Lumber
If you’re making this project exactly as shown, you can pre-cut all the pieces. This way you can do all the measuring at one time, followed by all the cutting, and then simply move on to assembly. This is definitely how to build a mounting block with maximum efficiency.
If you plan to modify the dimensions, like if your reclaimed wood is not exactly what’s listed here, don’t pre-cut. Measure as you go, cutting the wood to fit each step.
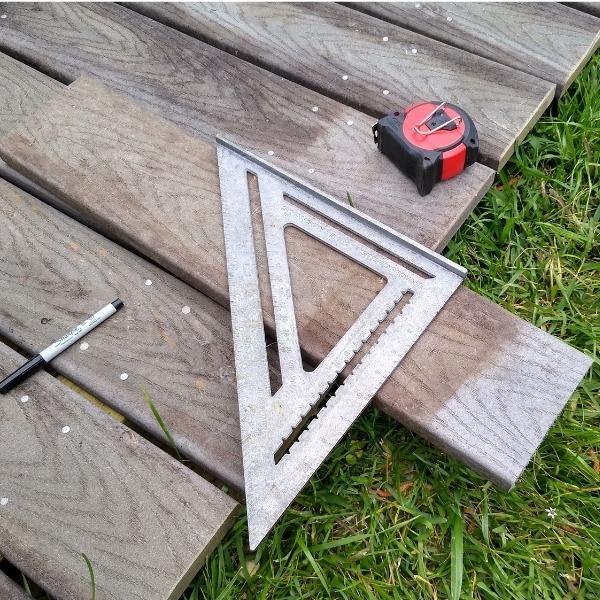
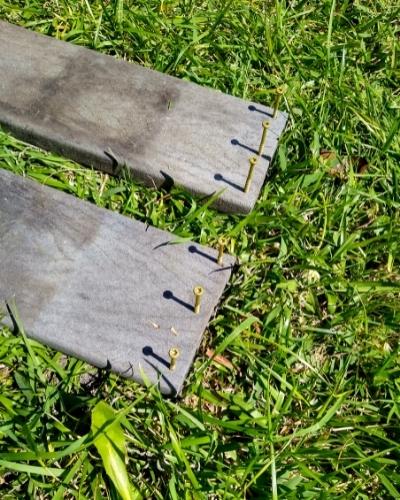
So with that said, begin by cutting all eight boards for the mounting block frame. You’ll need four 21-inch lengths for the base, and four 16-in lengths for the uprights. For best results, use a carpenter’s square for perfect square edges.
You can also cut the step boards at this time, but it’s okay to wait until the frame is assembled to take exact measurements. If you cut them now, you’ll need one 24in board and one 21in board.
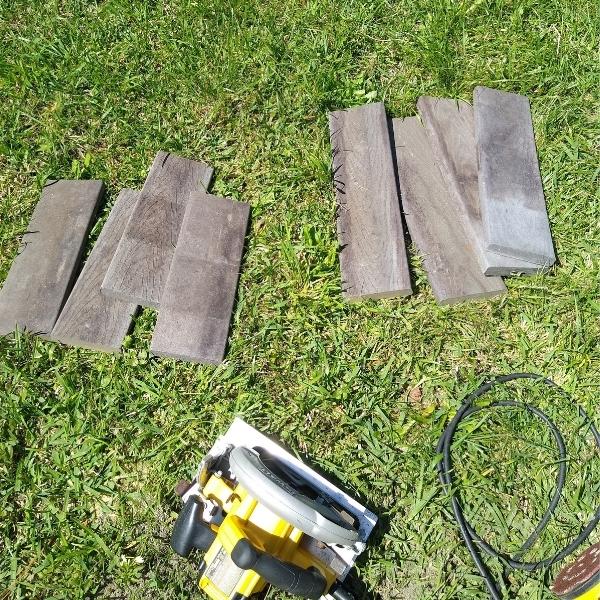
You’ll end up with lumber pieces ready to move on to the next step:
Step Two: How to Build the Mounting Block Base
Fit your 21in lumber lengths together to make a square. Assemble as shown, with the “side” boards of the mounting block to the inside of the square. Using 2×6 dimensional lumber, you’ll end up with a perfect 24” square base.

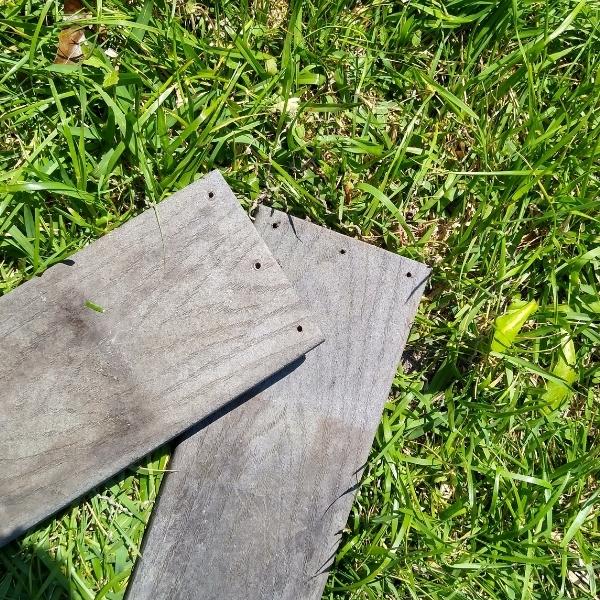
Assemble the base with screws as shown. Predrilled holes for the screws – pilot holes – make screwing the base together easy. Mark the end of the lumber as shown and carefully drill a hole a little skinnier than the screws you’re using.
If you don’t have a workspace with clamps, just hold the frame together as you screw the pieces in. It’s faster with a helper but you can do it by yourself without issue too. Pin the four boards together with a screw in each corner to make everything a little sturdier, then screw them in snugly.

Step Three: Install the Uprights
Now, you’ll screw in the 16-in boards that create the DIY mounting block’s second step.
Put a few pilot holes in the bottoms of the 16-in boards to make starting the screws easier. Line up the right upright on the outside of the mounting block’s frame, flush with the back corner. Screw it in place.
Then add the second upright and butt it against the first as tightly as you can. Work on a smooth and level surface so that the bottom of your mounting block ends up nice and level, and use your carpenter square to make sure everything is lined up well.
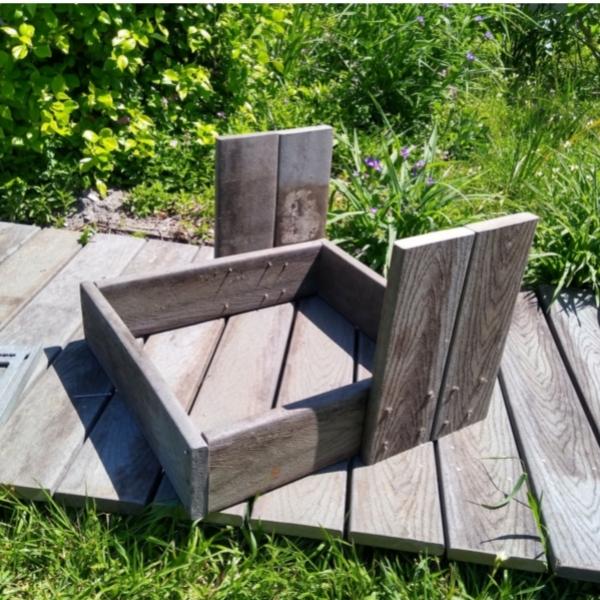
Repeat on the other side. Now you’ll have a square frame with four upright pieces until you have a square frame with four upright walls on it.
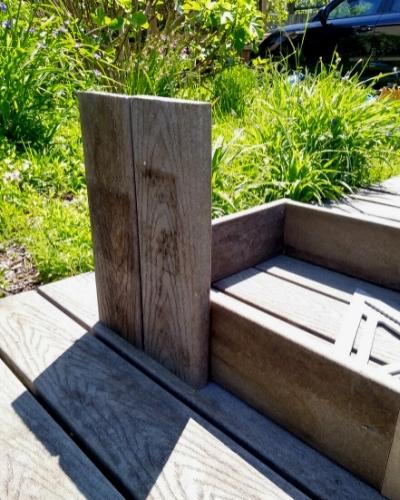
Note: experienced woodworkers may want to install the riser boards before assembling the base. Either way is fine. If you do this, just make sure the rearmost upright extends past the edge of the frame board so that it will cover the corner joint on the base, as shown:
At this stage, your DIY mounting block may seem a little wobbly. That’s normal because there’s nothing supporting the square base yet. Next, you’ll add the step treads and this will tie together the structure and make it ultra-sturdy.
Optional Step: Sand Edges
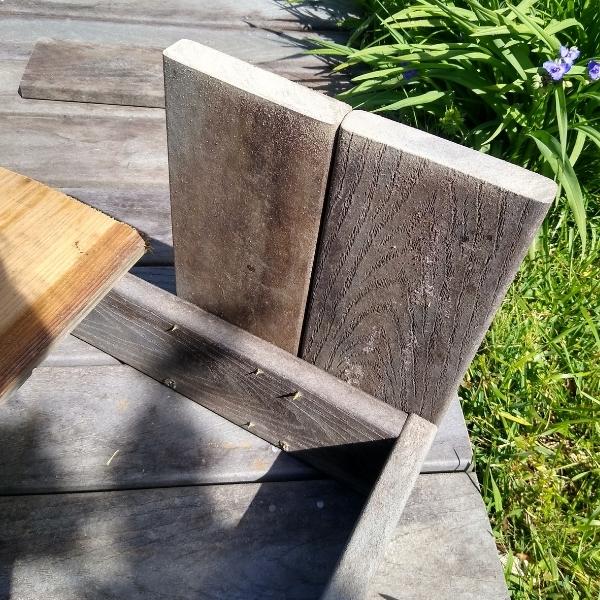
If the top edges of the risers aren’t quite perfectly aligned, you can burr them down a little with an orbital sander. Sanding is only necessary if they’re really uneven or if you’re adding wood glue in between the joints. This is how to build a mounting block that looks like a piece of fine furniture, so you may be able to skip this step.
Here you can see a freshly sanded top edge of the riser:
Step Four: Add the Step Boards
This is the last essential step, and it’s the one that makes your work recognizable as a DIY mounting block.
If you pre-cut the step boards, you’ll have one board shorter than the other. The shorter board goes on the lower step. Lay the boards in the right places on the frame, situating them flush with the front edge of each step.
If you didn’t pre-cut, measure the length and depth of the top and bottom step area, and cut the tread boards to fit.
Use thin siding or finish nails to secure the treads, starting with the corners so that everything stays nice and square. If you’re using screws, I strongly recommend pilot holes because you’ll be working so close to the edge where the wood is prone to cracking or splitting.
Put a nail or screw in each corner of the board and then a few more along each edge for maximum stability. Then, repeat with the upper tread.
That’s it! You’ve made a DIY mounting block! It’s usable as is, but if you have a few extra minutes, here are some nice add-ons or finishing steps that will give your project polish and improve its usability.
Add Paint or Stain
If you are using treated lumber, you can go without applying a stain or paint to your mounting block. The reclaimed composite lumber shown in the demo pictures also doesn’t require painting. But paint or stain is a good idea to add waterproofing and UV protection.
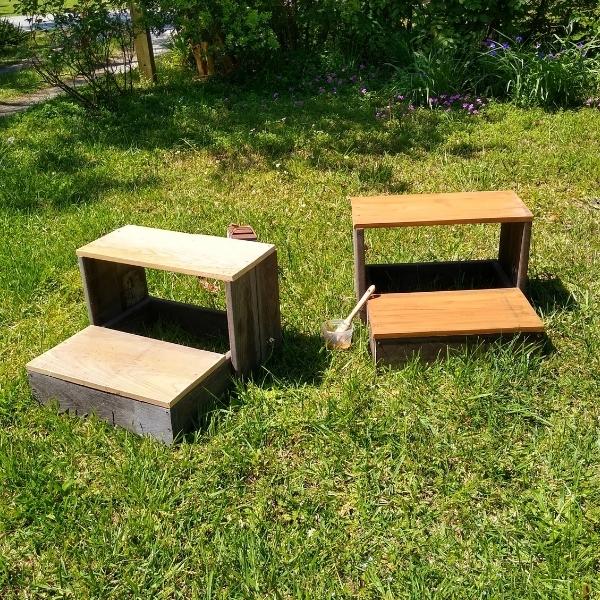
You can use whatever exterior-grade paint or stain you have on hand, or spring for something that matches your stable’s decor.
Add Rubber Tread
This DIY mounting block definitely has enough natural grip to be used as-is. But extra traction is never a bad idea, especially if you’re using the block with horses in training or mounting up in the morning when there’s dew on everything.
Head over the the local dollar store and pick up a basic rubber doormat. The kind with a nubbly surface is best, but use whatever you like and is available. One door mat should be inexpensive and will be enough for two mounting blocks.
Use a pair of good scissors and cut the tread in any shape you like. Apply it to the block using a staple gun or heavy duty exterior adhesive. If you glue it down, remember to let the adhesive cure completely before using the block.
And that’s all there is to it! This DIY mounting block is ideal for all stables and horses, and you can build it in less than an hour. This tiny investment of time results in a good start to hundreds of rides – all from this simple, budget-friendly project. Happy riding!