DIY horse enrichment isn’t just about treats and toys. Stall enrichment that provides mental stimulation is important too! If your horse needs to spend time in a stall, it’s a good idea to provide things that relieve horse boredom and provide mental stimulation. This simple DIY texture board is easy to make and provides horse sensory enrichment for stall time.
What is the DIY Texture Board for Horse Stall Enrichment?
This DIY horse enrichment item is really simple. It’s a wooden board with three different textile squares. When mounted on the wall of the stall or paddock, it’s a kind of “furniture” that your horse can nose up to. They’ll get to explore the different textures and sensations.
Why is Stall Enrichment Important?
Stall enrichment is important for horses because a stall can’t keep a horse in good mental or physical health by itself. While access to as much pasture or paddock time as possible (ideally 24/7) is important, most horses do have to spend time in stalls at least occasionally.
There are some good reasons for a horse to spend time in a stall. These include serious medical problems, waiting for the farrier or veterinarian, or when traveling to a show or clinic.
But even the prettiest, cleanest stalls don’t allow much natural equine behavior. As a result, horses can easily become bored, or anxious from pent-up energy.
Enrichment for horses can’t make this problem go away completely, but it can help. Stall enrichment can provide variety and make the horse’s stall more interesting. Enrichment gives your equine something to do and can give them an outlet for natural behaviors.
What Kind of Horse Enrichment is the DIY Texture Board?
This DIY texture board is a type of enrichment for horses that doesn’t involve food or play. It encourages more subtle, calmer behaviors. This makes sensory enrichment like the texture board perfect if you already have items to encourage foraging and movement, and want to fill in the gaps.
The DIY horse texture board is a type of sensory enrichment, which means it provides stimulation to your horse’s senses. Seeking out sensory stimulation helps with boredom and self-regulation. In fact, many “stall vices” in horses often begin as a way to get additional sensory input in an under-stimulating stall.
The texture board is a temporary addition to the stall so it creates variety. It also lets the horse have choice and control over their enrichment, because they don’t have to use it if they don’t want to.
What Kind of Horse Behavior does the DIY Texture Board Encourage?
The texture board encourages your horse to explore and use their senses. The main sense your horse will use with this stall enrichment is their sense of touch.
The different textures on the horse sensory enrichment board – soft, squishy, rough, etc – provide different sensations. Your horse will be able to explore them with their whiskers, them move in with their sensitive lips and nose. Some horses like the feeling of certain fabrics and will rub up on them.
Why Make Horse Enrichment Without Food?
Many people think that all horse enrichment has to have food. But that isn’t the case! Enrichment means encouraging natural behaviors. Food and treat based enrichment is definitely a lot of fun for everyone, but there are other equine behaviors. Expressing these is just as important for your horse’s mental wellbeing.
Equine sensory enrichment is an example of enrichment that doesn’t involve food (unless we’re talking about the sense of taste). Other non-food enrichment includes social opportunities with other horses, exploring new areas, and providing places and opportunities for equine self-care.
How to Make A DIY Texture Board for Sensory Enrichment
Making this enrichment is easy. It’s extra simple if you have access to tools, but you can use hand tools and come out fine.
Supplies You Will Need:
- A wooden board, 3ft/1m or more
- A selection of fabrics and materials of different textures. For this demo board I used chenille, sandpaper, and cotton over squishy foam. You can use any horse-safe fabric but a combination of textures is best.
- Glue
Tools You Will Need:
- Cordless drill for making and mounting the board (it’s possible to use nails but a drill and screws is much safer)
- Circular saw OR have your board cut to length when purchased
- Orbital sander OR use sandpaper by hand
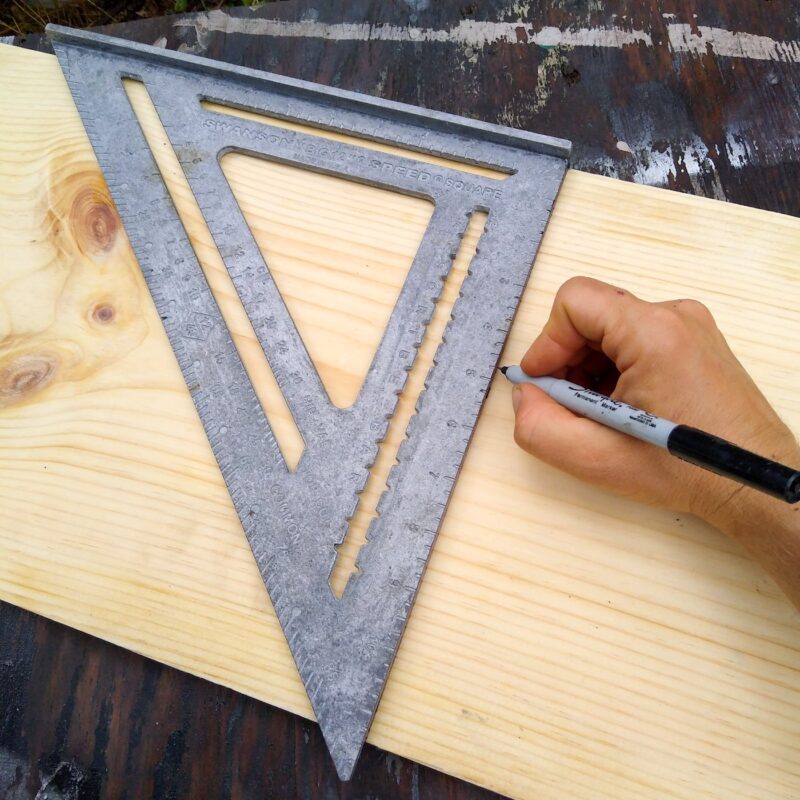
- Builder’s square (optional, but great for making nicely edged corners and straight cuts)
Step 1. Select and Cut the Sensory Enrichment Board
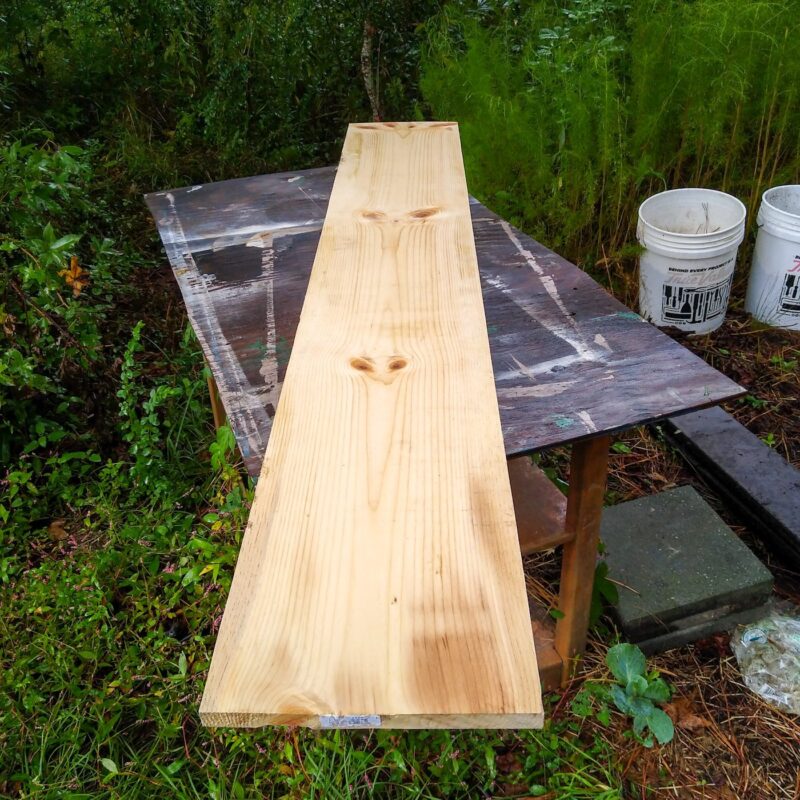
Wooden boards like this can be found at most home improvement stores. You can use any type of wood. You want a board at least 6 inches wide to accomodate the equine nose. The board pictured is 1×12 inches and is six feet long. I purchased this board in order to cut it in half and make two projects.
Cut the board down to size with a power saw or hand saw:
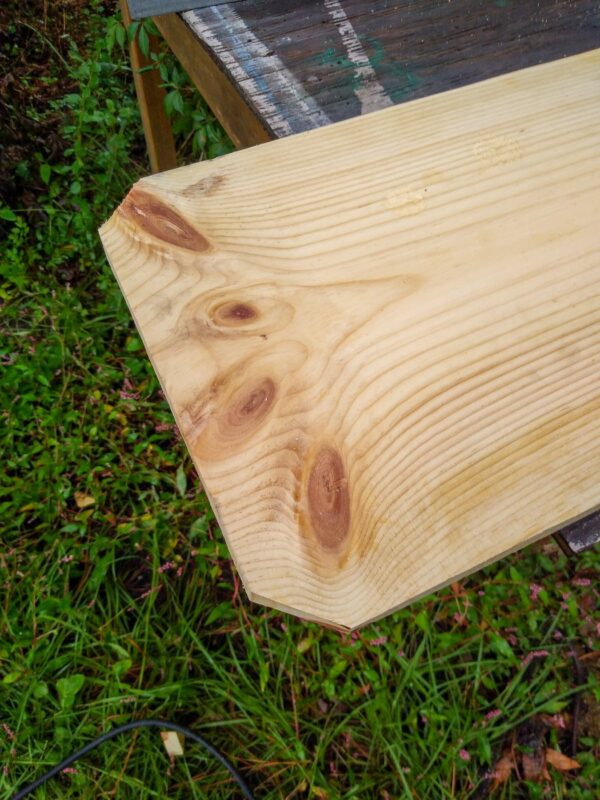
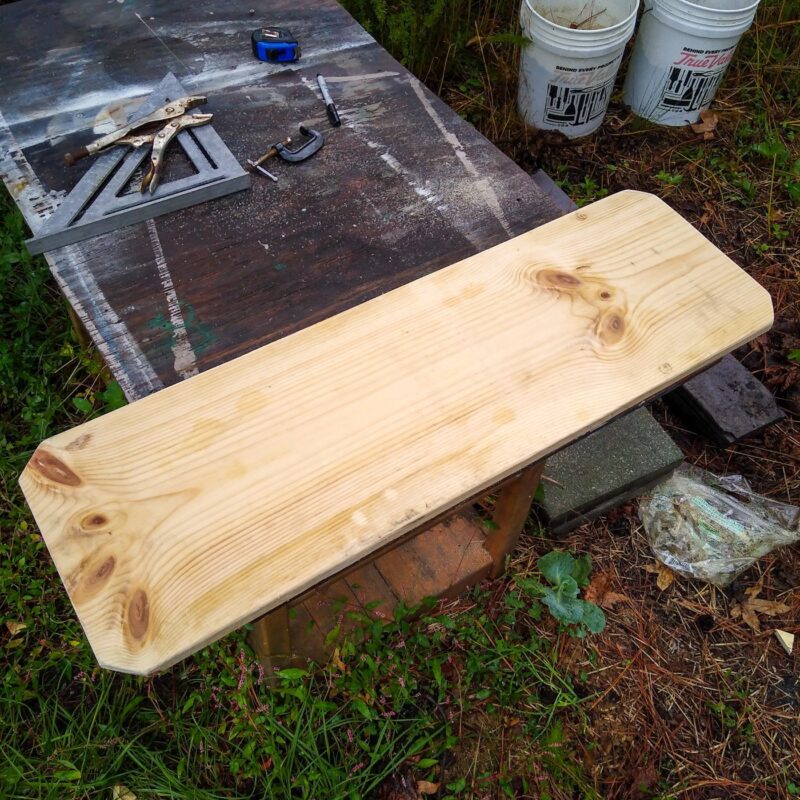
Step 2. Cut Some Corners
It’s best to edge down the corners of the sensory board. Horses are prone to accidents. Even when the board is mounted securely on the stall wall, an unfinished corner can be a safety problem.
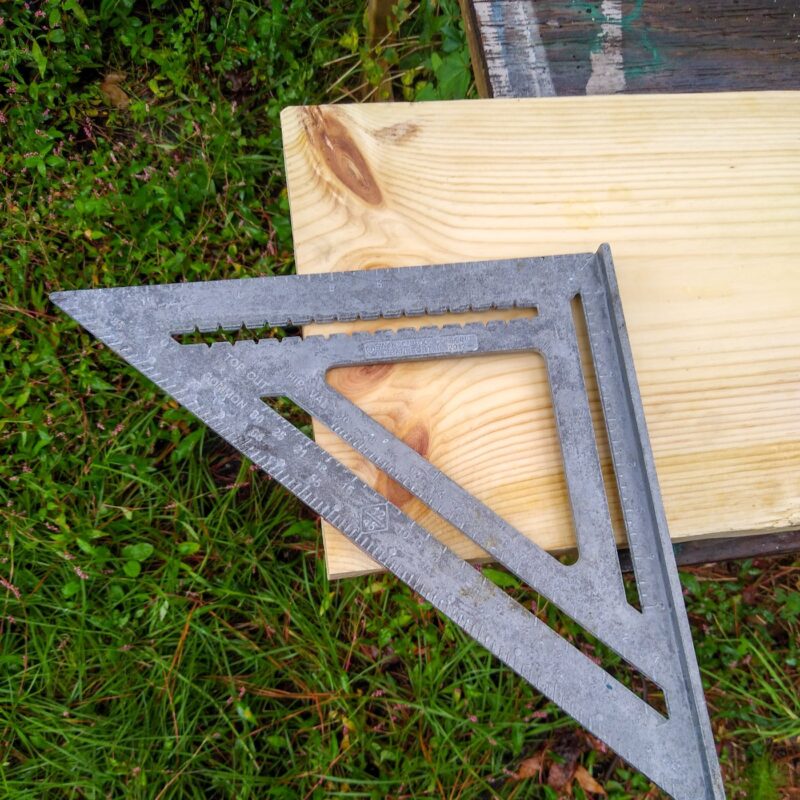
The carpentry square makes it easy to cut nice, even corners. But it’s not required. If you don’t have one, just make a quick cut right across the corner to remove the sharp point. If you don’t have any tools, use rough-grain sandpaper to really sand down that pointed corner.
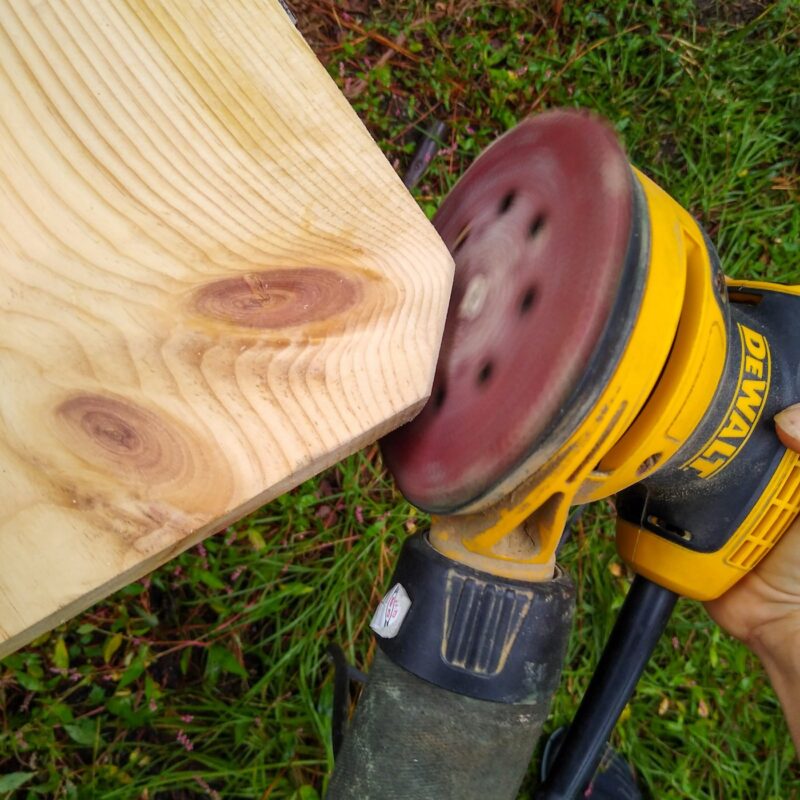
Step 3. Sand the Edges
It’s important to sand down the sharp edge along all parts of the wood. This prep work actually takes more time than adding the fabric, but it’s worth it! You don’t want any sharp edges that could harm your horse when they use this enrichment. Since they may rub on the fabric, making the wood smooth is important.
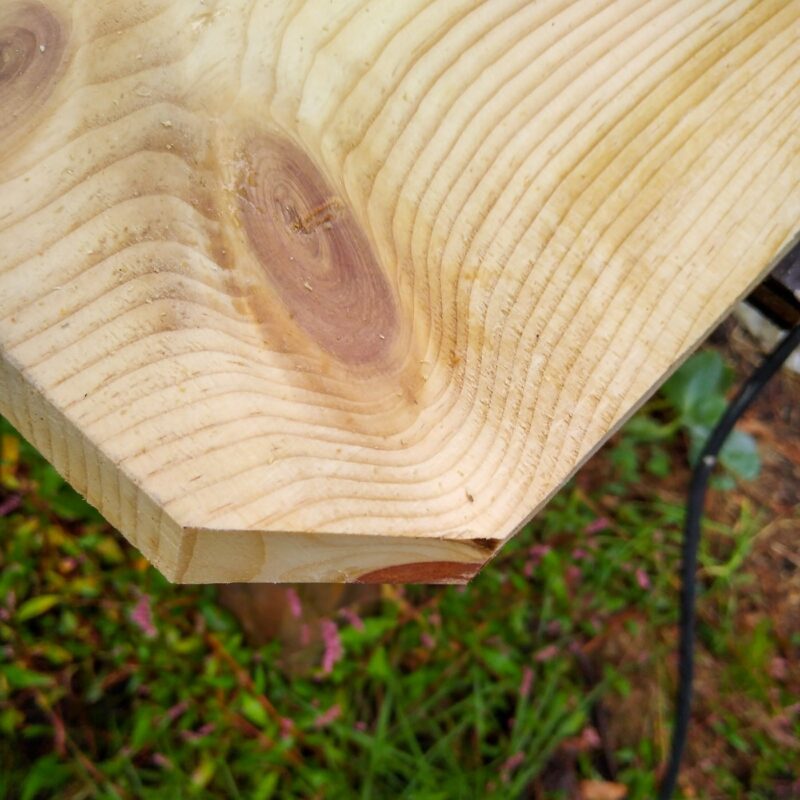
Your corners should look nice and round along all edges, like this:
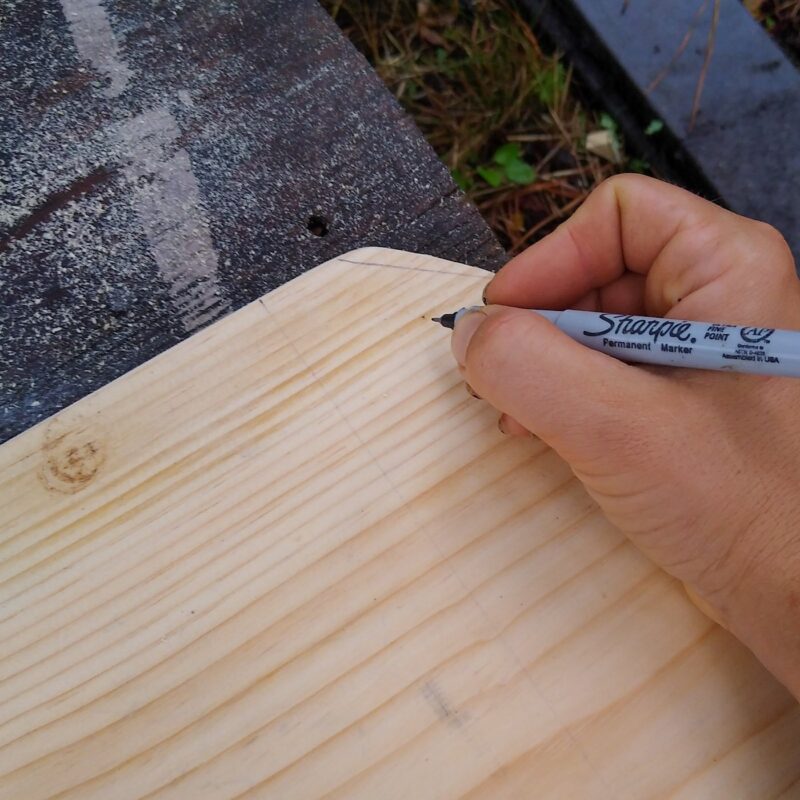
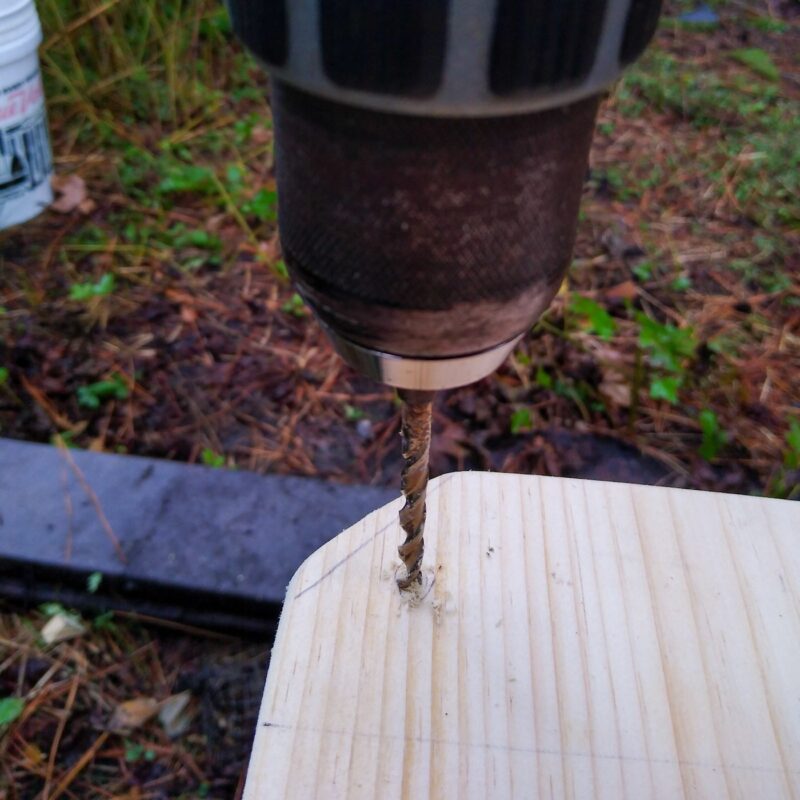
Step 4. Mark and Drill Pilot Holes
It’s best to make and install this DIY stall enrichment with a power drill. You can use a hammer and nails, but nails are never as safe as a screw that can be sunk into the surface of the board.
Pilot holes are pre-drilled holes that make it simple and easy to screw the board into the wall of your stall. They also let you tie the board securely if you want to mount it on a corral panel instead. You don’t have to have them, but it makes installing the board faster and smoother in the stable.
I’m also showing how to make the board so that the screws sink below the level of the wood. With this method there won’t be any metal sticking out at all, giving you a clean look and making the board safer.
Mark where your attachment holes need to be. You’ll need one in each corner to mount on a plain wooden stall wall. If your board is 4 feet or longer, put a set in the middle too.
When you want to use the board somewhere else, like mounted on a pasture fence, put your pilot holes wherever your fasteners need to go to securely mount the board. If you’re not sure, take the board out to your pasture or corral and check. You can also drill the holes later, when the board is ready to mount.
Pick a drill bit a touch smaller than the screws you plan to use. I like using wide screws with a broad head but you can use any type that works for your barn.
Drill the pilot hole:
Optional Step: Countersink Holes for Extra Safety
When your board is installed, the screws should be completely flush with the wood. This is the only serious safety concern with this stall enrichment item.
Countersinking ensures that the screw is always where it should be, below the surface level of the wood. A countersunk screw also looks much nicer than just squashing the screw into the board. If you want this enrichment to look polished in a fancy stable, definitely include this step.
These are countersink bits. You can borrow them, or buy your own set if you’re into making DIY enrichment:
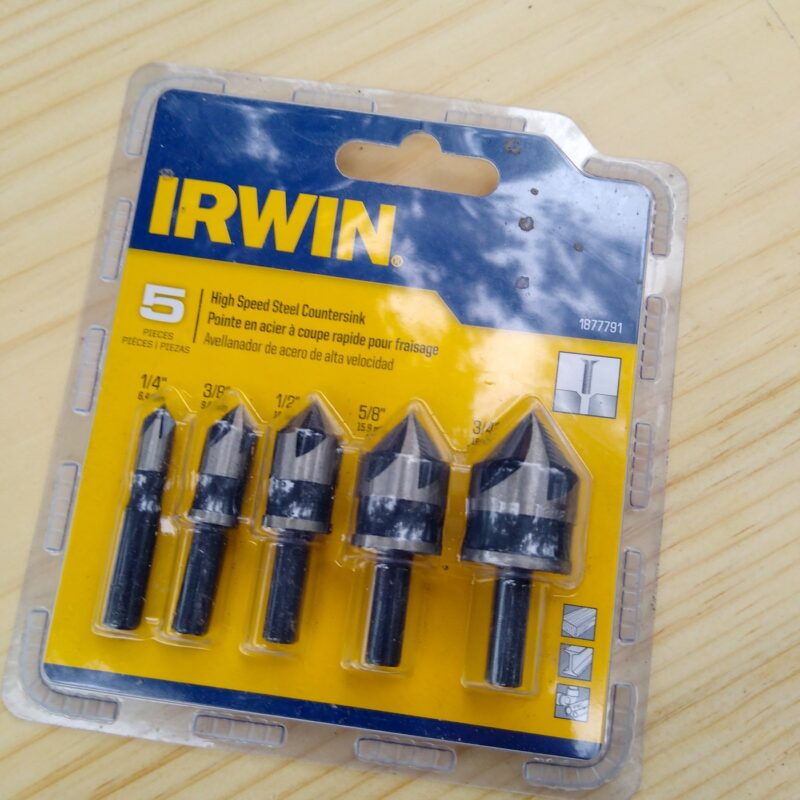
These bits make a scooped-out hole around your pilot hole. You can make the countersink hole before or after you finish the pilot hole.
Just put in the chuck of your drill and have a go:
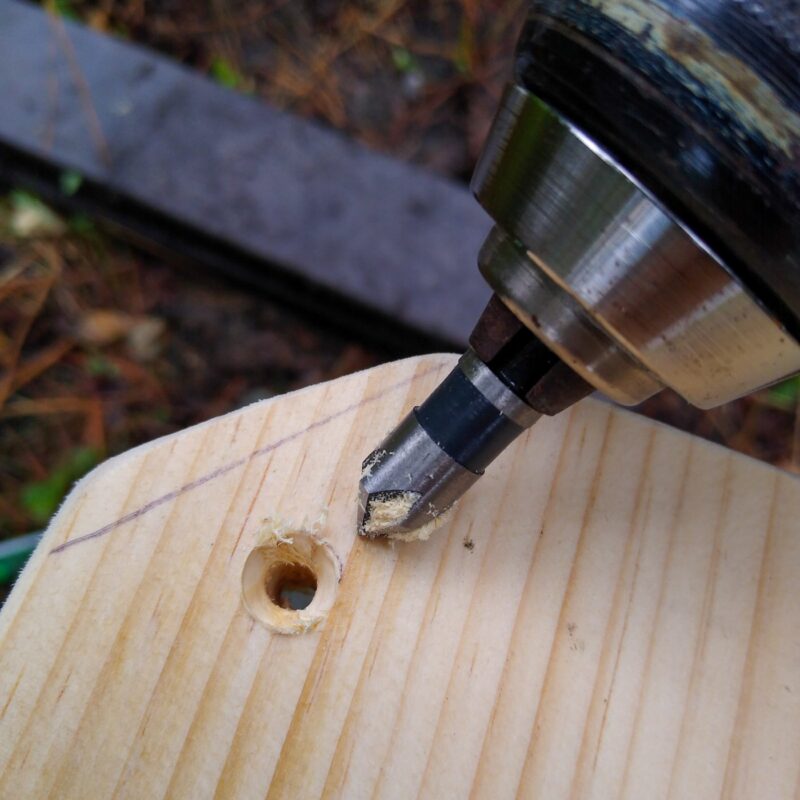
The countersink bit makes a perfect, sloping hole that will hold a screw or bolt’s head for a safer, more secure fit.
Now your DIY texture board is ready for its texture. But if you want, you can paint or stain it first.
Optional Step: Stain or Paint
I like to put wood sealer or paint on all DIY horse enrichment projects that use wood. A good quality coat of paint or sealer makes your enrichment last longer. It’s a must-have for outdoor horse enrichment, and it makes all wooden enrichment projects look more polished.
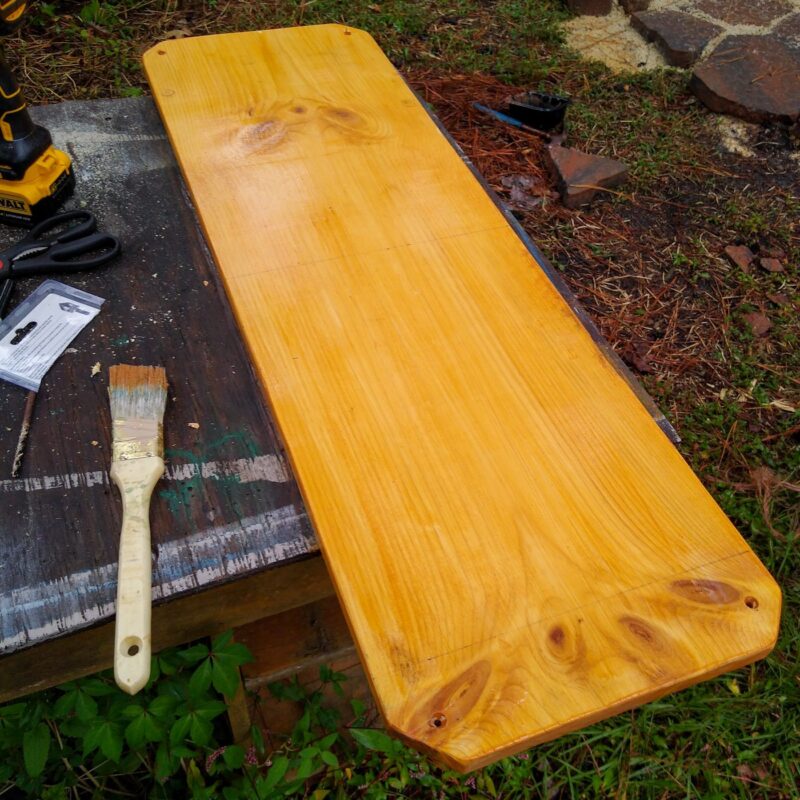
Here’s my texture board after adding the cedar toned stain and sealer combo. Once dry, your board is ready for the fabric.
Step Five: Pick the Textures for the Sensory Enrichment Board
A texture board for horses is all about the fabric or other textured material. That’s what gives the board its sensory enrichment value.
You can use any fabric for this board, but I like a combination of different textures for maximum sensory value.
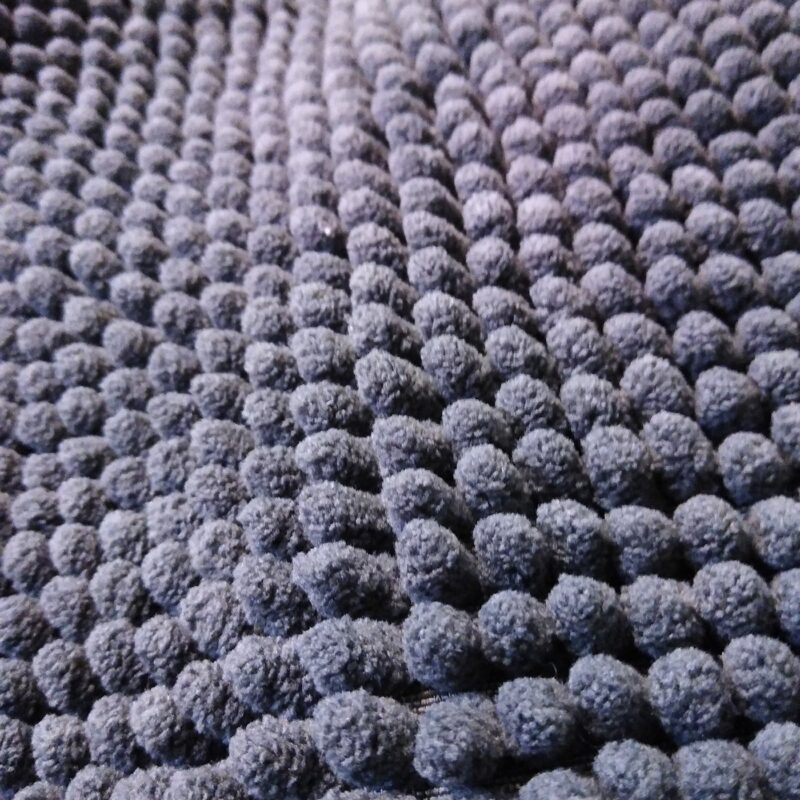
I chose three textures for the board: rough sandpaper, smooth but squashy canvas-covered foam, and soft fluffy chenille.
You don’t have to buy a lot of fabric for this enrichment. Many stores with a fabric section have a clearance bin where you can find short lengths of material. This is a great way to score some interesting textures for this DIY horse enrichment.
This chenille fabric feels amazing because of its microfiber nubs. It’s perfect for providing tactile sensory input. It was originally a bath mat I found at a discount store! Look in creative places and you can find some really neat materials for this enrichment project:
Here are some more ideas for fabrics and other materials for the board:
- Felt craft squares for a soft smooth feel; add layers for extra plush
- Smooth blanket fleece
- Fluffy or sherpa fleece or faux fur
- Corduroy
- Satin or silk
- Corrugated cardboard
- Leather
- Yoga mat material (thin foam)
Step Six: Add the Textures to the Sensory Enrichment Board
There’s more than one way to attach the fabrics to the stall enrichment board. The method you choose depends on what you have available and on your horse.
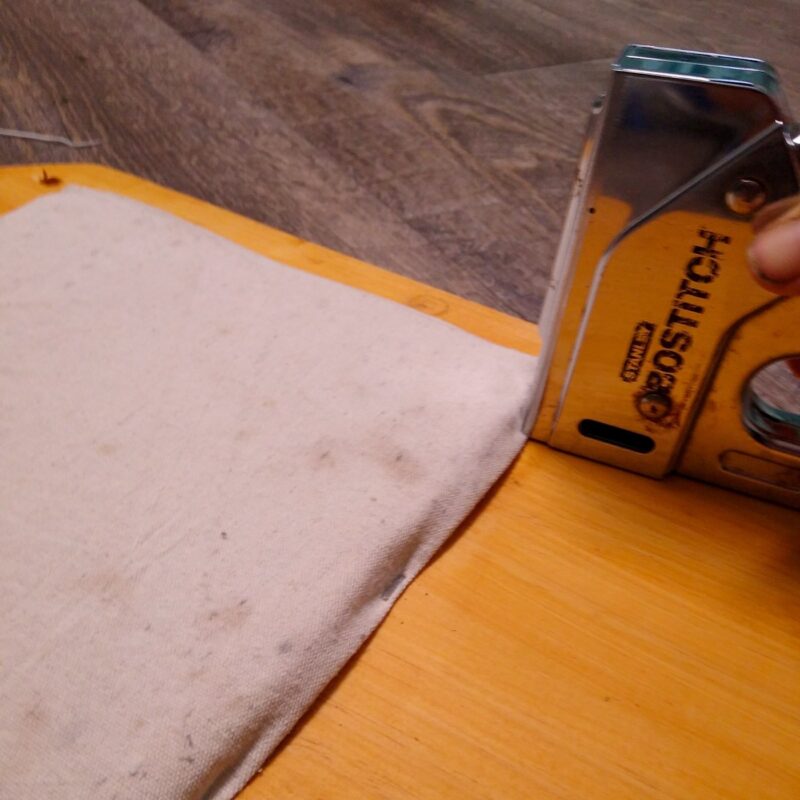
Cut your fabrics into the right size. For woven fabrics like canvas, remember to cut a little extra because you’ll need to fold the fabric under before you staple it down. This keeps the fabric from fraying around the cut edge.
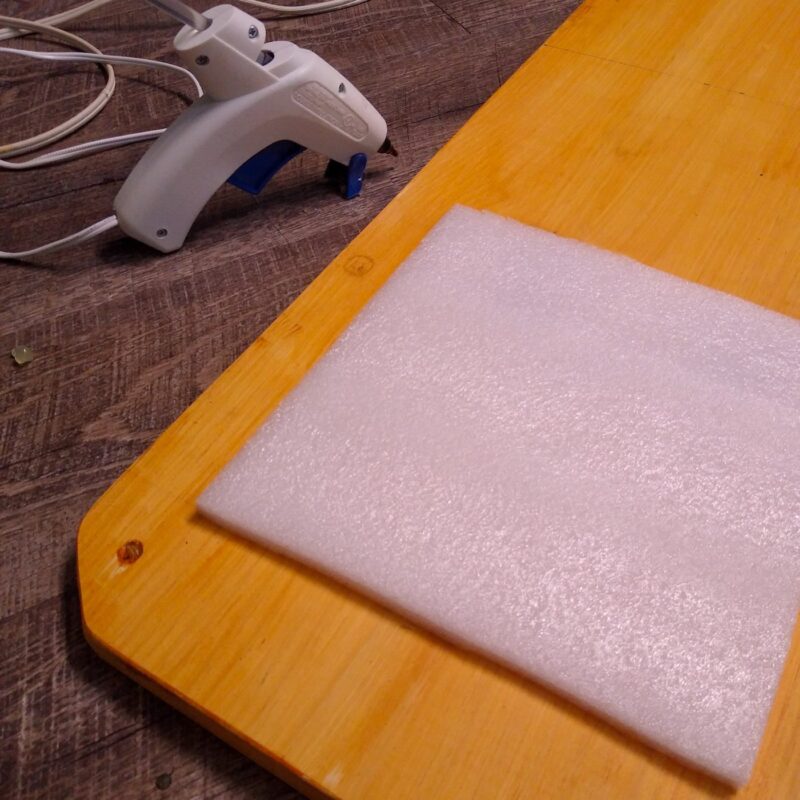
Foams and pads should be glued into place. For this demo, I used hot glue. For a more durable enrichment item, use construction adhesive or Gorilla Glue:
Then attach fabrics using a staple gun. Notice how the edge of the canvas has been folded under itself. Staple right on that folded part to keep fabric from unraveling around the staples:
There’s no rule on how many pieces of texture/fabric you can use. Sensory boards like this are easy to make, so get creative! You can make several with different combinations of soft, rough, plush, and firm materials.
Remember to keep safety in mind with the staple gun. All staples have to be firmly embedded in the wood. If a staple doesn’t go in all the way, tap it in with a hammer.
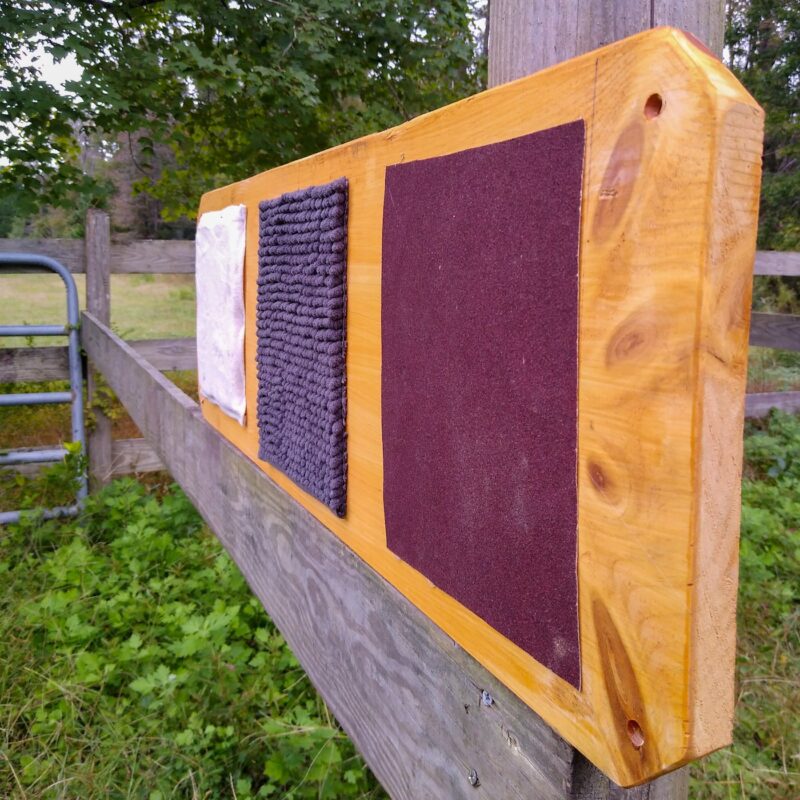
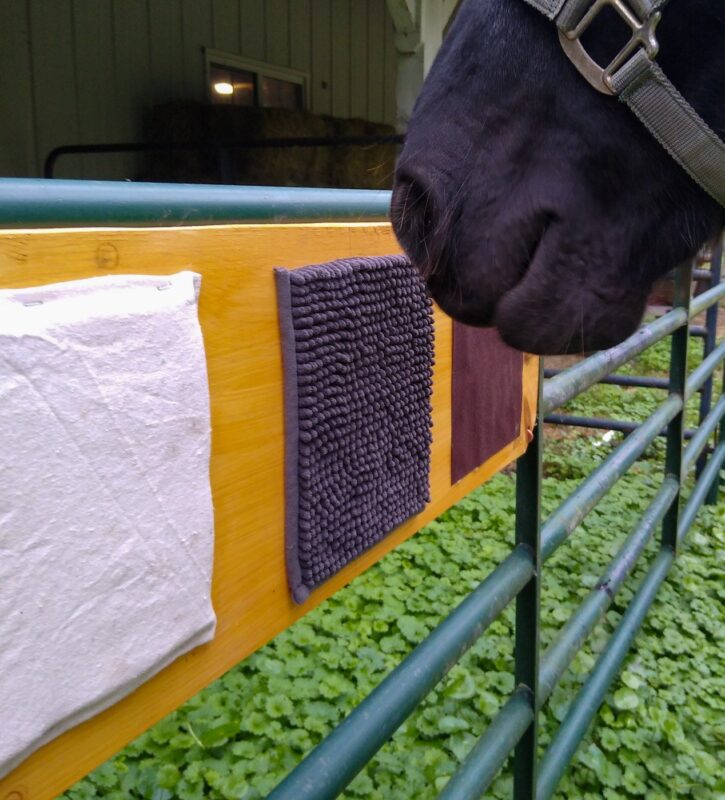
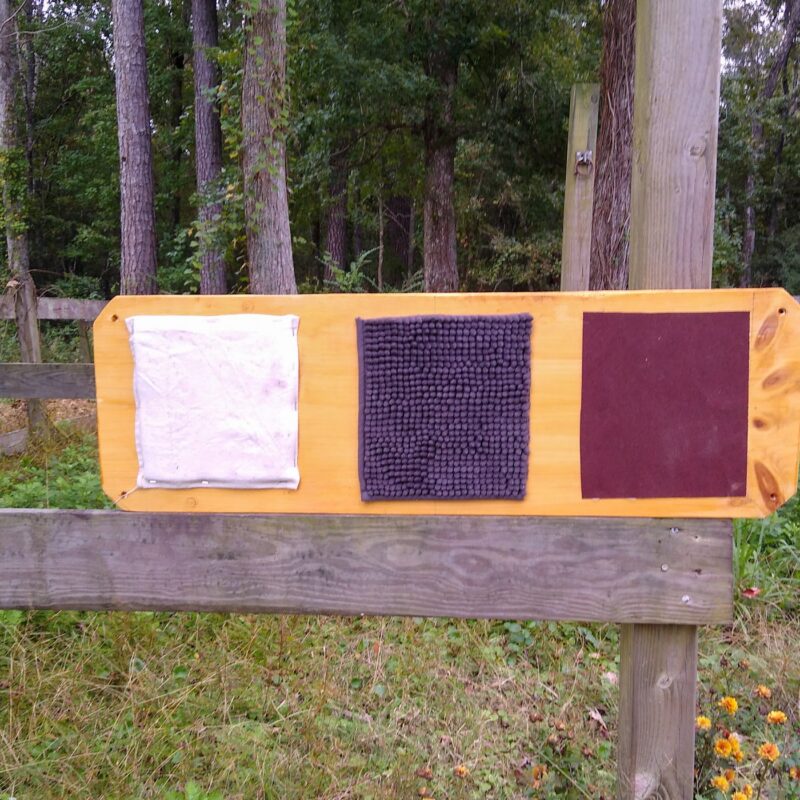
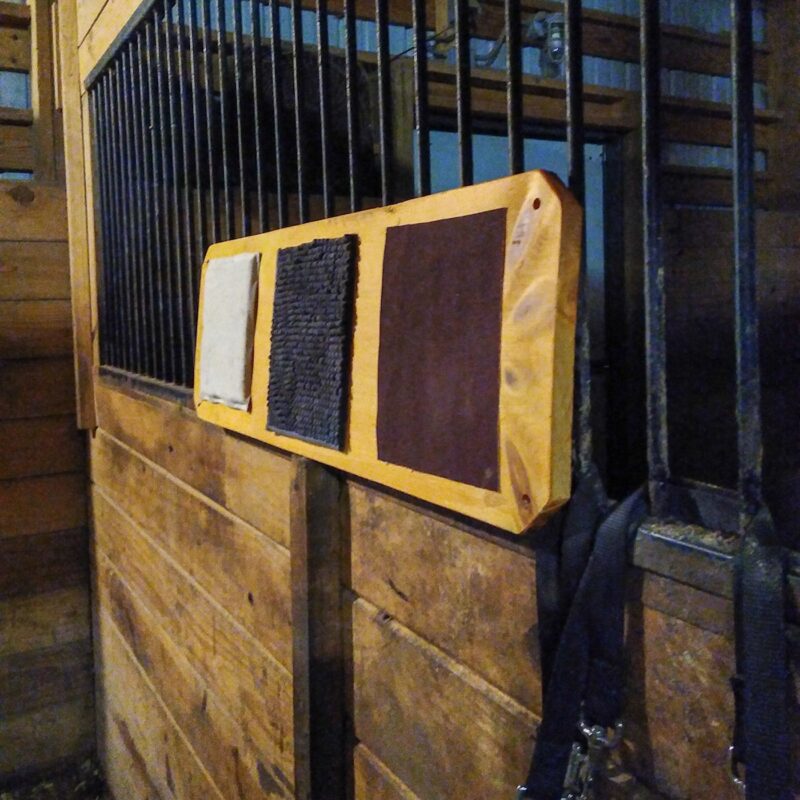
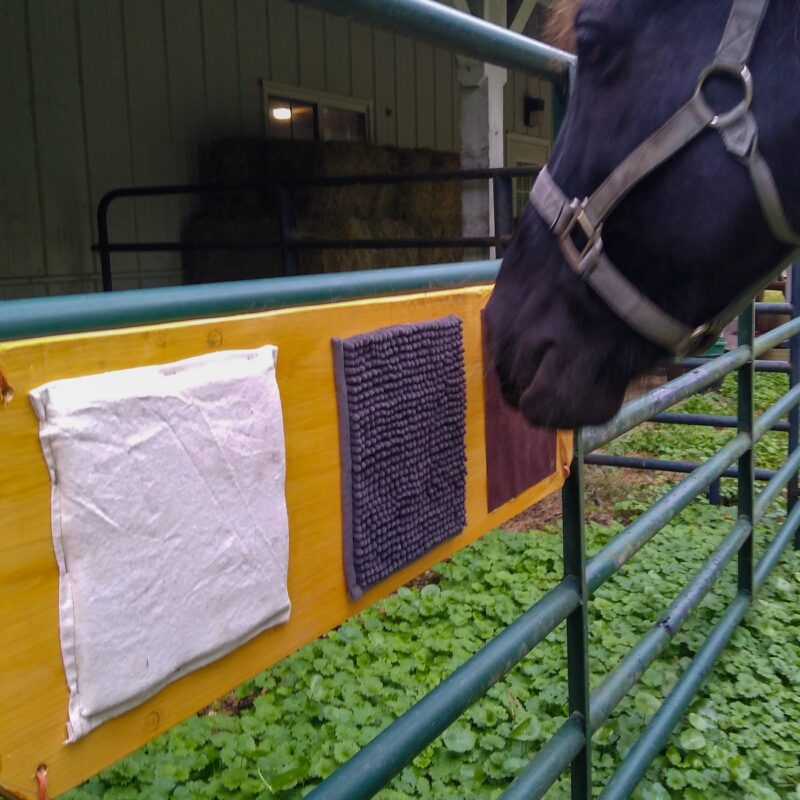
Here’s the finished board! On the left is smooth canvas with squashable foam underneath. In the middle is fluffy microfiber chenille. And on the right is coarse sandpaper.
Using Your DIY Horse Texture Board for Sensory Enrichment
You can install your board in lots of locations. The best and easiest place in a stall where you can screw or bolt it into a wooden wall. You should plan to place the board at your horse’s normal head height.
For a taller horse, you can also tie it securely to stall bars. You can see the texture board here being fitted for attachment to the bars. For best results, use cable ties:
If you want to use your board outdoors, mount it to a sturdy wood fence if possible. Since this is a custom project, you should make a board that fits where you want to attach it. Use a board of the right width for your planned location, and adjust the placement of the pilot holes so that your screws will attach securely.
You can also attach it to a metal fence panel or round pen:
How Do You Know If the DIY Stall Enrichment Texture Board is Working?
Compared to exciting treat feeders and toys, this DIY horse enrichment item may not look exciting. In fact, you might even think your horse is ignoring it.
The secret sauce of sensory enrichment is that it’s there for your horse all the time. They can use it whenever they want to explore or seek sensory stimulation. As a result, you may not see your horse exploring or feeling their texture board when you’re around the stable. After all, you’re there and there’s activity going on! It’s after you leave and your horse needs to occupy themselves that enrichment really shines.
Some horses will use the board by checking it out with their sensitive whiskers. Others want to really feel the fabrics with their noses. When they’re bored, your horse might nose up against the textures to feel the different sensations. Some horses really like certain fabrics. This horse was a big fan of the soft, nubby chenille:
This is the kind of enrichment that you add simply to make your horse’s environment more mentally stimulating.
The DIY Textured Sensory Enrichment Board and Safety
The instructions for this DIY stall enrichment have safety in mind. All DIY horse projects have some room for creativity, but here are the main points to keep in mind for safety.
Sensory enrichment for horses is usually self directed and very safe. Even so, all enrichment should be supervised at first. Don’t leave a horse unattended with any new enrichment item.
Make sure all the edges of your DIY texture board are sanded down to remove sharp edges and splinters. Run your hand along the board and check for edges that still need work.
Use secure fasteners such as heavy duty screws to install this item. If you can’t use screws, high quality cable ties are a good idea. Make sure that any screws you install are completely buried in the board and don’t stick up, creating a cut hazard. And if you install this item on a shared stall wall, make sure that the screws don’t penetrate into the next stall!
If you want more info on making equine enrichment safer, check out the ebook Safe Equine Enrichment on Amazon! It covers what you need to know when designing DIY enrichment like this texture board.
Have you made this DIY horse enrichment item? Did your horse like it? Tell us about it in a comment!