
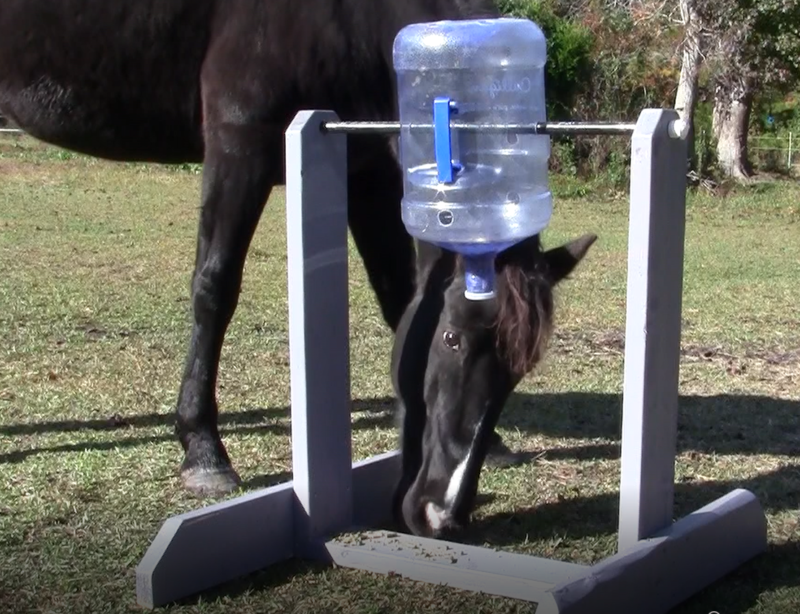
It’s big, it’s loud, it’s ridiculous and your horse will LOVE it. If you want a one-day DIY horse enrichment project to make your pasture more exciting, the Spin the Bottle toy is for you! Here’s how to make this treat dispensing, boredom busting horse toy.
What Is a Spin the Bottle Toy for Horses?
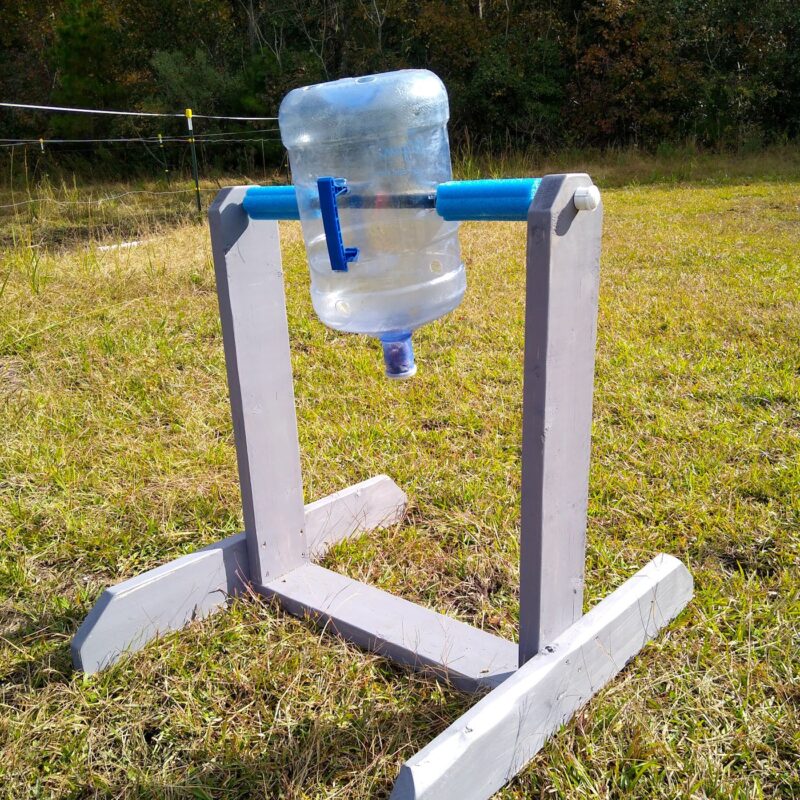
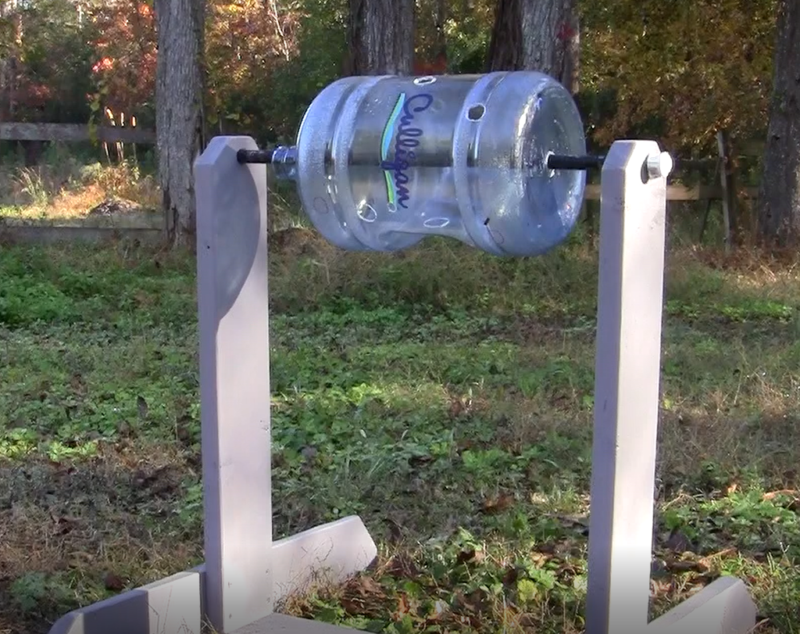
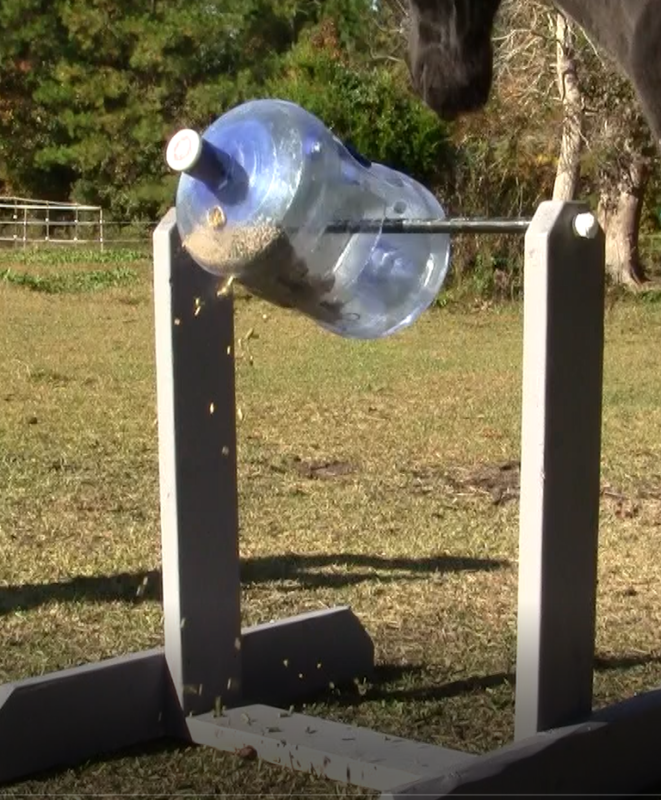
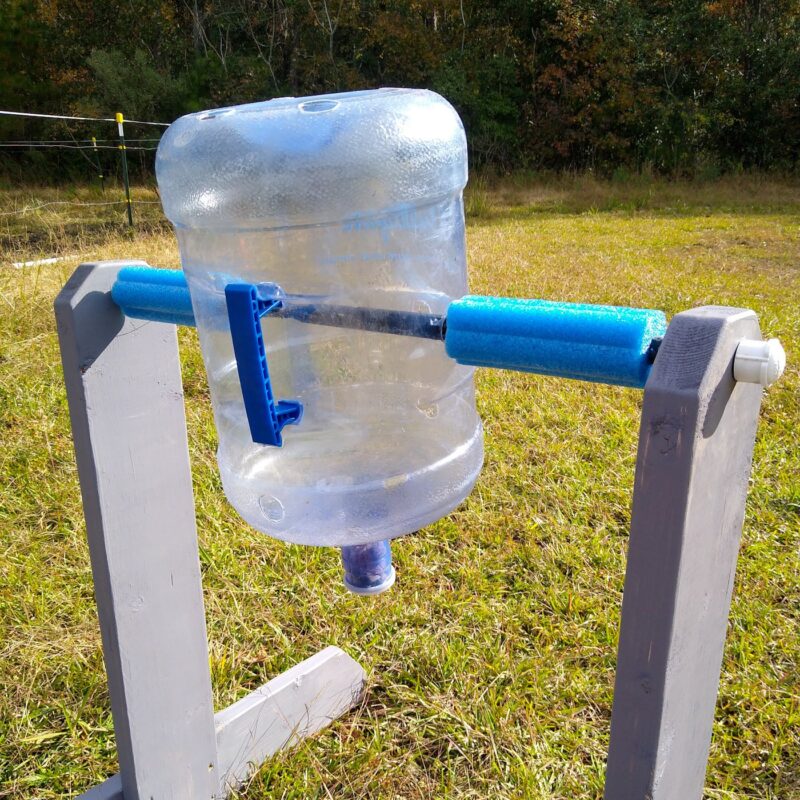
This horse enrichment is a simple concept with lots of options. A spin the bottle enrichment is a wood frame with a sturdy rod in the middle. You make holes in a large bottle or other container and thread them on the rod, and add some holes for food to fall out. Fill with treats, and your horse has a moving, spinning, super exciting treat toy!
Why Is the Spin the Bottle Horse Toy Great for Horses?
The spin the bottle horse toy is an enrichment item that encourages important behaviors – and it’s fun! Enrichment is all about giving your horse the chance to express their natural behavior, and providing mental stimulation. In other words, enrichment like toys and puzzles help your horse stay active instead of bored.
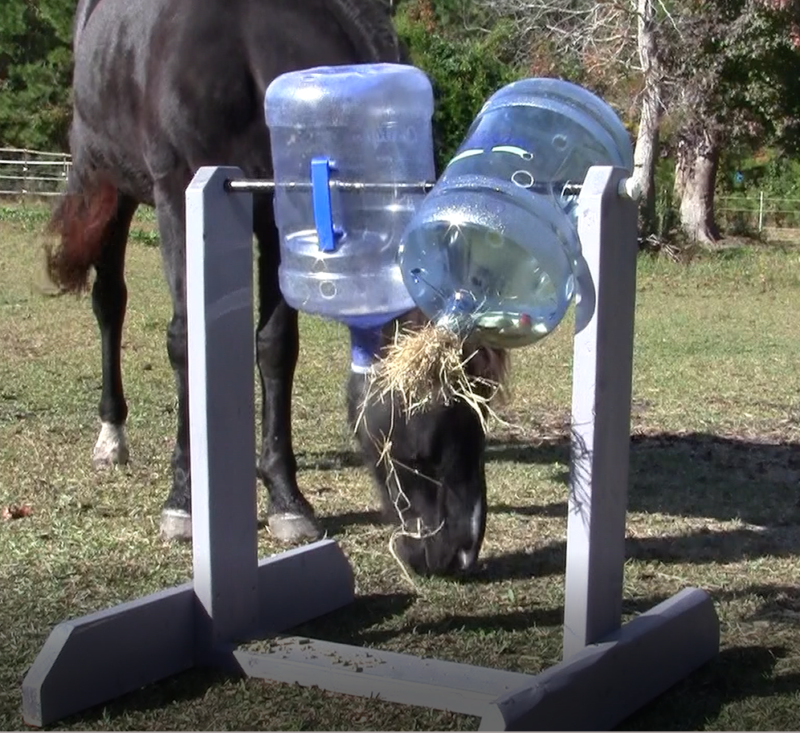
The spin the bottle toy gives your horse a mental workout as they learn how to spin the bottle around. It keeps them occupied because it releases goodies slowly. You can also use it as a slow feeder by using forage cubes or pellets instead of special treats. It’s sturdy and horse-sized.
When your horse uses the spin the bottle toy, they’ll also get some quiet, low intensity physical activity plus a brain workout.
Why is the Spin the Bottle Horse Toy Great for YOU?
This enrichment item is pretty low budget for something so big and long-lasting. And you can use reclaimed or repurposed materials to make it!
The spin the bottle toy is an “anchor item” in your enrichment collection. Small toys, balls, and feeders make great horse enrichment, but it’s also good to make larger, permanent objects that can rotate in and out of your pastures. Unlike smaller toys and puzzles that wear out or are single use (like the super easy and free forage box), this toy is truly horse-grade and will give you years of usability.
There’s also endless variety with this toy. Using different the kinds of spinners will keep the Spin the Bottle enrichment fresh and exciting, and let you target different behaviors. You can also change the difficulty level by using different spinner options.
That’s a LOT of enrichment value for you and your horse – for a one-day project!
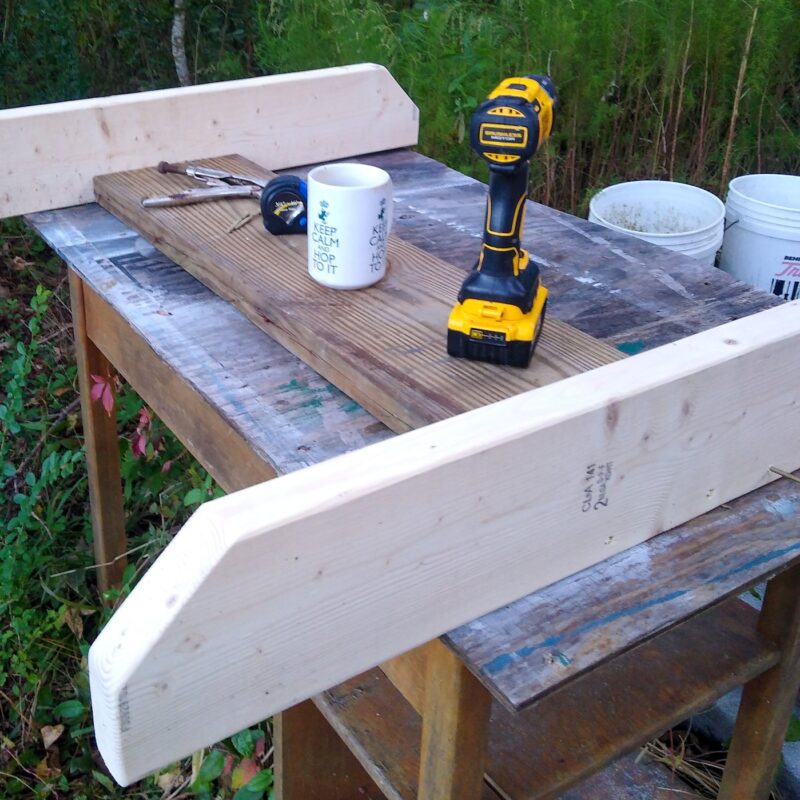
It takes basic power tools to put this horse toy together. You’ll need a saw, drill, and preferably a sander. But if you don’t own or want to use tools yourself, ask around – if you find someone willing to make the frame (which really does take less than an hour!) you can do the rest yourself. Once you have the frame, there are lots of spinner options that are tool-free.
How to Make the Spin the Bottle Horse Toy
Tutorial time! Here’s how to make the spin the bottle toy. Note that I don’t include exact lumber dimensions in this tutorial because every horse or stable has slightly different needs. You may want your spin the bottle horse toy to be slightly larger or smaller than this one. I’ll include notes on sizing where it’s important for safety or how the toy works.
Supplies Needed
- Lumber, at least 2×6; 2 8 foot boards or at least 16 feet of lumber (In the USA you should look for 2x6x8 treated pine boards. If using reclaimed lumber, larger sizes are fine. You should not use smaller lumber such as 2×4 for this project because it’s not as sturdy and stable.
- Wood screws, at least 2″ in length
- Wood glue optional but recommended
- Paint or stain
- 30″ rod of your desired material check below for info on rod materials
- 2 end caps for the rod, matching rod material
Tools Needed
- Circular saw (you can also use a good hand saw, but power saw is recommended)
- Drill
- Drill bits sized for your screws and rod diameter
- Countersink bits for a more professional appearance
- Spade bit recommended for rods above 1/2″ diameter
- Hole saw kit if using PVC pipe for spinners
- Orbital sander (you can also use sandpaper by hand, but power sander is recommended)
- Paintbrush and paint or stain
- Bottle(s) or other spinner material
The Right Rod for Your Spin the Bottle Horse Toy
You have several options for the spinner axle, or rod, that makes this toy spinnable and fun. These three are the best choices – decide which one you want based on your needs:
Fully Threaded 1/2 Inch Rod
This steel rod has threads all along its length. You can buy these in several lengths at larger hardware stores and use it right away without additional cutting at the store counter. If you want to use PVC pipe for your spinners, this is the rod you should use because of its smaller diameter. When you use this rod, you’ll build the spinner frame to match its length.
If you choose this rod style, buy 2 matching washers and nuts for the end caps.
End Threaded Metal Pipe
These rods have threads only on the ends. You can buy them in several lengths in the plumbing section of your local hardware or builder’s supply store. The surface of the rod is smooth and gives the toy a great spin, and end threads are perfect for quickly uncapping and removing the rod to change spinners. Use 1/2″ pipe for this toy for a really solid axle. When you use this rod, you’ll build the spinner frame to match its length.
If you choose this rod style, buy two matching threaded caps in either metal or PVC from the plumbing fittings aisle.
PVC Pipe
Use 1/2 PVC pipe if you don’t want to use metal or if you want to build your frame first and then cut a rod to fit. This is the best choice if you’re using reclaimed wood. PVC is also perfect for challenging coastal climates because it will not rust. It’s very inexpensive. To cut it to length, you’ll need a set of handheld PVC snips.
If you choose this rod style, buy two matching slip caps in PVC from the plumbing fittings aisle. “Slip” means there are no threads on the inside of the caps.
Step 1: Cut and Trim the Spin the Bottle Toy’s Base
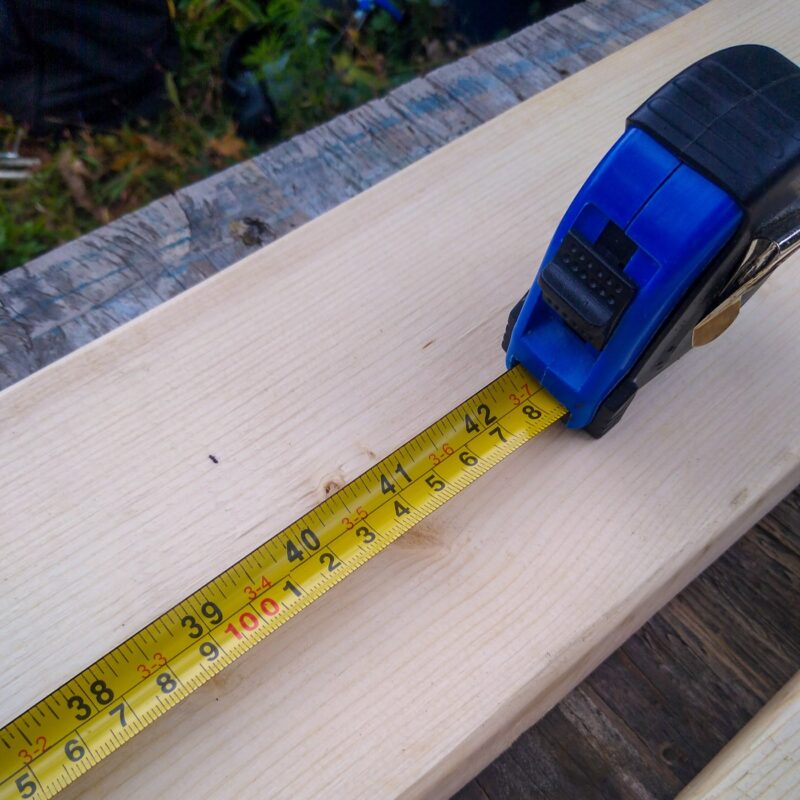
Measure and mark your lumber about 1 to 1.5 inches shorter than your rod. For example, I had a 30 inch metal rod so I cut the base to 28.5 inches long.
You make the base slightly shorter than the rod so that, when you finish the frame, the axle rod will stick out a little for you to secure it with caps.
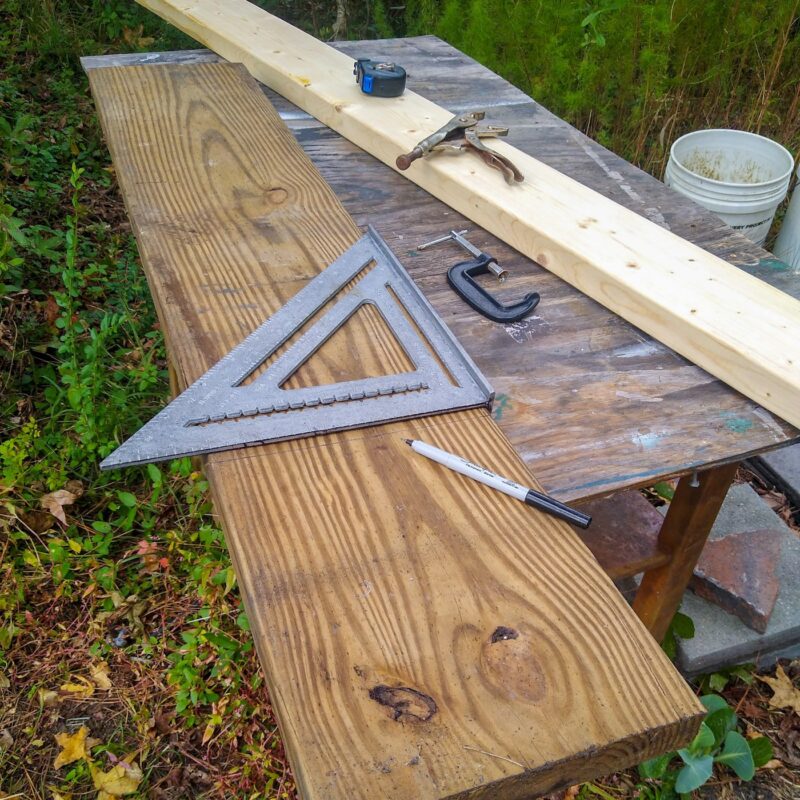
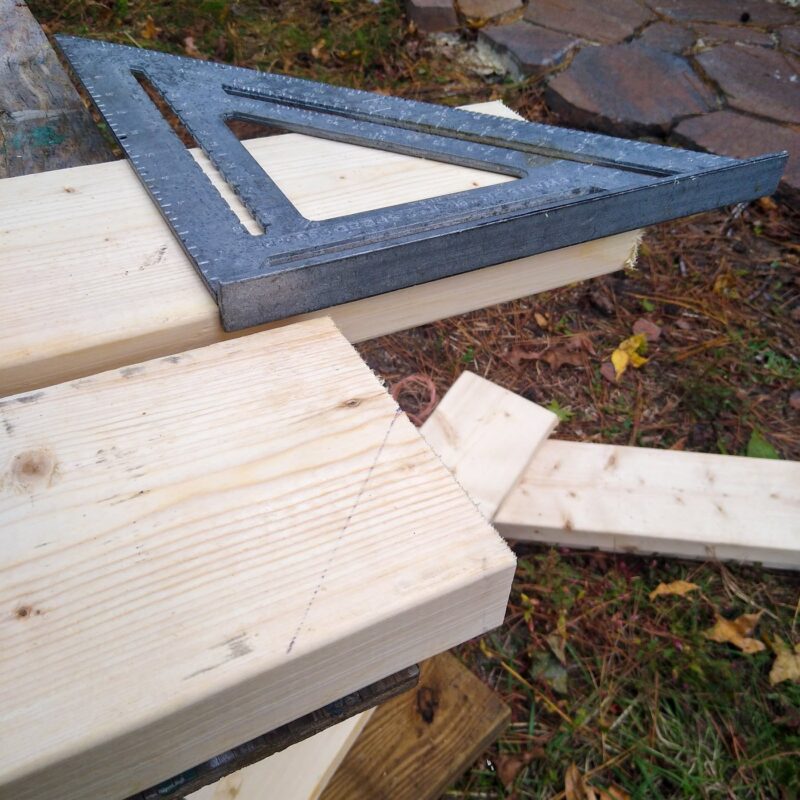
Using a builder’s square is easy and keeps your cuts perfectly straight and square.
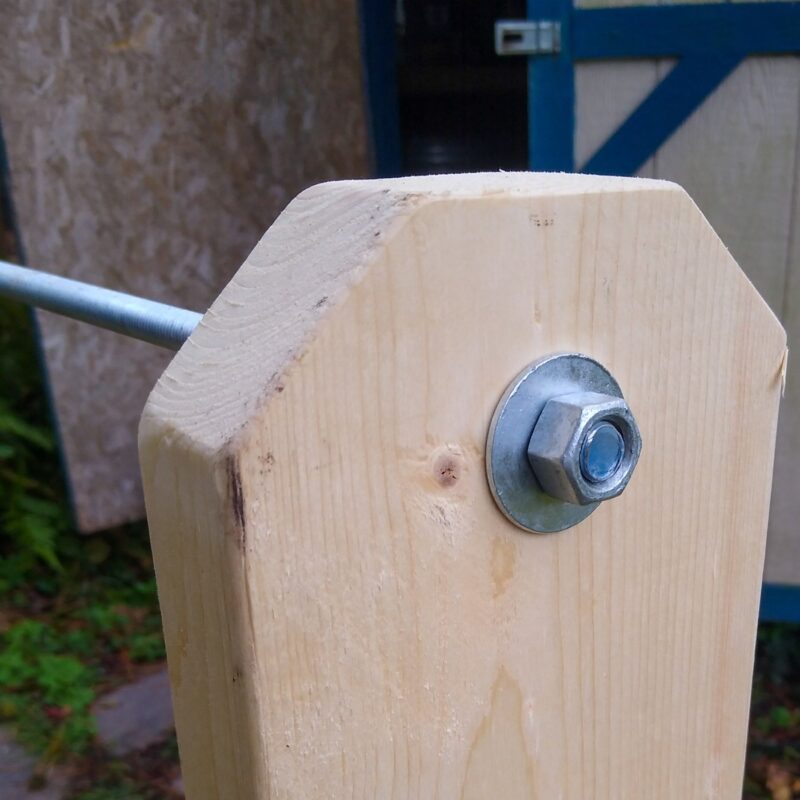
When you’ve cut the bottom base (or before you cut, just to be safe!), double check it against your rod length. The ends of the rod should extend just far enough beyond the base that you’ll be able to cap them off. This is important for safety, so don’t cut the base so short that your rod ends stick out more than an inch.
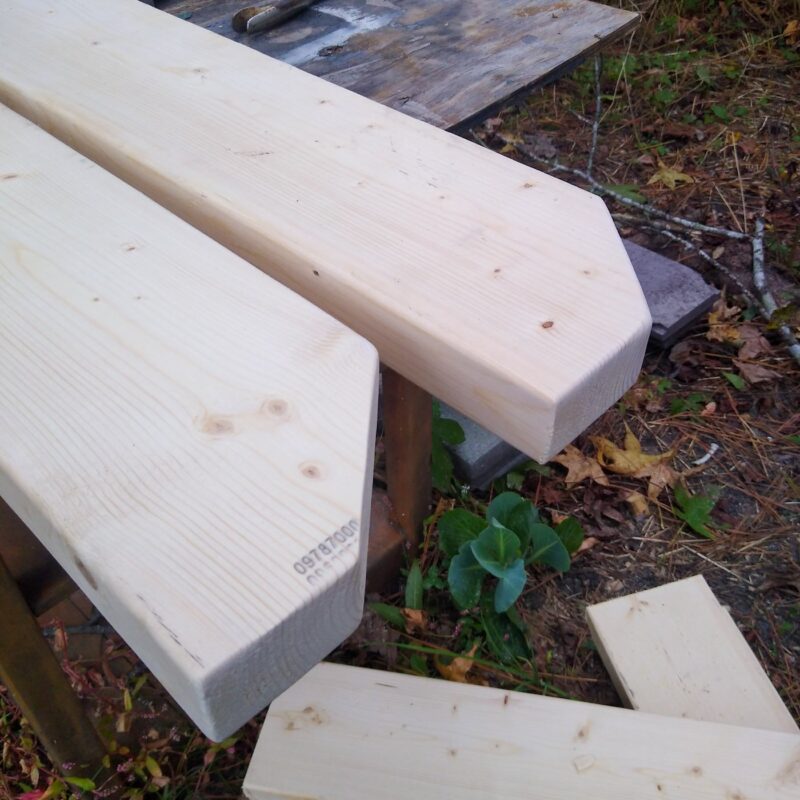
With this part done, set the base board aside and cut the “feet.”
Cutting and Edging the Feet
The longer the feet, the more stable the toy. I made two spin the bottle horse toys for this article and cut the base feet for both of them to 3 feet or 1 meter. Just measure and cut your feet to length:
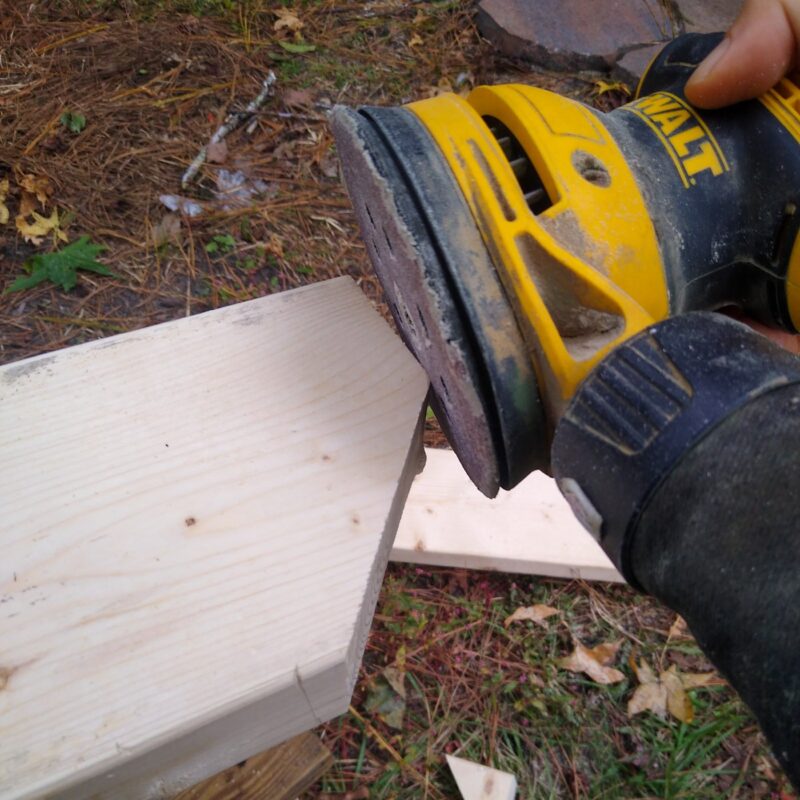
For safety, I recommend that you cut the corners and sand all hard edges with your orbital sander. Horses are wonderful at hurting themselves! Since your horse will be eating the treats close to the toy’s feet, you don’t want any sharp or hard corners.
Here you can see how one corner of the board has been cut off. The sander makes taking off rough or sharp edges a breeze:
When the feet are done, set them aside with the base. You’re all done and ready to make the Spin the Bottle horse toy’s upright pieces!
Step 2: Cut and Trim the Uprights
First decide how tall you want your spin the bottle toy to be.
The shorter the toy, the more stable it is. The taller the toy, the more it can rock from side to side if your horse uses it sideways.
I recommend a height close to 3 feet or a little smaller. Aim for chest height or a little beneath so that your horse’s head is at a relaxed, neutral posture when they touch the bottle with their nose.
The uprights in this design rest on top of the base, so decide on your total height and cut the uprights about 1.5 inches shorter than that.
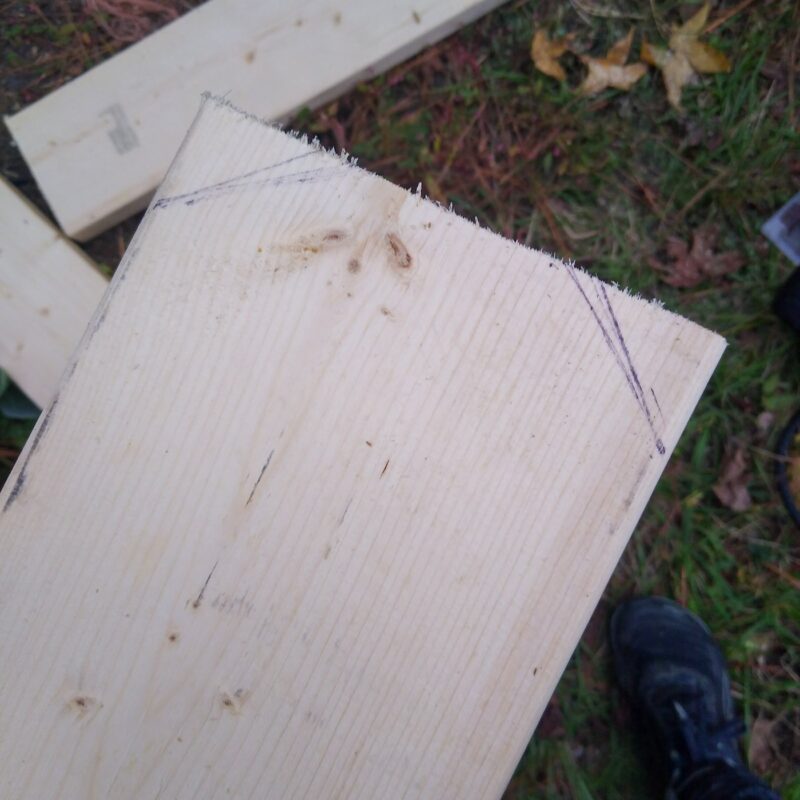
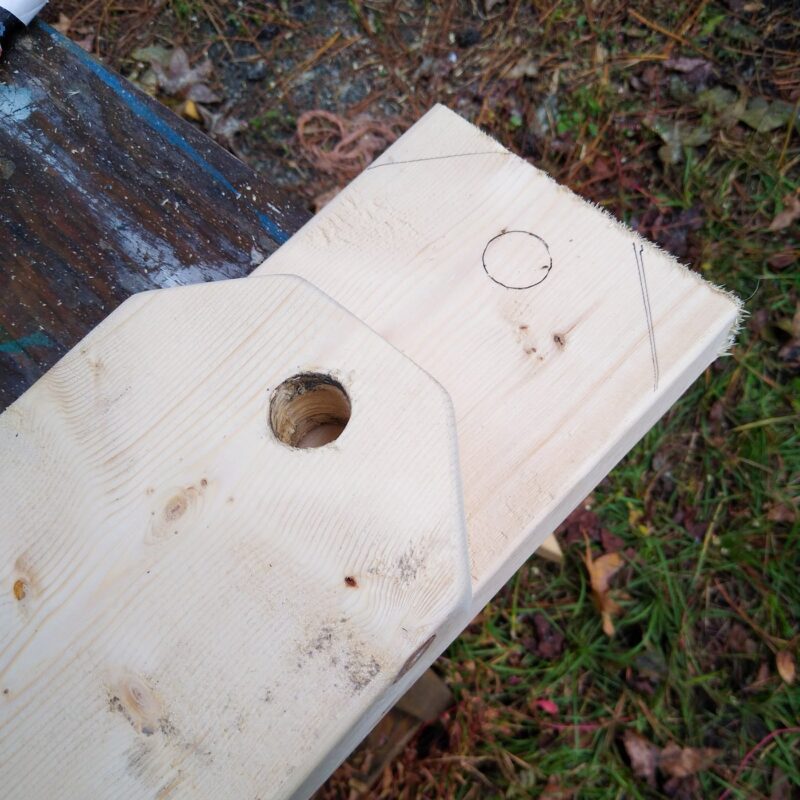
Trim and sand both corners on one side of the board, at the top where the rod will go.
Next, you’ll add the holes for the spinner’s axle rod.
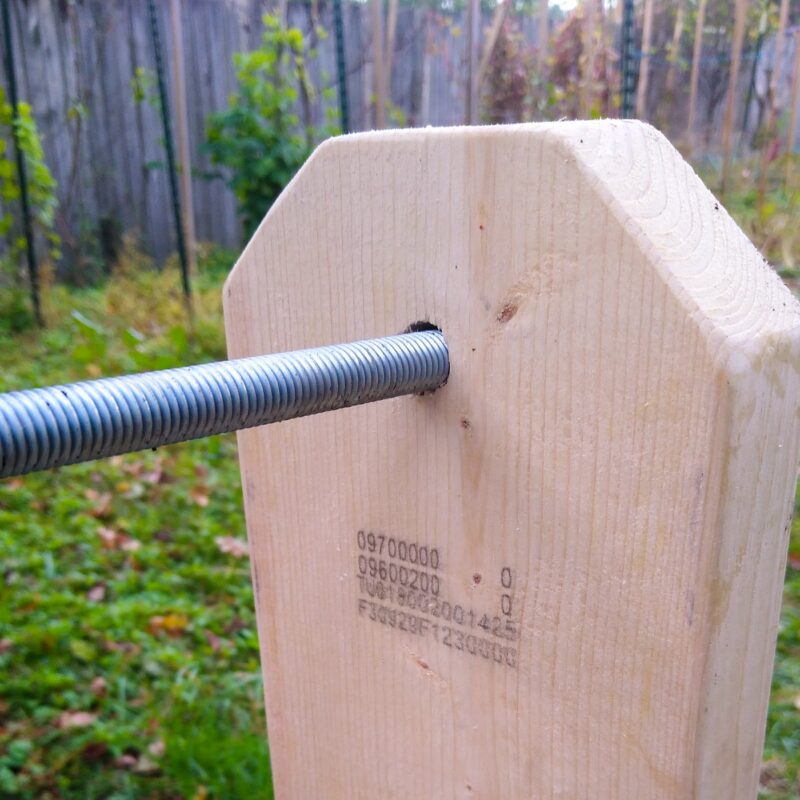
Step 3. Drill the Hole for the Rod
The kind of rod you purchased will determine what diameter of hole you need. The holes in your uprights should be just a little bigger than the rod’s diameter. This makes sliding the rod out to add or change the spinner for your horse a breeze.
If you’re using a 1/2 inch fully threaded rod, you’ll want to use a 9/16 inch drill bit or a little bigger, up to 3/4 inch.
If you’re using the 1/2 PVC or steel pipe, you’ll want a hole from 3/4 inch to 1 inch in diameter.
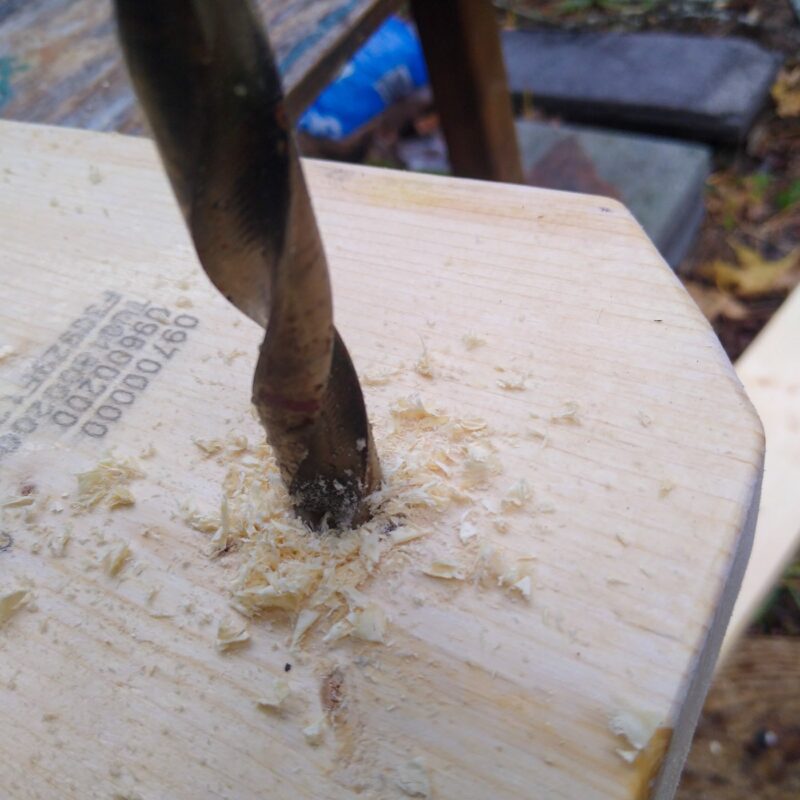
Mark your uprights right in the middle. Use a standard fluted bit for a 1/2 inch hole. If you need a bigger one, a spade bit is the best choice.
Next, clean and sand around the hole. I like to use a countersink bit to add a little slope to the hole (it makes the caps fit on the rod more snugly). If you or the person building the frame has a set, it’s worth the extra step.
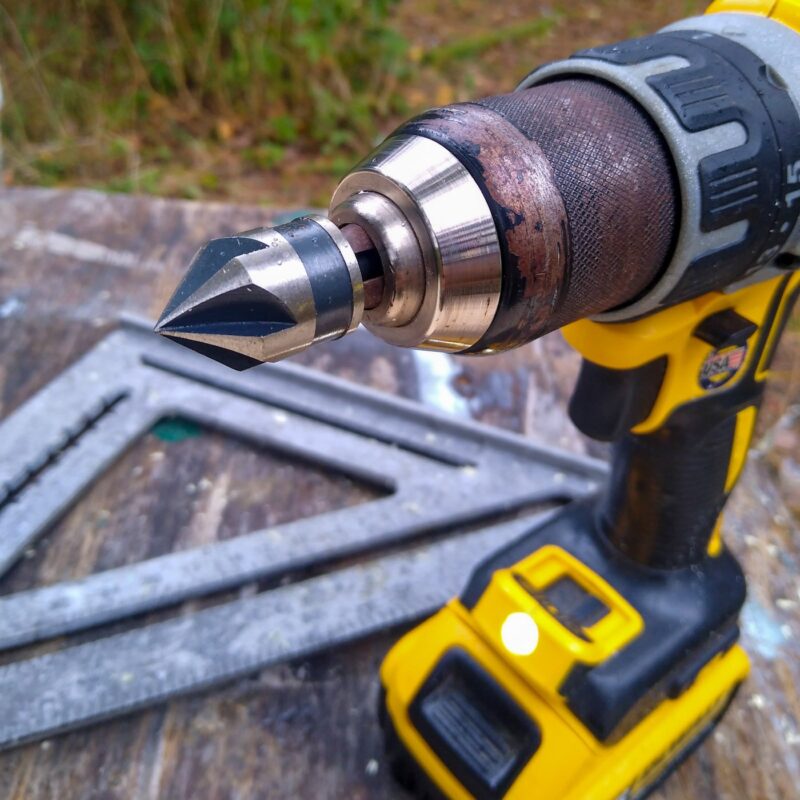
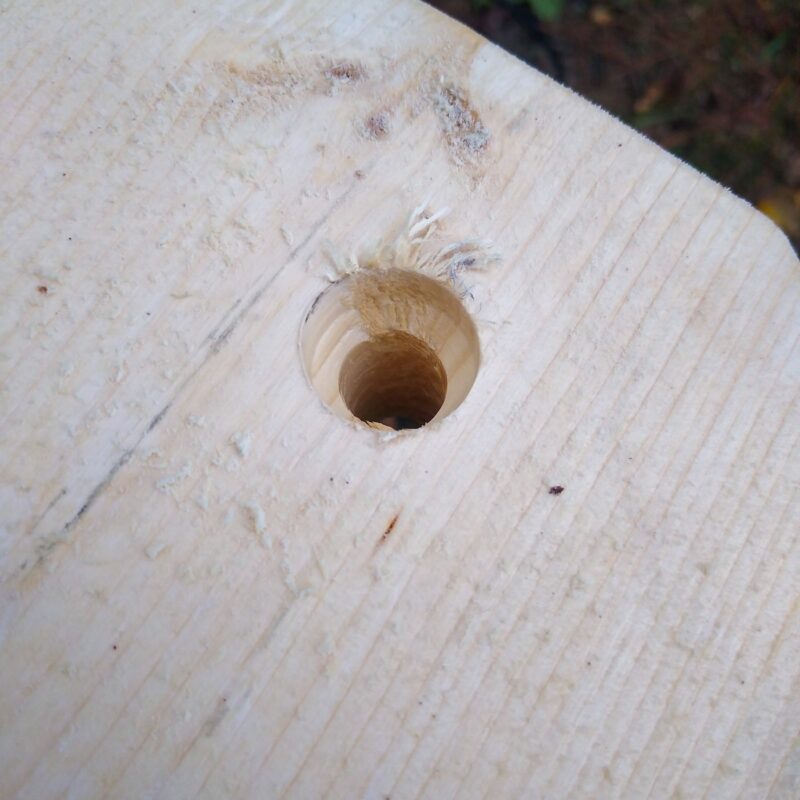
It’s important to drill straight down when making the holes! If they are at funny angles, your rod may not fit.
Step 4. Assemble the Spin the Bottle Horse Toy
Now all you need to do is screw the pieces together. It’s easiest to start with the base. Mark each of the feet right in the middle.
Then mark in the middle of your base board where the foot will attach.
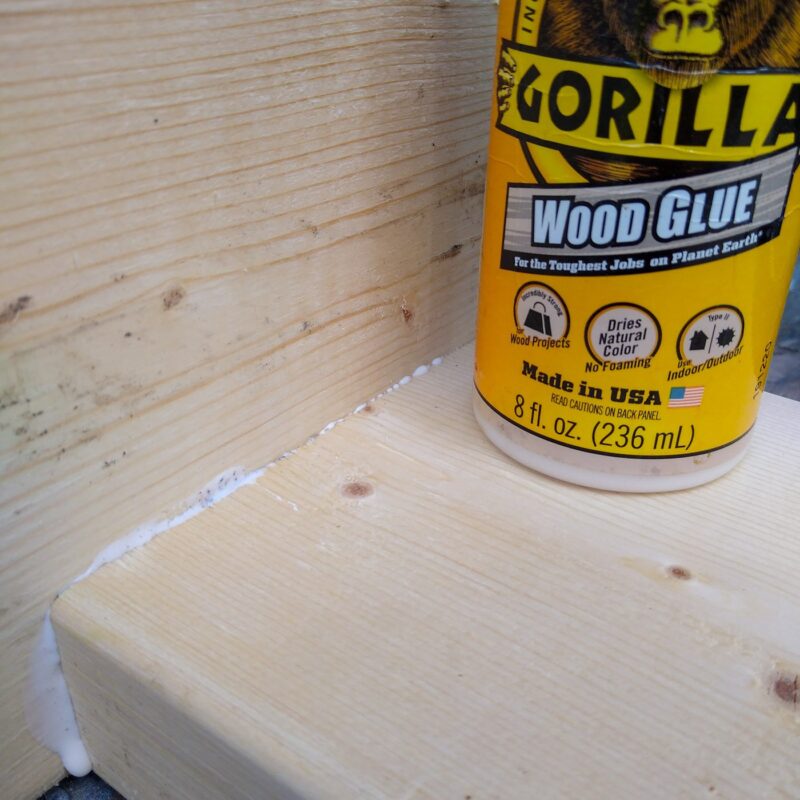
Apply wood glue if using – it’s optional but recommended for durability – and screw together using 3 screws. Make sure you fit and attach these pieces on a level surface so the toy is solid and doesn’t rock when you finish.
Repeat for the other side. You’ll have a nice flat base ready for the uprights:
To put on the uprights, start a few screws on the “foot” just above the base. Apply more wood glue, hold the two firmly together (or have a helper support the upright) and put in a screw, driving from the foot into the upright. Move to the other side and drive a screw from the upright into the foot. Repeat every few inches until it’s firmly attached from both sides.
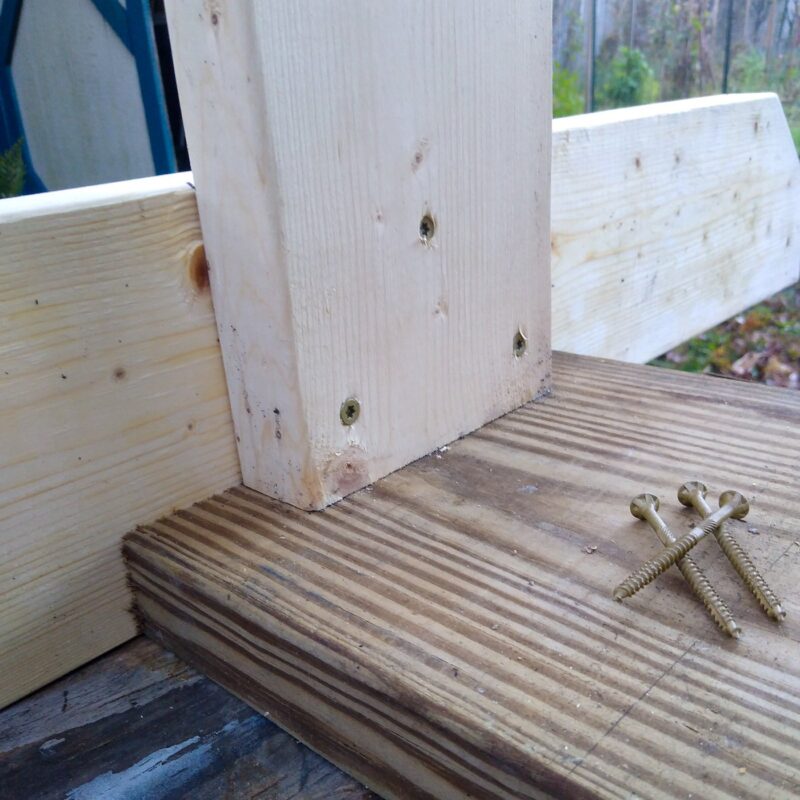
Then repeat on the other side, and then appreciate your work!
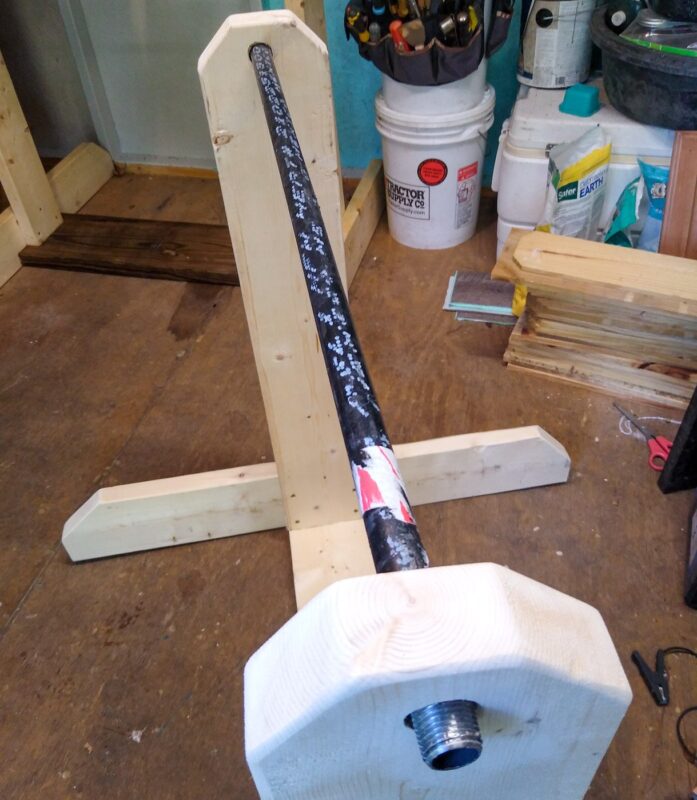
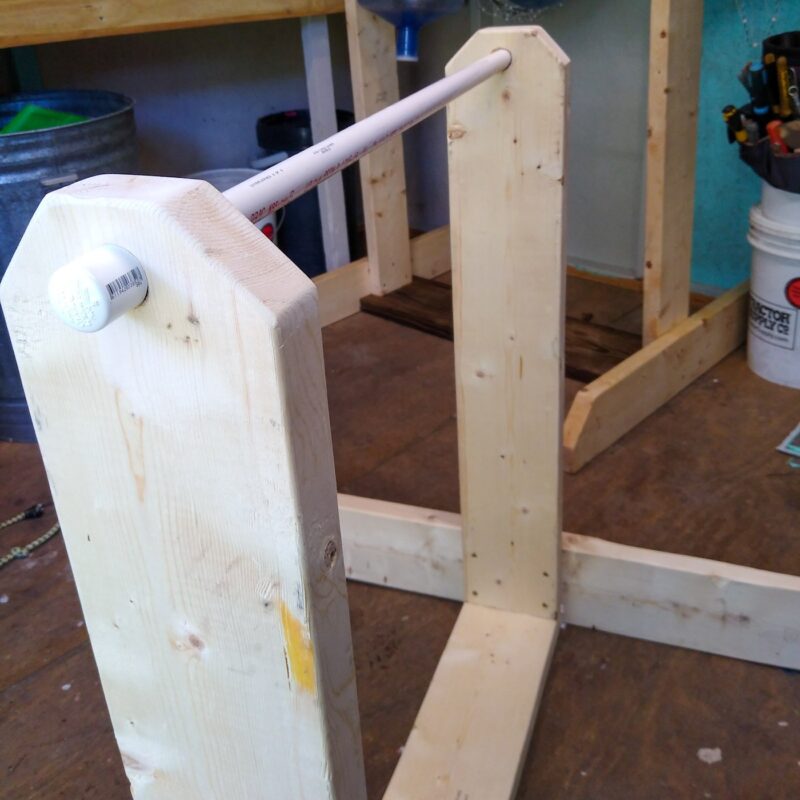
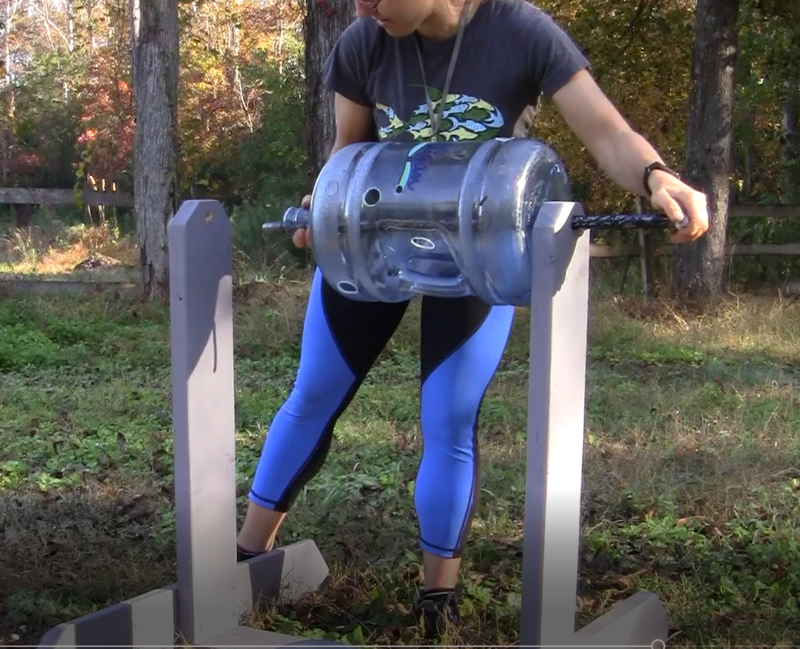
Step 5. Add the Rod and Check Fit
Gently thread your rod through the holes in the uprights. It should fit snugly but easily.
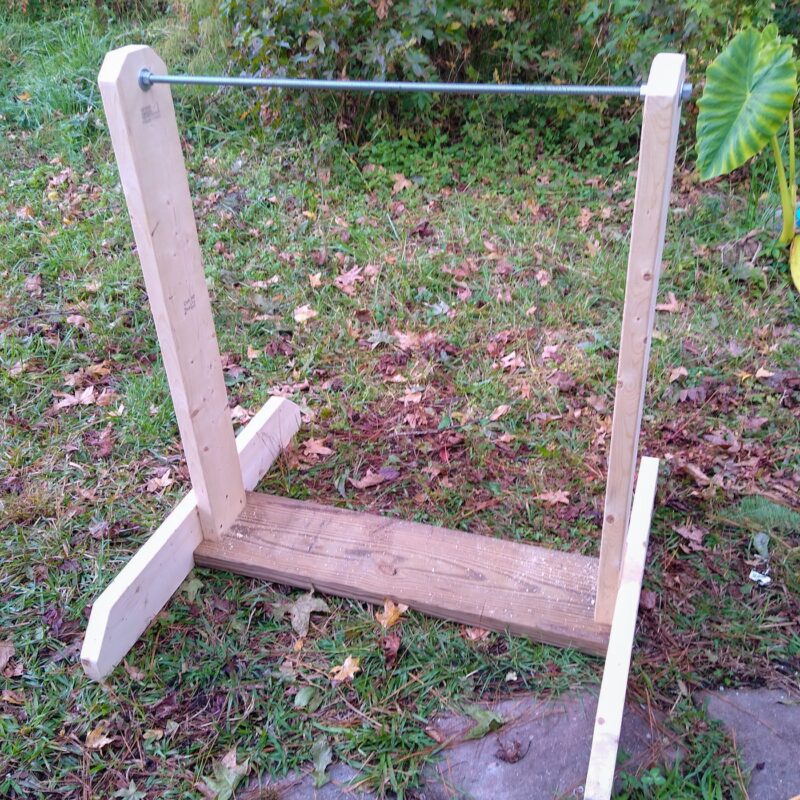
The ends of the rod should be sticking out on either side. You may need to gently push or pull the uprights by about a quarter inch to make it fit perfectly because it’s normal for them to be just a little out of plumb.
Now cap both ends of the rod and leave the rod in place for painting. This helps the spin the bottle toy’s frame mold to exactly the right alignment for the rod. This is especially important if you used wood glue or freshly pressure treated wood.
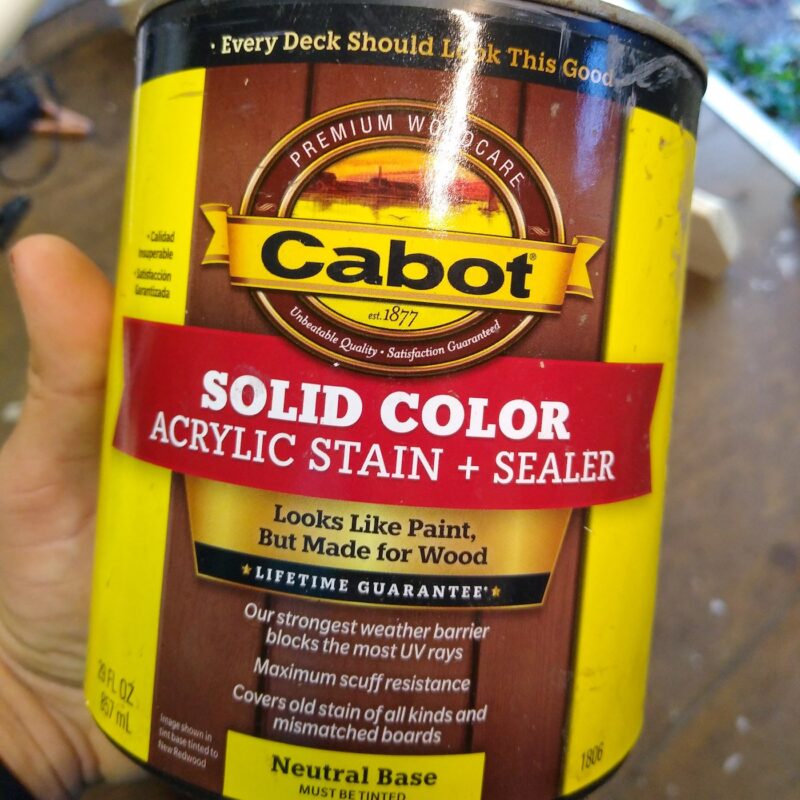
Step 6. Seal and Paint
It’s a good idea to put a quality coat of paint or sealer on this toy. It helps keep the wood protected from the elements. It will also make your spin the bottle toy more waterproof for easy cleaning.
Any exterior paint or stain will work. For DIY horse enrichment, I like to raid the local hardware store’s paint section for cheap paint on clearance – like this quart of solid wood sealer!
Paint and let the paint and wood glue dry.
Step 7. Make the Toy’s Spinning Bottles!
This is the really fun part! You have lots of options for creating spinners for this toy.
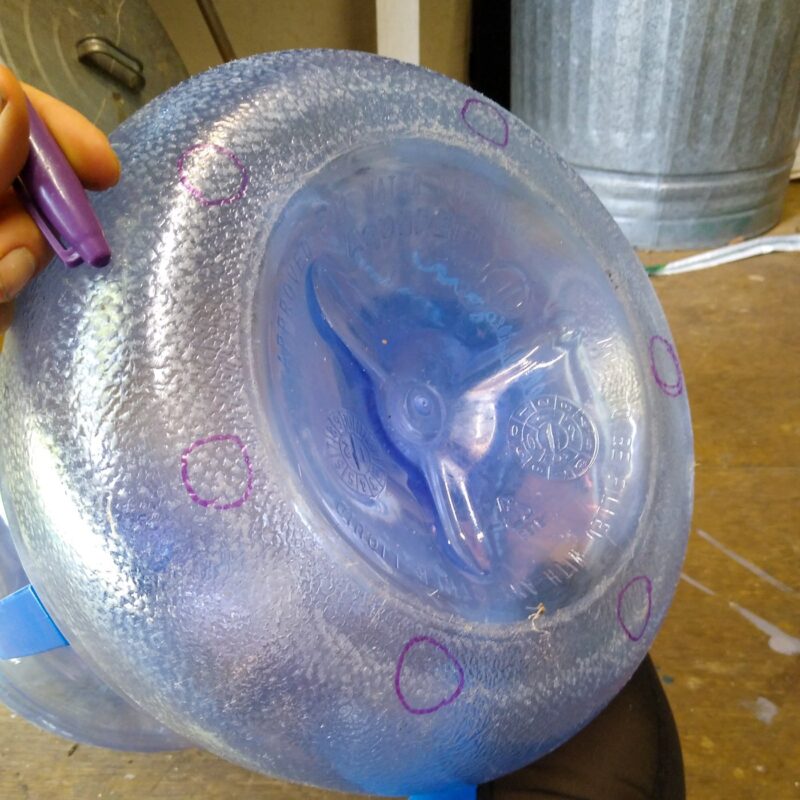
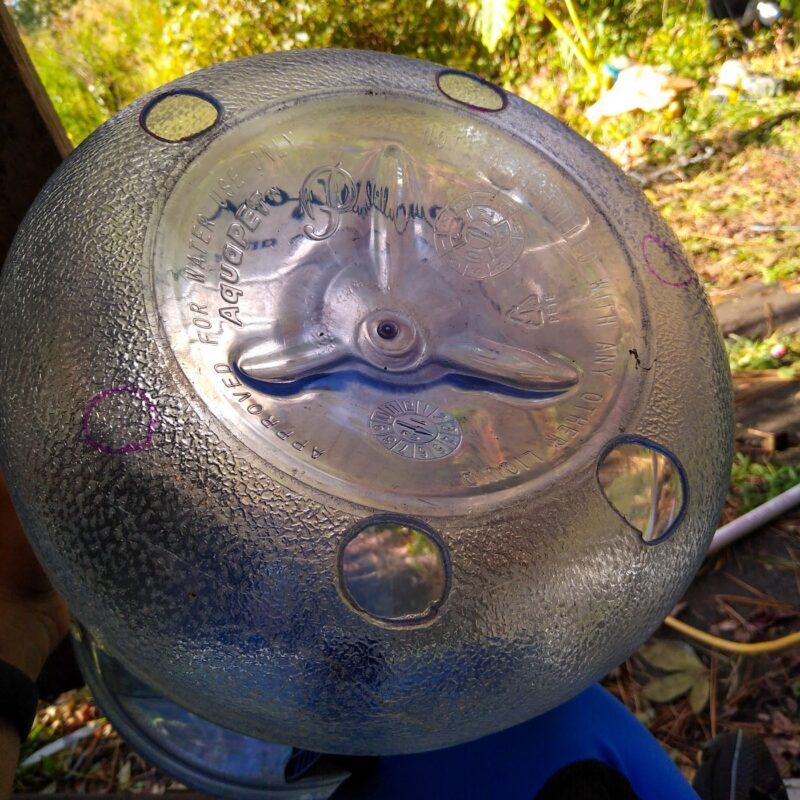
Shown here is a 5 gallon water cooler bottle. It’s easy to find these at an office or school and a great way to repurpose some plastic.
You can also use any of the following:
- Lengths of 2 inch PVC pipe with caps
- Plastic soda bottles
- Plastic milk jugs
- Paper milk or juice cartons
- Rubber Jolly Balls
- Paper shipping tubes
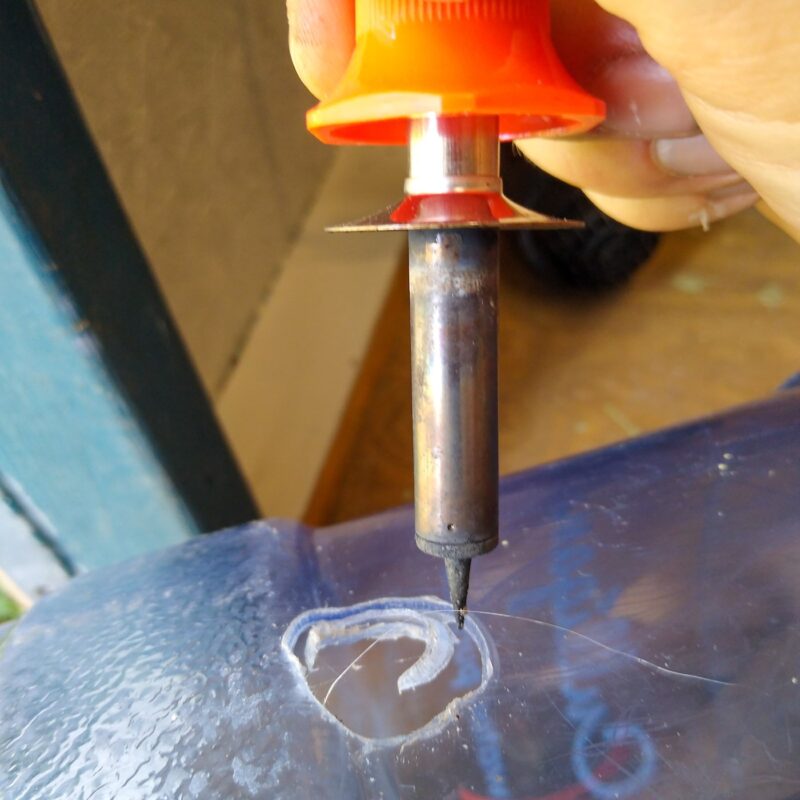
Add holes to the bottle or carton. For this large, heavy duty plastic bottle, I used a wood burning pen to melt holes. You can also use a hole saw and drill, which you might remember from the article on repurposing a rubber Jolly Ball into a treat roller ball.
Mark your holes first to plan a good layout for the spinner:
For paper tubes or cartons and small plastic jugs, use a knife or scissors. Be careful!
You’ll need to add two holes straight through your spinner so that the rod can pass through. Right in the middle of the item is best.
Then, add additional holes for the treats to come out.
If you’re using jugs or cartons, you can use the bottle’s existing opening. Experienced horses might not need any more holes for a challenging toy. If this is your first spinner, it’s a good idea to add more holes to the jugs/cartons in order to teach your horse how to use the toy without frustration.
What Treats and Food Can You Use with the Spin the Bottle Horse Toy?
Any food is usable in this toy – it’s really versatile! Some enrichment works best with certain types of food, but the Spin the Bottle horse toy works wonderfully with everything. Just adjust the sizes of the holes to the type of food you want to use.
Larger holes make the toy easier to empty – good for horses who are just learning or prone to frustration. Smaller holes increase the challenge and are good for hay pellets or pelleted horse feed and grain. You can use store bought horse treats, whole grain cereal, or fruits and veggies like carrot and apple.
If your horse needs a low-sugar diet, hay pellets are a great choice. You can also use low sugar veggies like cucumber and celery.
Where Can You Use the Spin the Bottle Horse Toy?
This toy needs to be used in a wide open space. It’s too big to use in your horse’s stall. Use your Spin the Bottle toy in the pasture (sorry for the heavy lifting!). You can also set it up in an arena, or outside in the stable yard as part of an enrichment or sensory walk.
Note that if you use this toy in an arena, you should put down a pan or some cardboard so that your horse doesn’t eat sand along with their tasty treats.
Safety and Supervision for the Spin the Bottle Horse Toy
This horse toy is a lot of fun, but it’s always important to stay safe when giving your horse enrichment. It’s not likely that a horse could become stuck in this toy, but horses love to prove that anything is possible.
For this reason, don’t leave your horse unsupervised with this toy. Place it in the pasture only when you can directly watch them or when there are others on the property who can make sure that your horse is using it safely. When your horse is done or you need to leave, take the Spin the Bottle Toy out of the pasture.
Some horses might even be a little scared of this big, moving toy at first. Neophobia, or fear of new things, is normal for horses! Check out the article on neophobia for tips, and read up on ways to teach your horse how to use toys and enrichment for more info on getting your horse used to this super cool enrichment item.
You must use smooth caps on the end of the rod. They keep the rod from falling out of the frame and creating a possible safety hazard. But since the rod ends need to extend a little outside the frame, they’re also important for preventing a bump or scrape should your horse knock into the toy:

Related Enrichment
The Spin the Bottle Horse Toy is a food puzzle. There are lots of other puzzle feeders for keeping your horse’s mind healthy and active. These are some of the best enrichments for preventing boredom in your horse.
Don’t miss these!
Rolling Jolly Ball Treat Feeder
DIY Treat Roller from a food canister
And if you make a Spin the Bottle, tell us about it in the comments!