Horses love to rub and scratch away their itches. Your horse will use anything handy to relieve an itch, like trees, fence posts, or even you! Why not give them a scratching station instead? This DIY scratching board for horses is easy to build, inexpensive, and gives your horse a perfect scratching solution.
What Is a Scratching Board for Horses?
A scratching board is a DIY horse enrichment project. You can make a scratching board for horses in a few different ways, but this tutorial shows how to make a super simple but very effective scratching board…from scrub brushes!
A scratching board lets your horse take care of their itches in a safe way. And this DIY stall enrichment project is simple and budget friendly.
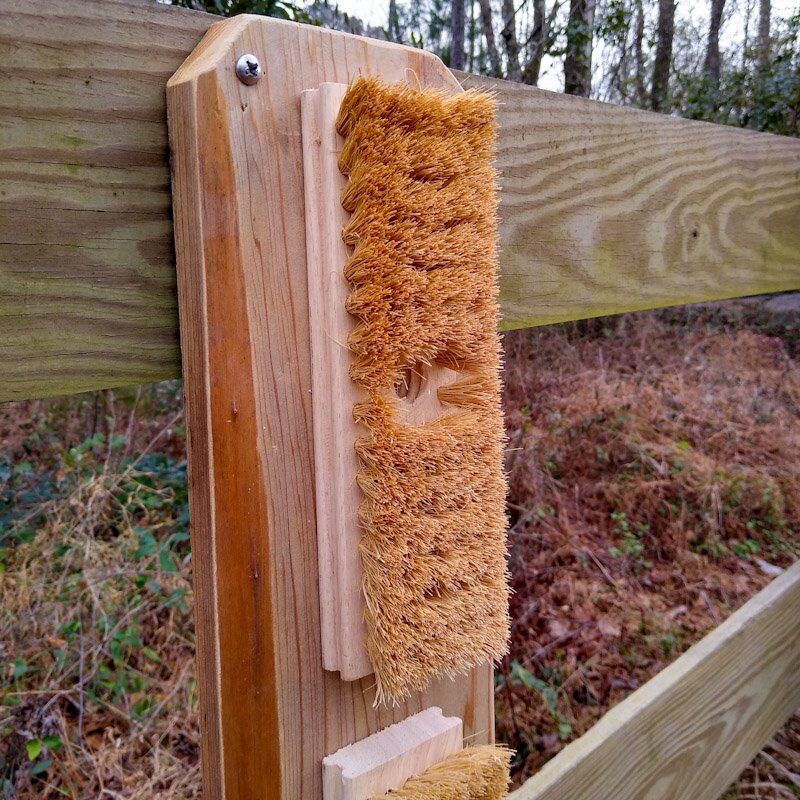
The horse scratching board shown here uses brushes on a hardwood board that’s easy to install in your stable. But you can also fasten the brushes to a sturdy post for a horse scratching post instead – it’s a really versatile concept.
Why Build a DIY Horse Scratching Board?
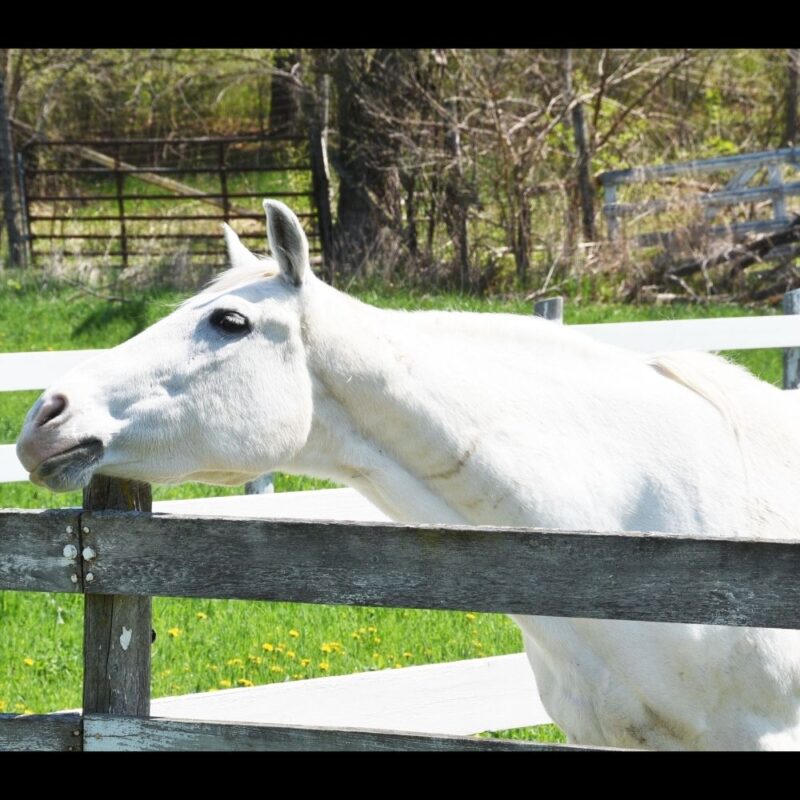
Horses get itchy just like people, but they don’t have long arms and fingernails for getting that perfect scratch. Sometimes, they’ll use their teeth or even a hoof. And other times, horses relief itching by rubbing against hard or rough objects.
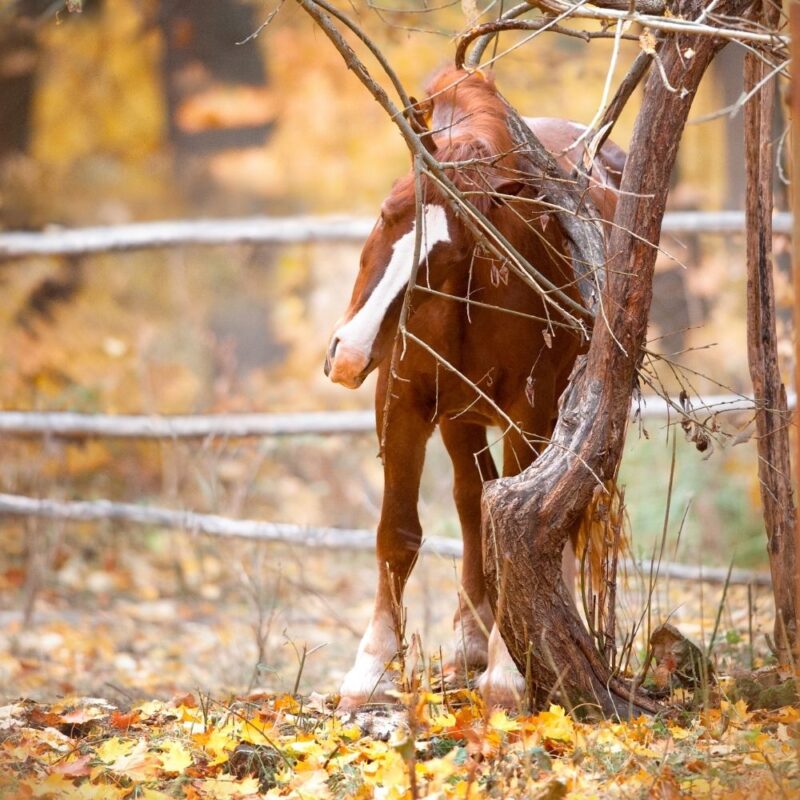
Your itchy horse will rub against trees, fences, barn corners, and any other solid object. This isn’t great, for two reasons.
Horses Scratching Can Damage Property
Horses are big, heavy animals. Their rubbing and shoving as they seek itch relief can bend or break fences, kill trees, or damage their stall or other structures.
Itchiness happens year round, but is especially intense in summer when insects are active. At this time of year, your horse may return to their scratching station over and over to get relief – resulting in property damage.
Horses Scratching Can Cause Injury
The need for itch relief can also cause horses to overdo it on the scratching. If the itch keeps coming back, your horse may rub to the point of hair loss or skin injury.
Medical conditions or sensitivity to insects are the main culprits, but skin and coat damage can result from scratching on the wrong surfaces, too. Fence boards and other structures can pinch skin or trap manes and tails.
The itchier the horse, the worse the damage becomes, rubbing away or pulling out mane and tail hairs. Scratching on unsafe objects also risks scrapes, cuts, or eye injuries.
So if scratching is such a problem, why not try to get rid of it altogether? Is it possible to itch-proof a horse?
Your Horse Needs to Scratch!
It’s important for horses to be able to scratch their itches. Itching is a normal part of horse life, even if you have perfect fly control and a handle on other medical issues. Scratching and rubbing are important self-care behaviors for horses.
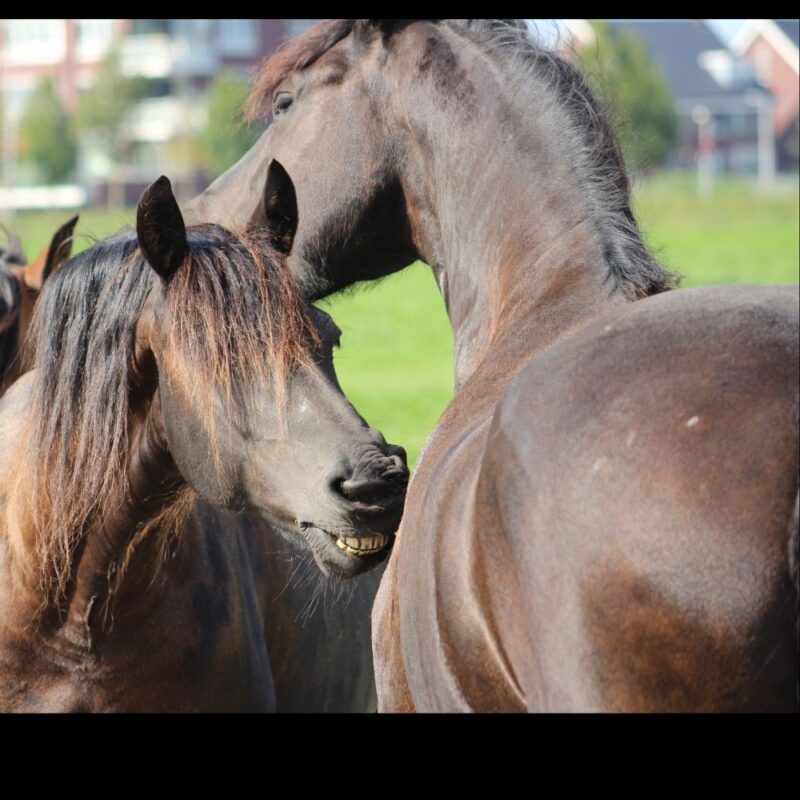
Self maintenance – what we call self-care for people – are the ways horses take care of their bodies. Scratching itchy places has lots of benefits: removing parasites, improving blood flow to the skin, and massaging the muscles.
And in addition to all these perks, scratching just feels really good!
When horses scratch each other, they not only reach itchy places they can’t get on their own. Mutual grooming is a strong relationship-building behavior for your horse and helps strengthen the bonds in their herd.
So scratching is a natural behavior for horses, and it’s important for their physical and mental health.
Benefits of the DIY Scratching Board for Horses
Scratching stations of all kinds have a lot of benefits for your horse. All horses should have access to scratching boards or posts so that they can relieve itches in a safe way.
But the scratching board isn’t just good for your horse’s welfare. Providing the perfect itch-relieving station can give your horse an alternative to rubbing on fences, buildings, and trees.
This DIY horse scratching board can cut down on property wear and tear, and keep your horse’s skin, mane, and tail in good shape. It uses brush heads that are firm enough to relieve the itch, but gentle enough for regular use.
How to Build a DIY Horse Scratching Board
First, gather your materials and supplies. And you won’t need much: this enrichment is really simple.
You will need:
- One solid wood board, pine or hardwood, approximately 6 inches wide and 3 feet long
- Three firm bristle scrub brushes with plain, flat heads
- Drill, plain fluted bit, and Phillips head bit
- A circular saw
Do you need a board?
Why use a board? Can you build a scratching post or scratching pad in your horse’s barn by attaching scrub brush heads to the wall?
Absolutely! It’s okay to skip the board entirely and just screw brushes into the wall. I like going the extra step here for a few reasons:
- The board provides a better scratching surface by moving the brushes off the wall or fence a little
- The board is easier to install and move than individual brushes – perfect for boarding barns
- It looks nice!
With that out of the way, it’s time to source your scrub brushes.
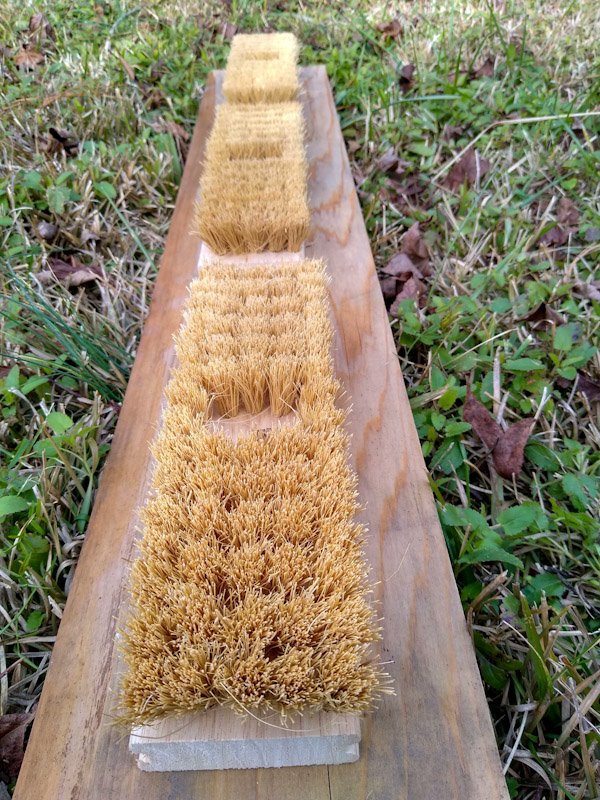
To get the look shown here, you’ll want plain, flat handle brushes like these, which came from a local hardware store:
If you don’t want to search locally, this brush is available from Amazon at the same price.
I really like these brushes because of the stiff natural bristles. They’re firm enough to get the job done, and the entire brush is biodegradable.
Brushes with flat, smooth tops are necessary for this project because they’ll lie flat against the board. If you use another type of brush, make sure it has a flat top and fairly short bristles.
How many brushes?
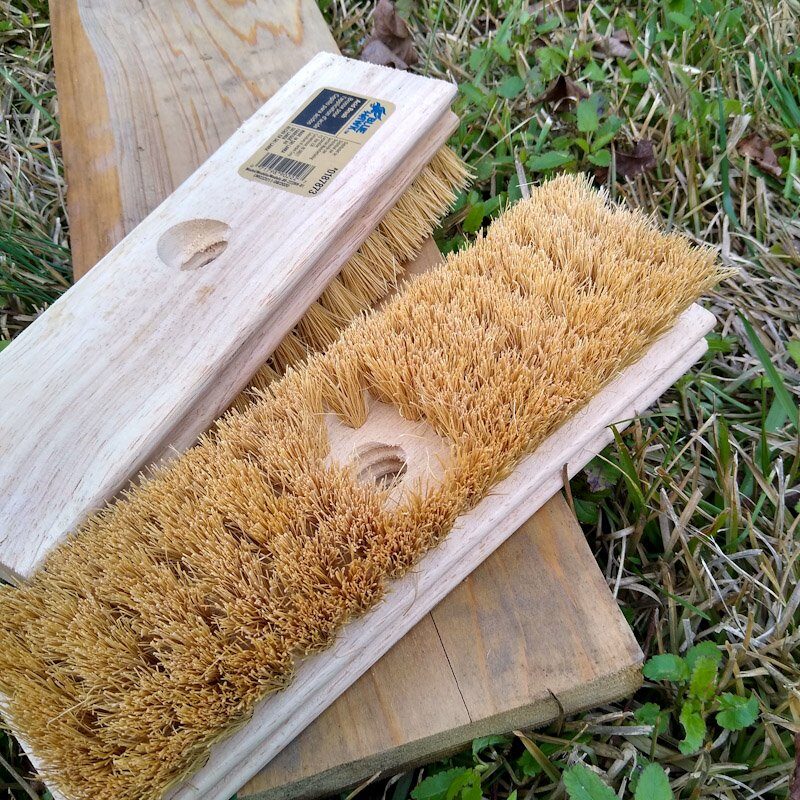
To make this horse scratching board, you’ll need three brushes. Three seems to be the perfect number for these smaller brush heads.
You can make a smaller scratch board with fewer brushes. This is fine if you need to stretch your enrichment budget across a whole stable, but I like making a larger board that gives your horse more options for scratching.
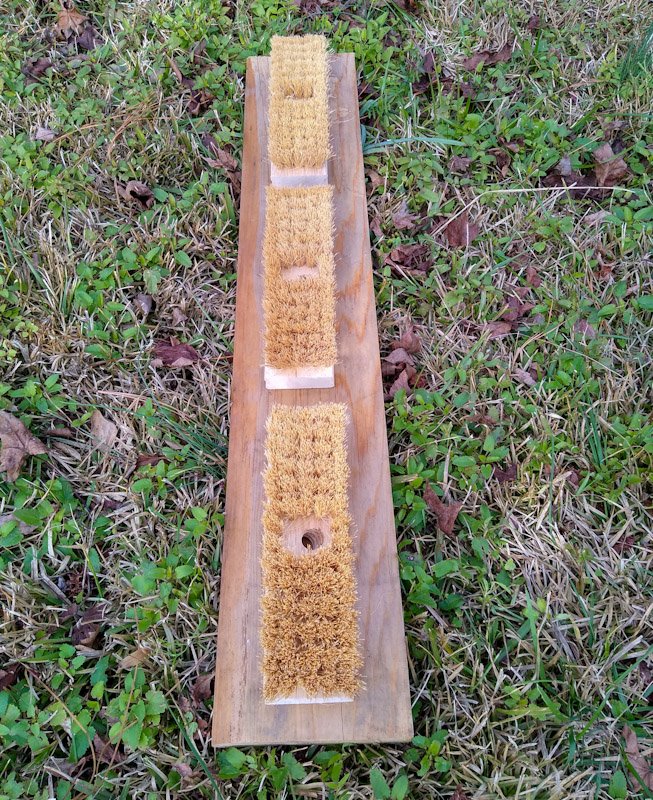
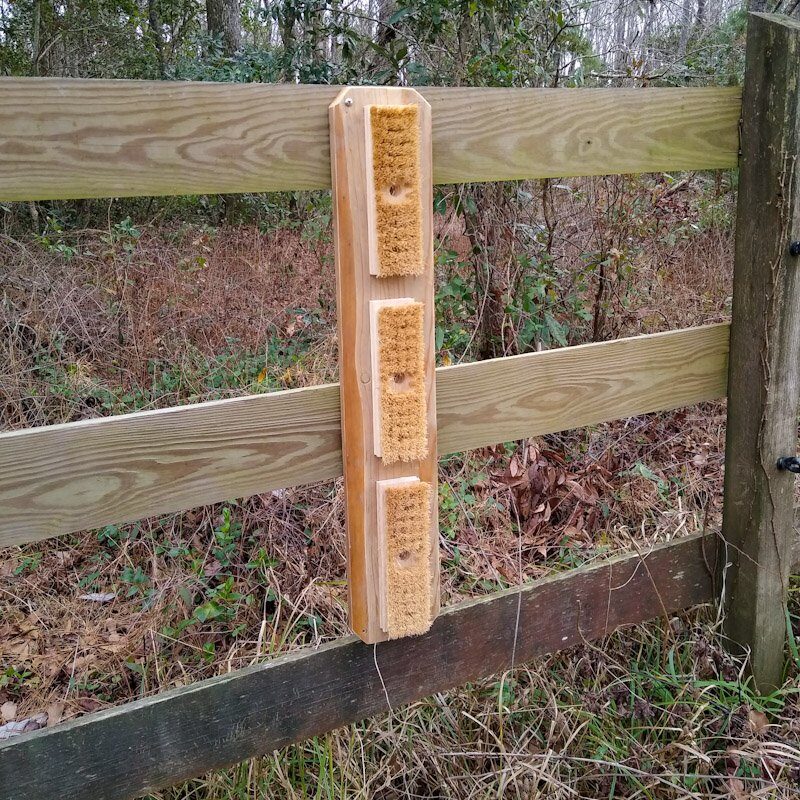
With three brushes, you’ll be able to install the board horizontally (perfect for itchy horse bums) or vertically (ideal for the whole-body scratch).
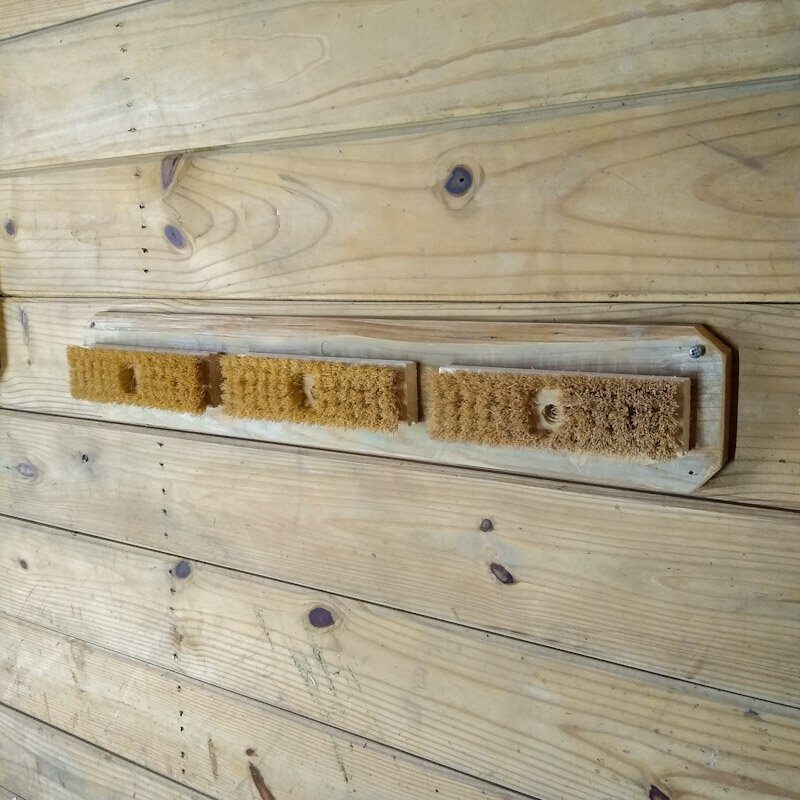
Step 1. Cut Your Board
Lay out your brushes on the board and check the length. Mark the board where the last brush ends.
I like the brushes to be centered in the board and a little space between each brush.
Measure and cut the board to length.
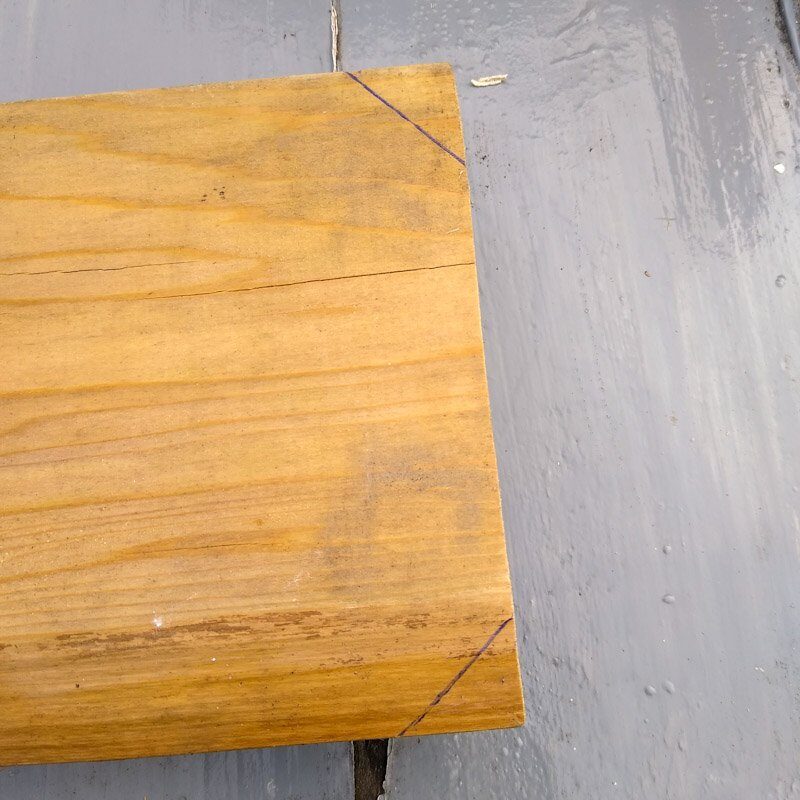
Step 2. Cut the Corners
For safety, it’s best to cut the corners of the board. Sharp, hard wooden corners on something your horse will rub with their face are a bad idea.
Cut away each corner. A 45 degree angle is shown here; yours doesn’t have to be perfect.
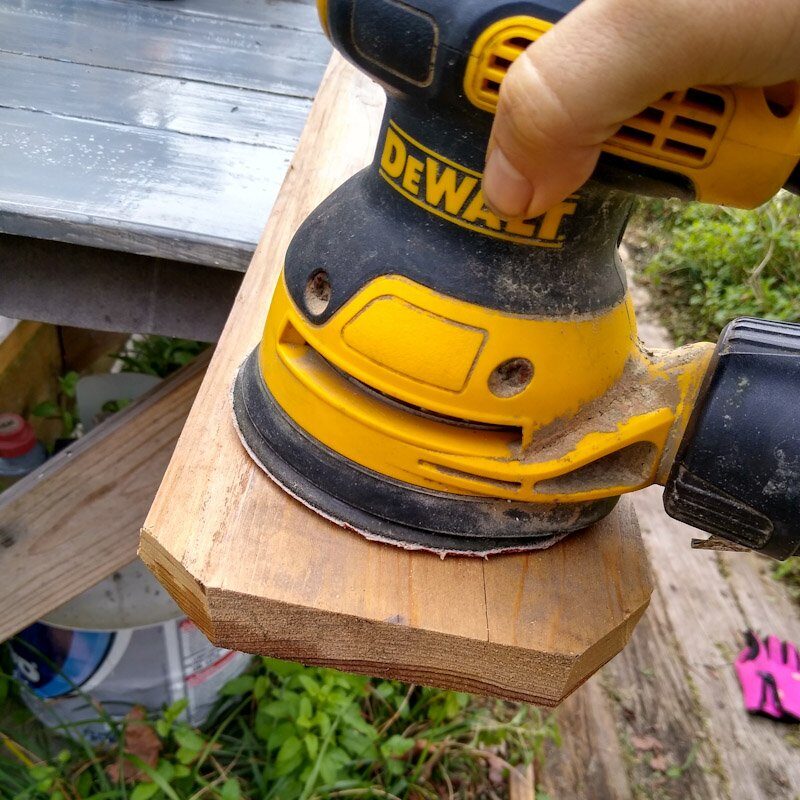
For polish and additional safety, you can sand down the hard edges of the board. I’m using an orbital sander, but sandpaper will work fine too:
Optional Step: Pre Drill Holes for Installing the Board
To make installing this scratch board in your horse’s stall or pasture easier, you can predrill pilot holes.
Just use your normal fluted drill bit and put one hole in each corner of the board.
Step 3. Pilot Holes In the Scrub Brushes
You’ll need to drill pilot holes in the brush heads for best results. A pilot hole is a predrilled hole that makes it easy to install screws.
Drilling pilot holes before you attach the brushes to the board ensures that the screw heads are completely flush with the brush – no dangerous metal sticking out. They also prevent splitting, which can happen if you drive the screw straight into the brush head.
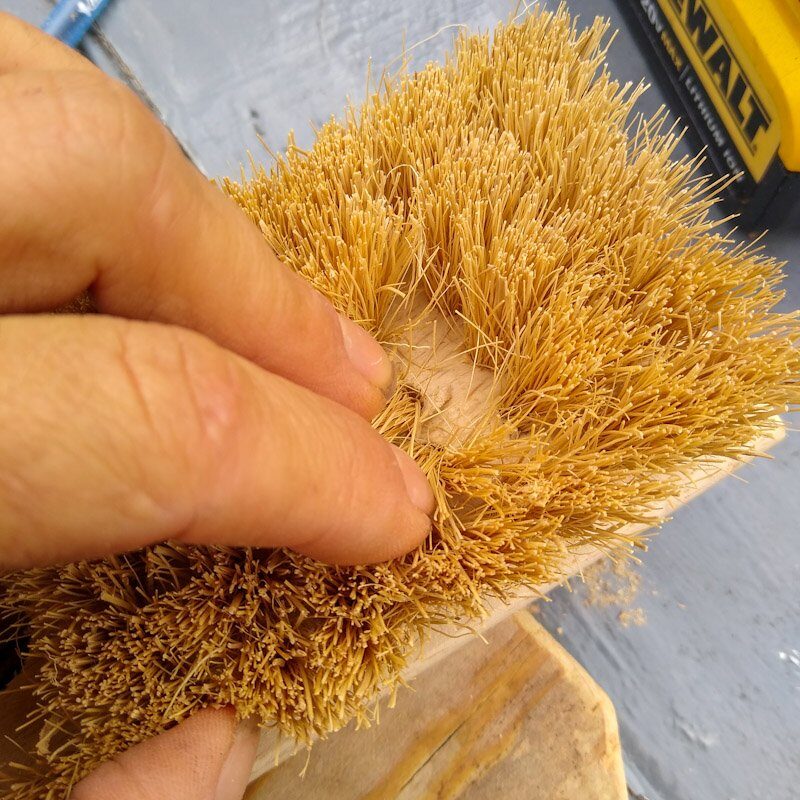
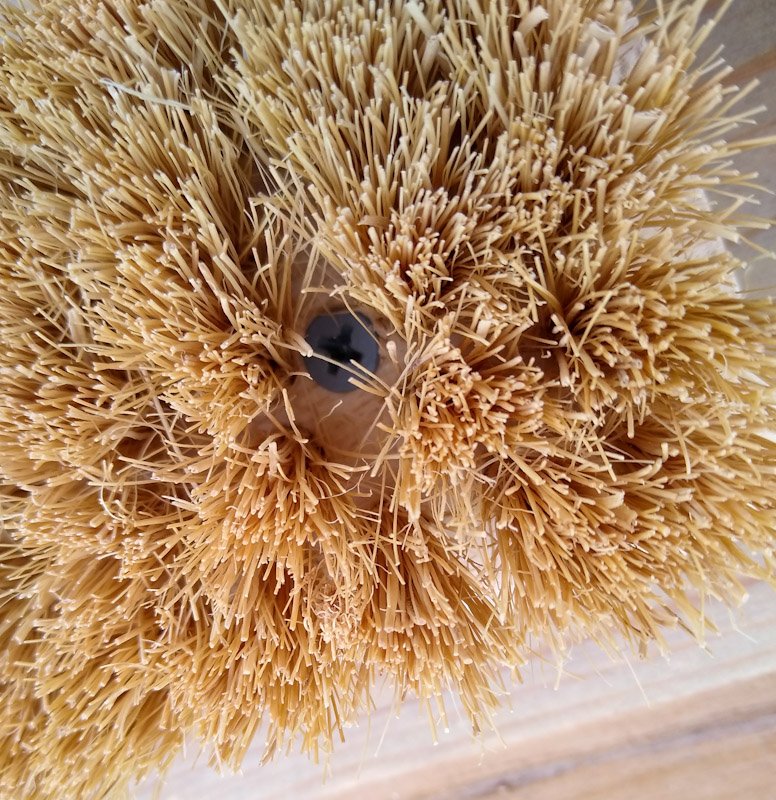
Push aside the bristles to find a solid patch of wood between the scrub bristle clusters. Drill a hole at each side.
Step 4. Attach the Brushes to the Board
Swap to a Phillips head bit. Position the brush head where you want it, and either hold it down with your knee or have a helper stabilize the brush as you drive the screw.
Repeat with a screw on the other side of the brush, and then with the other brushes.
Make sure your screws drive all the way flush with the wood. Don’t let the heads stick up – a metal screw head is hazardous to a scratching horse.
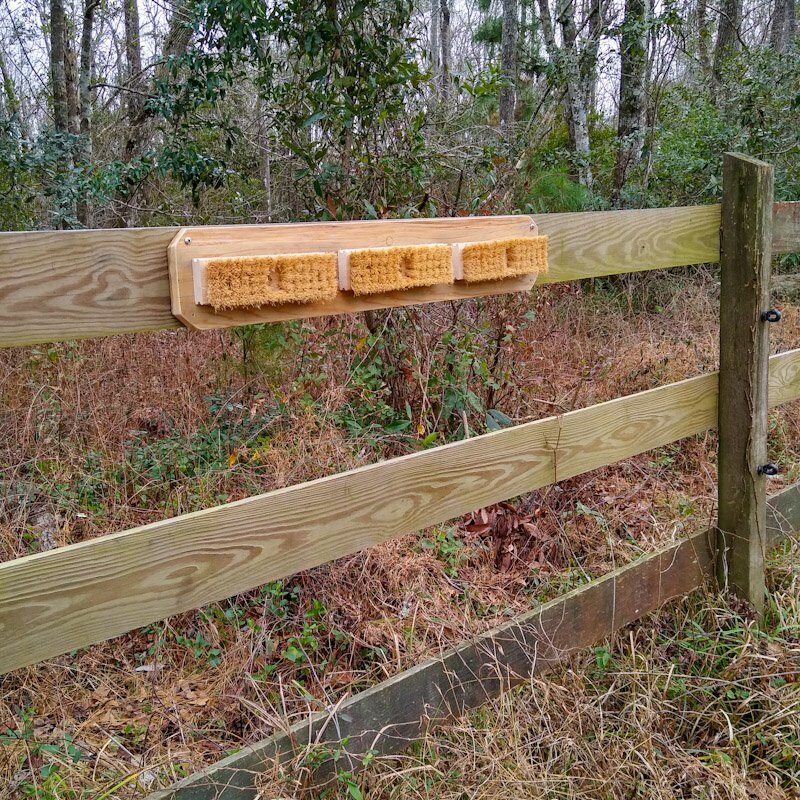
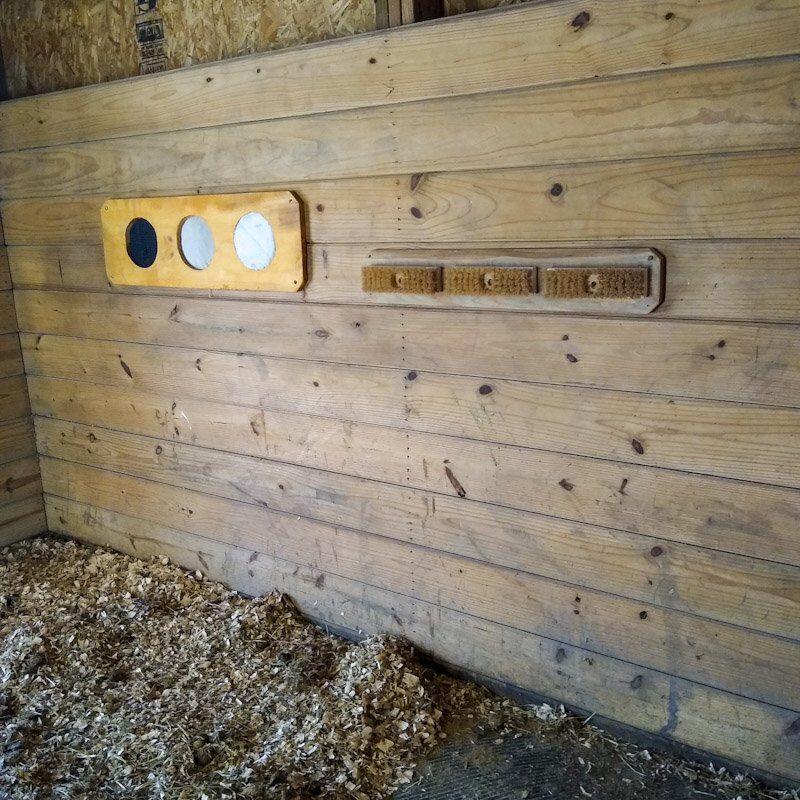
That’s it! Your scratching board is finished and ready for your barn or pasture!
Step 5. Install Your DIY Horse Scratching Board
What’s the best location for your DIY scratch board?
You can install this enrichment item anywhere your horse may need to scratch. An open section of the wall in your horse’s stall or shelter is an ideal location.
The DIY horse scratching board works outdoors, too. Here, place it near the areas your horse already scratches.
If you want to discourage your horse from using certain locations to scratch, like fence boards, install the DIY scratching board close by so that they can easily use it. When they realize how well it works and begin to use it consistently, you can move it to a different location away from the fence.
Install the board by driving a screw at each corner. You can also use nails, but screws make it easy to remove and reposition the board later.
Other Scratching Ideas
The DIY horse scratching board isn’t the only way to give your horse scratching options!
Cocofiber mats and textured rubber floor mats make great scratching stations for horses. You can also try different brushes, offering various textures for your horse to choose from. Install them on a board like this post’s DIY idea, or on a post or tree trunk.
More is better when it comes to scratching locations. Different texture and locations give your horse options, and ensure that the whole herd can take care of itches.
This is one quick DIY enrichment that belongs in every stable!